learn. C4D Mograph Techniques 04
$49.00
learn. C4D mograph techniques with this collection of expert training from Tim Clapham. Part four of this inspiring series brings more Cinema 4D knowledge, OpenVDB, cloth dynamics, plus many more of the mograph tools.
learn. C4D Mograph Techniques 04 is the fourth in a series of tutorials to help you master the Cinema 4D toolset. Work fast & efficiently with these production ready methods to improve your skillset in Cinema 4D.
Taught by expert C4D user, Tim Clapham, with over 20 years of experience, these are some of Tim’s go-to techniques, guaranteed to provide you with essential skills for your motion graphics projects.
These tutorials focus on typographic effects, but all setups can easily be applied to other 3D objects or adapted for alternative uses.
Training Summary
Master the C4D Mograph toolset
4 projects, 9 chapters, 80 minutes
Plus 8 Redshift tutorials, 87 minutes
Includes free HDRI files
Scenes, models & textures included
All finished setups
Min requirements C4D R26 & Redshift 3.5
Basic knowledge of C4D & Redshift required.
Each set of training comes with a companion chapter for rendering with Redshift. These additional chapters run through the setup of lighting and materials for all four projects. Each chapter covers a different material setup, so new users can learn the various nodes as they progress through the course.
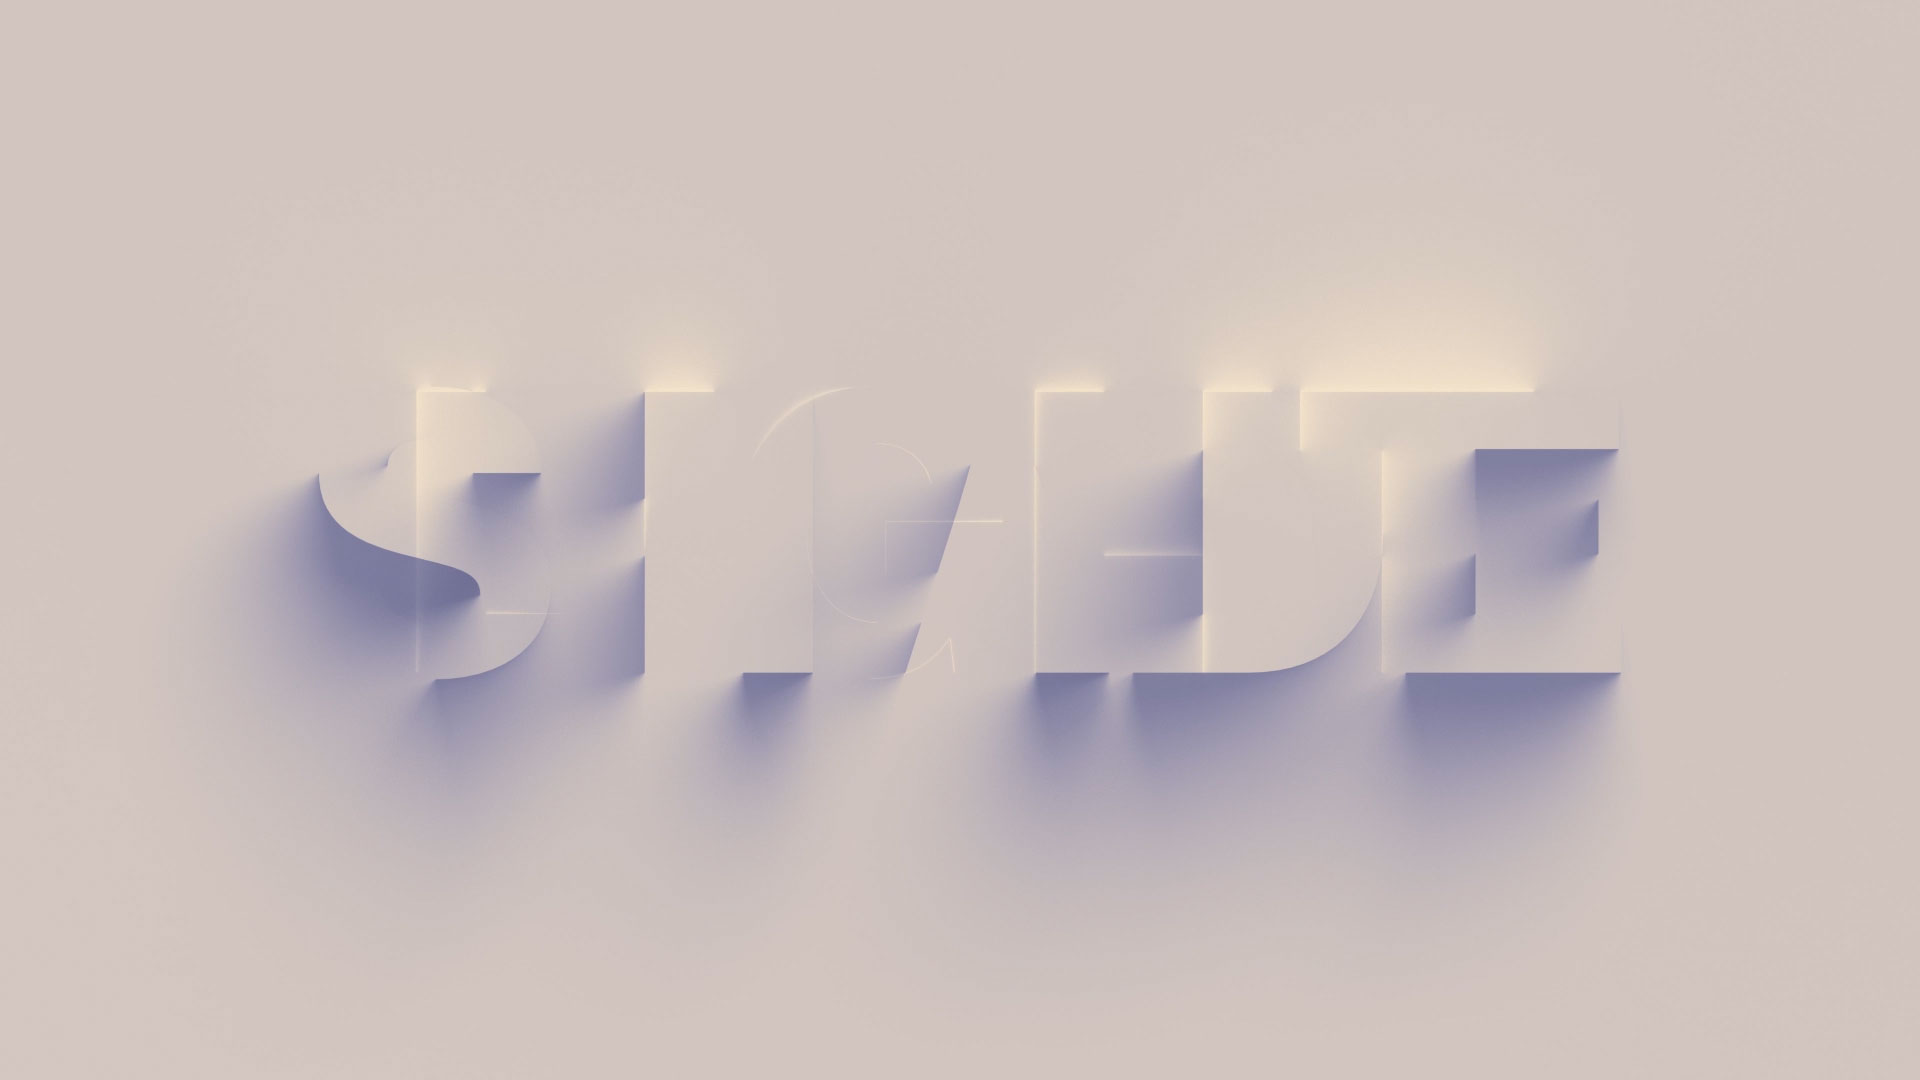
Fields are one of the most powerful features of Cinema 4D, allowing you to flow data through your scene, keeping all elements in sync and coherent.
In this lesson we use some simple Mograph techniques to reveal the words light and shade, the trick here is to re-use the fields and manipulate the existing data, this keeps your setup to a minimum and ensures efficiency.
We rework the concept from the first chapter and use the same principle with deformation to demonstrate how we can use and adapt the same setup in multiple places.
The final result of this chapter relies heavily on some rendering trickery. We hide our geometry and only allow the renderer to generate light and shadow from the global illumination and shadows being cast from our light.
We look at how we can introduce colour into the shadows and reflections to create a mesmerising result.


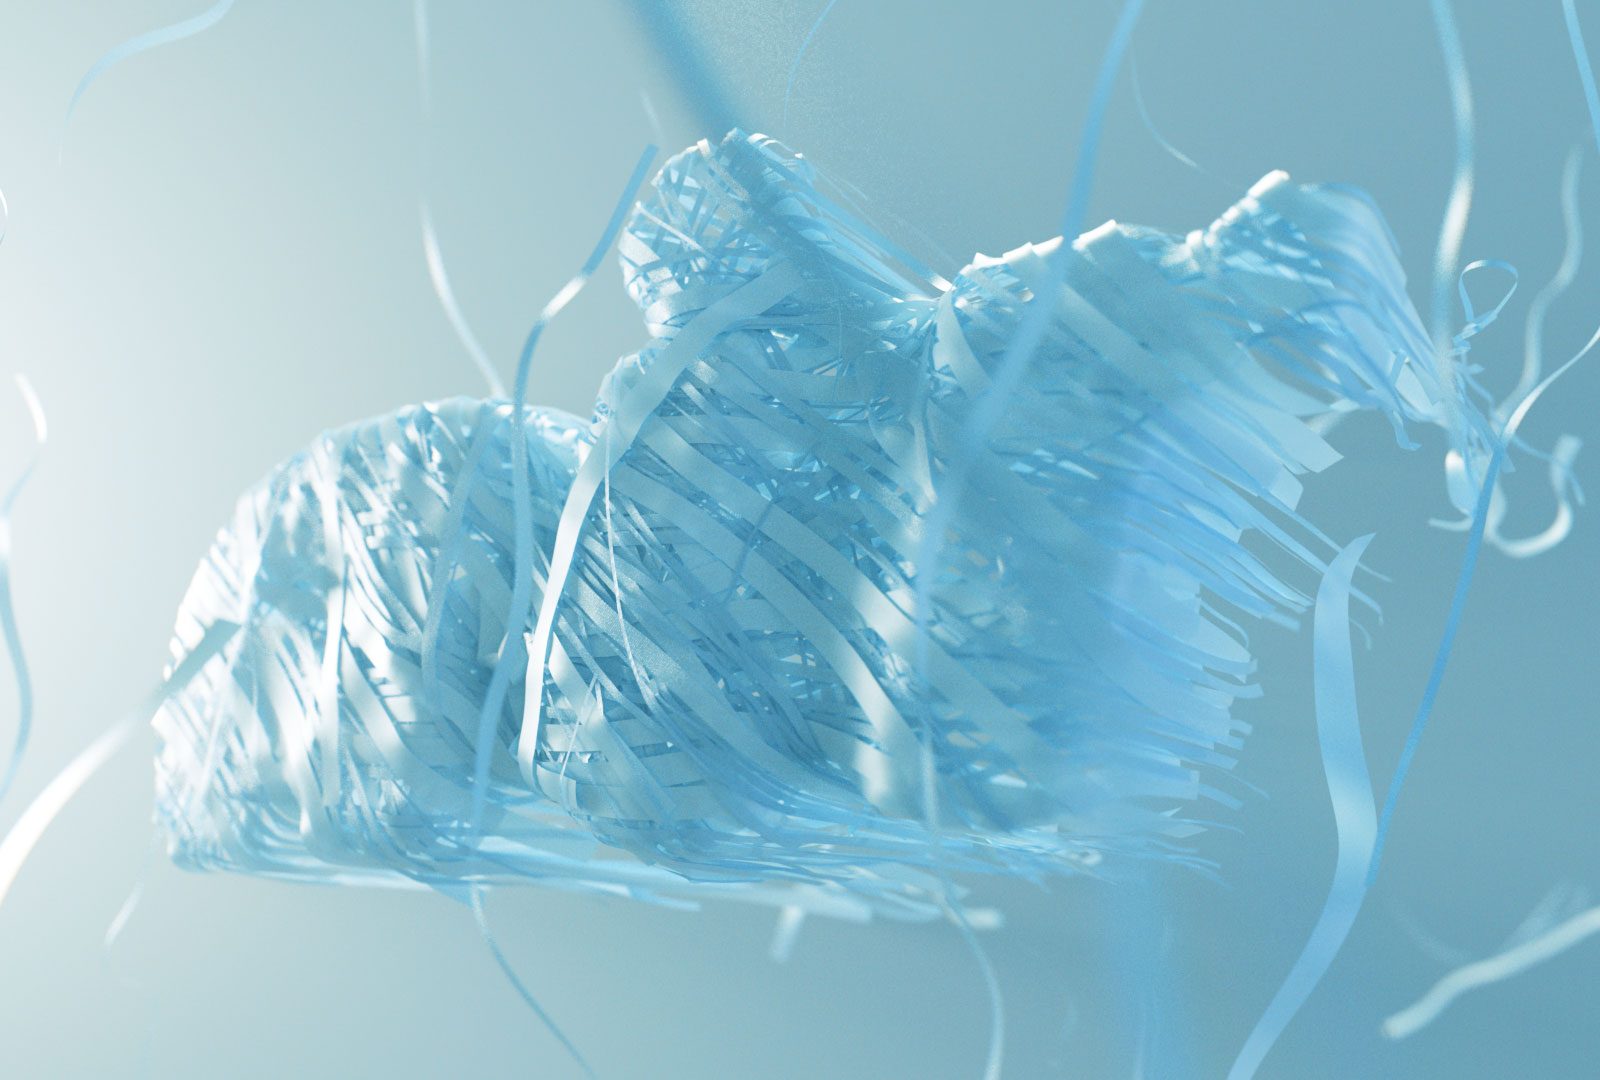
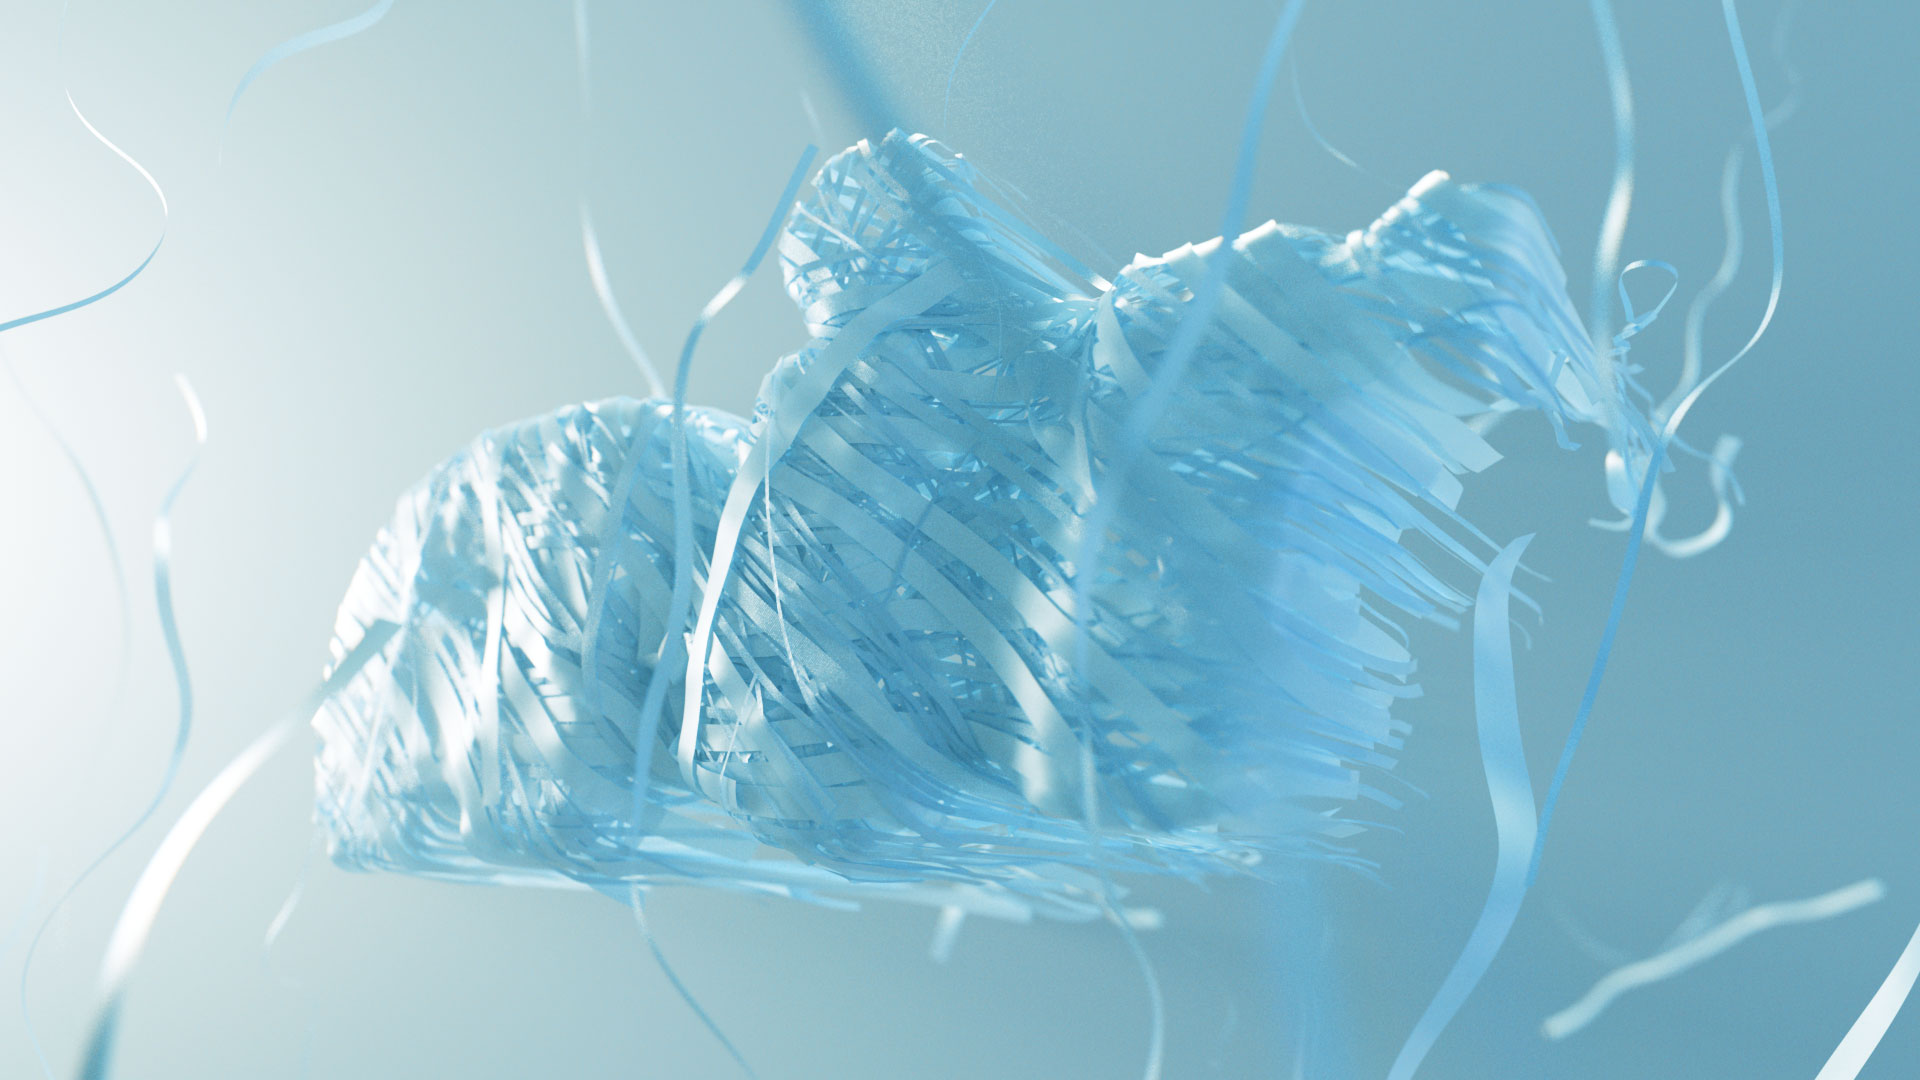
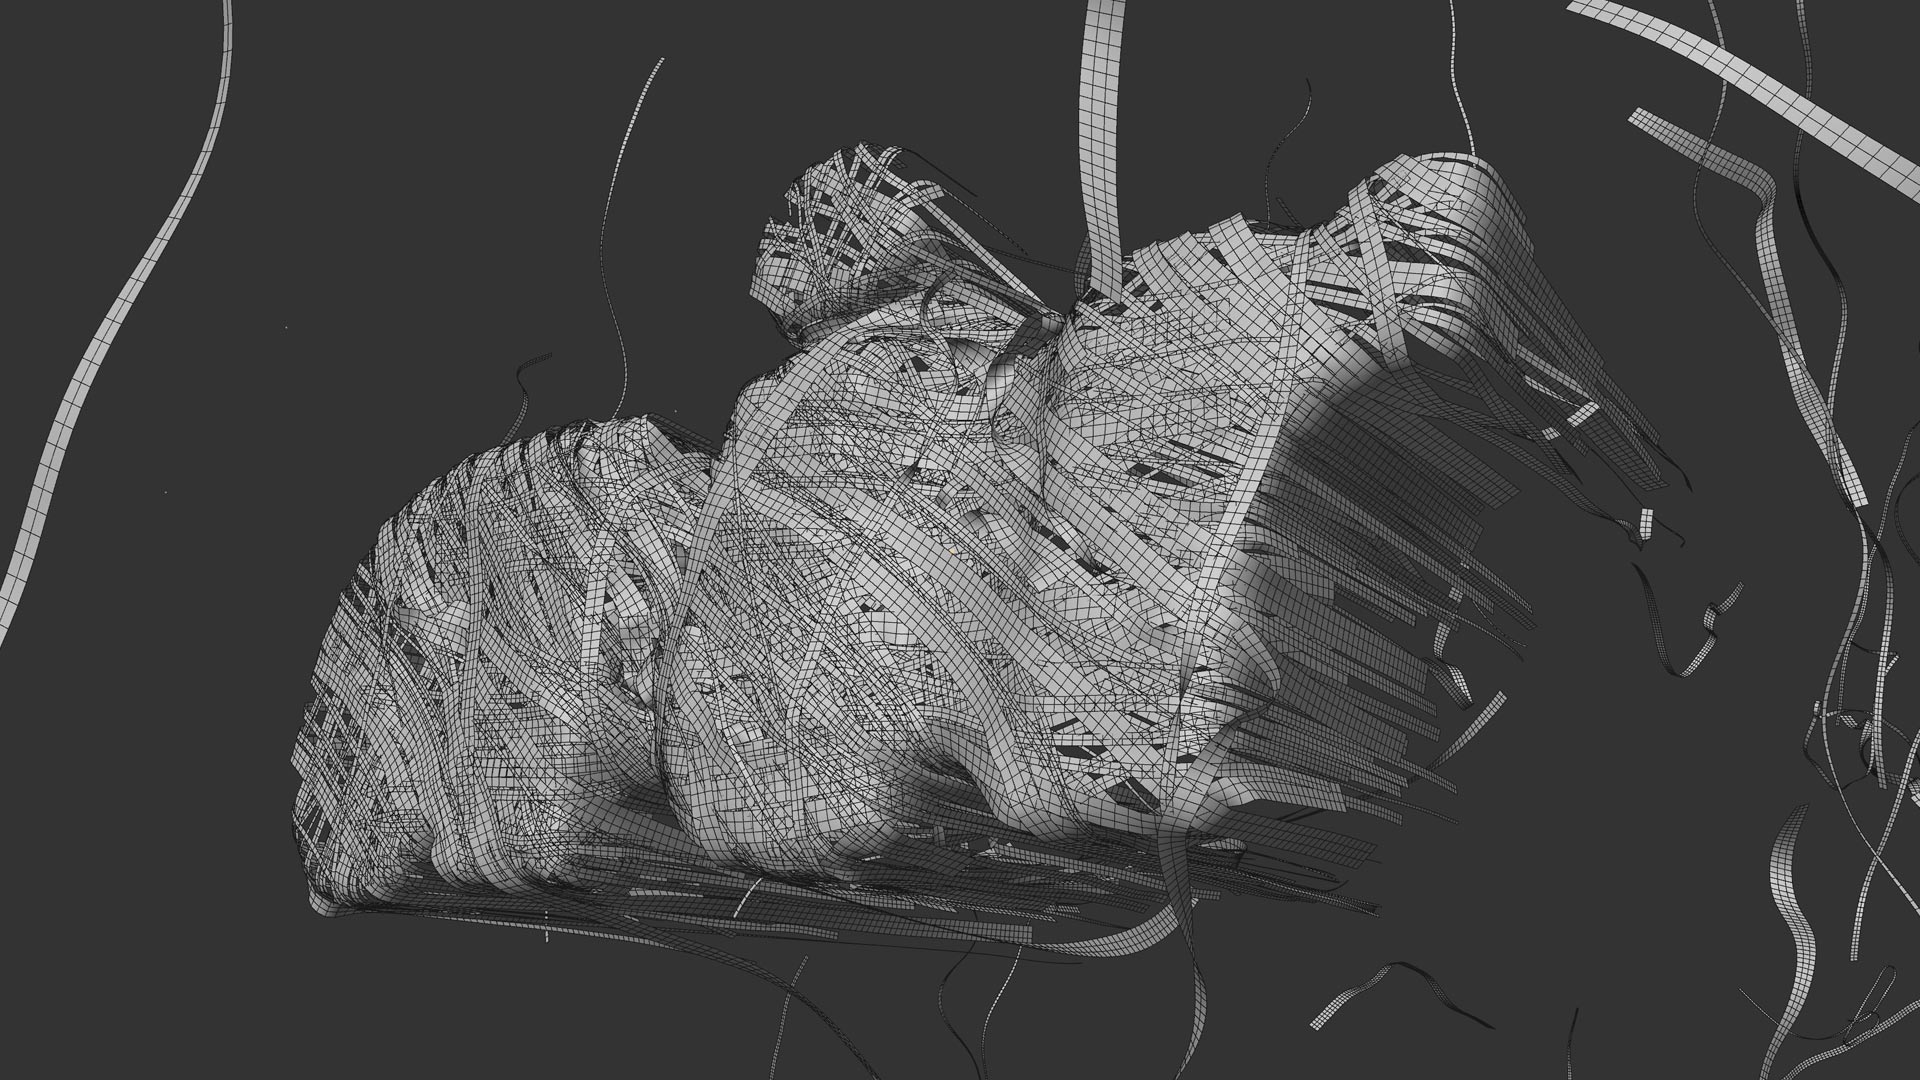
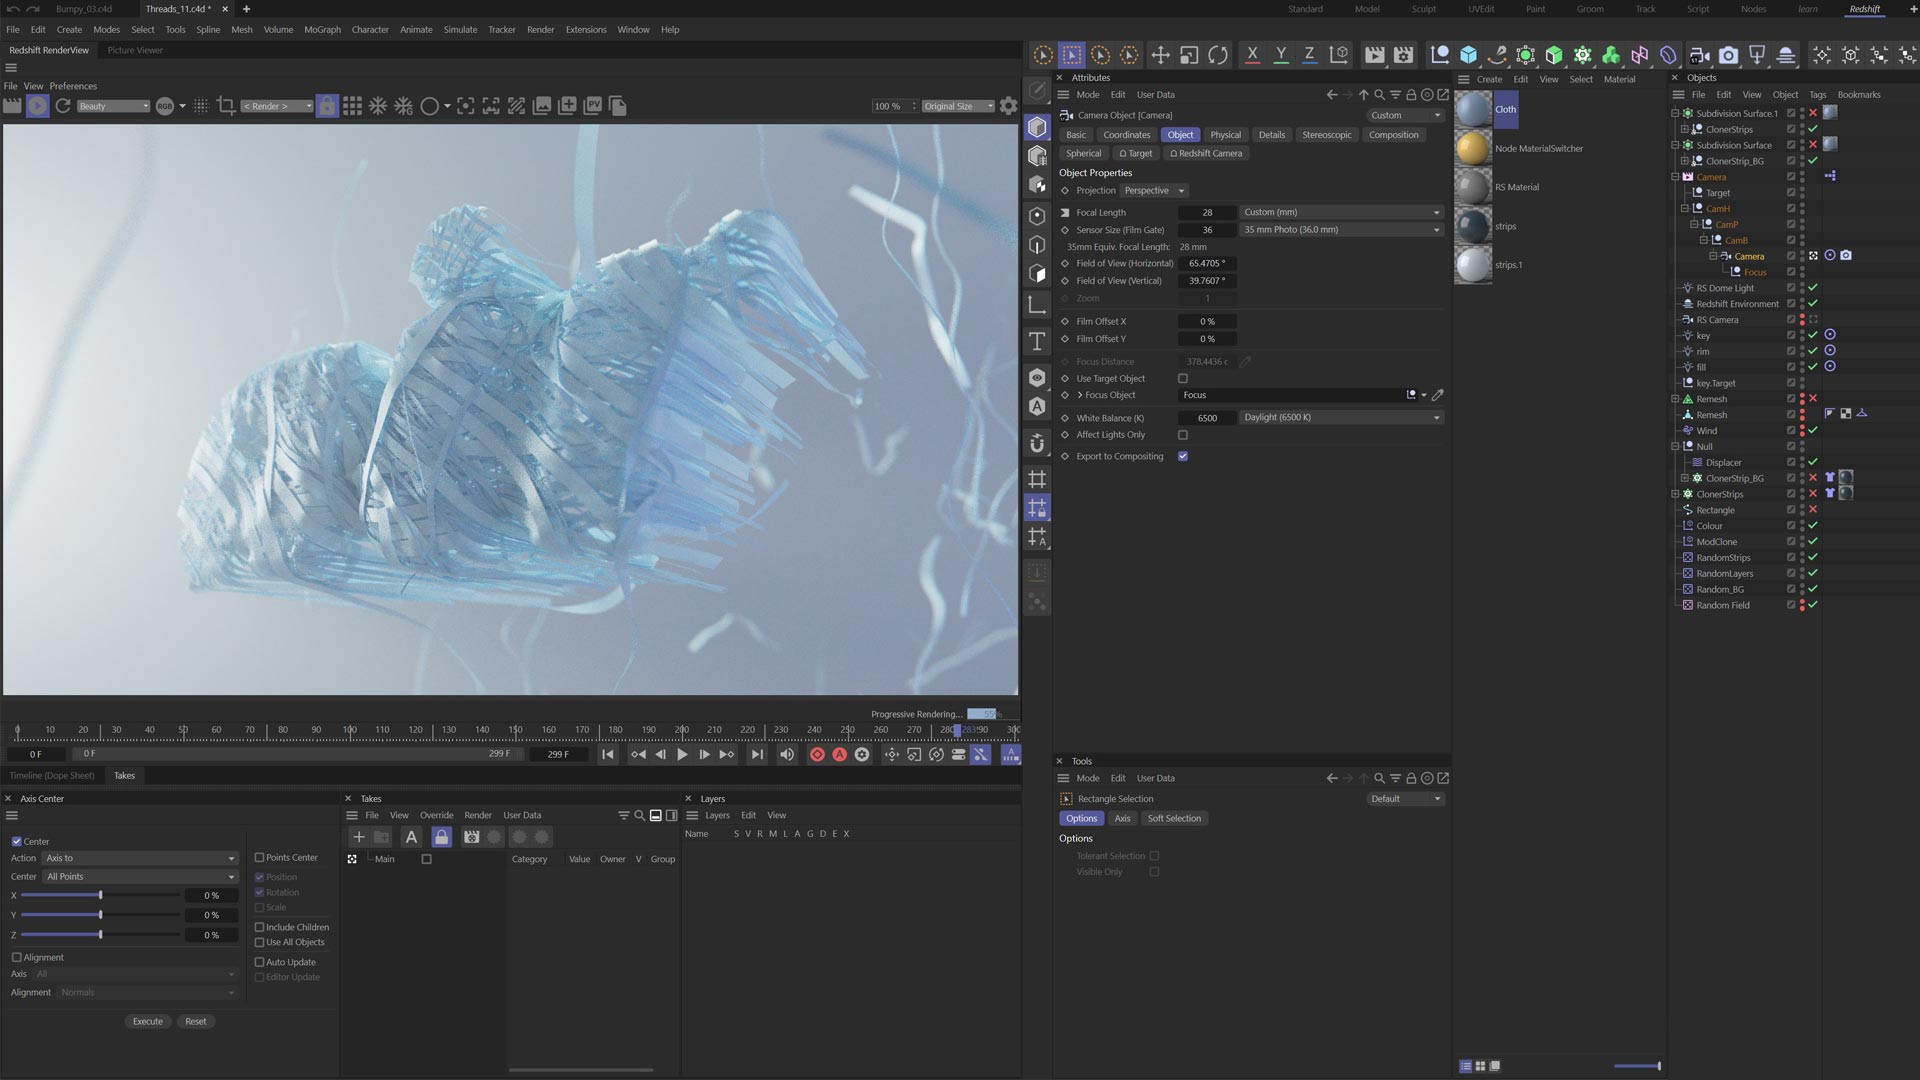
This tutorial creates the word air by blowing hundreds of strips of simulated cloth onto some hidden geometry.
We start by creating the text and smoothing it out using volumes. We then build multiple layers of cloth which is generated procedurally using Mograph. This allows us to give each piece of cloth a unique colour which we use for texturing later.
The Cloth simulation is configured using one layer of cloth for speed and efficiency.
Once complete the simulation is applied to multiple layers of cloth which we cache to Alembic, transferring our Mograph Colour to the Vertices for use in Redshift and allowing us to work freely when we set up our lights and shaders.
We create a Redshift Material using various bitmaps for bump and roughness, these are set up to match the scale required for the different cloth strips, allowing us to build multiple cloth textures with one material.
The scene is lit using backlighting and volumetrics which gives an airy feel when combined with the cloth translucency.

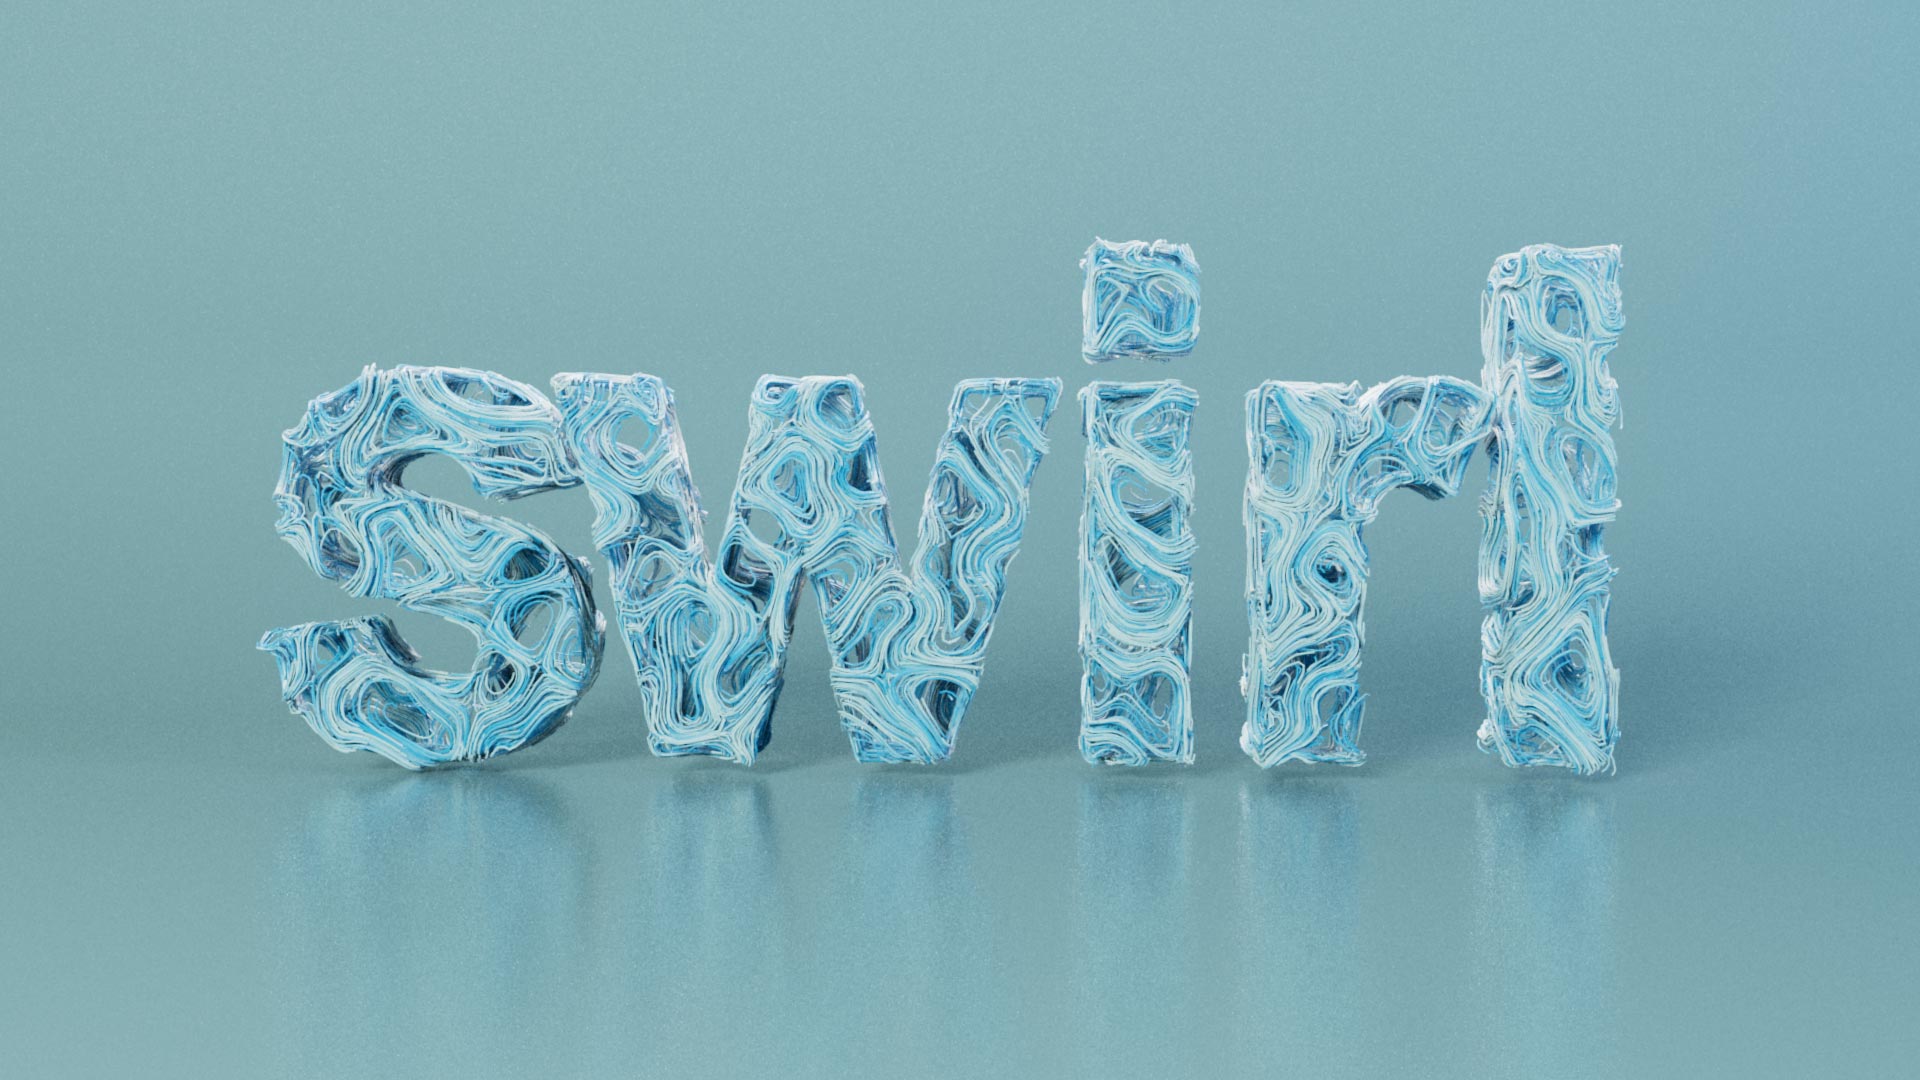
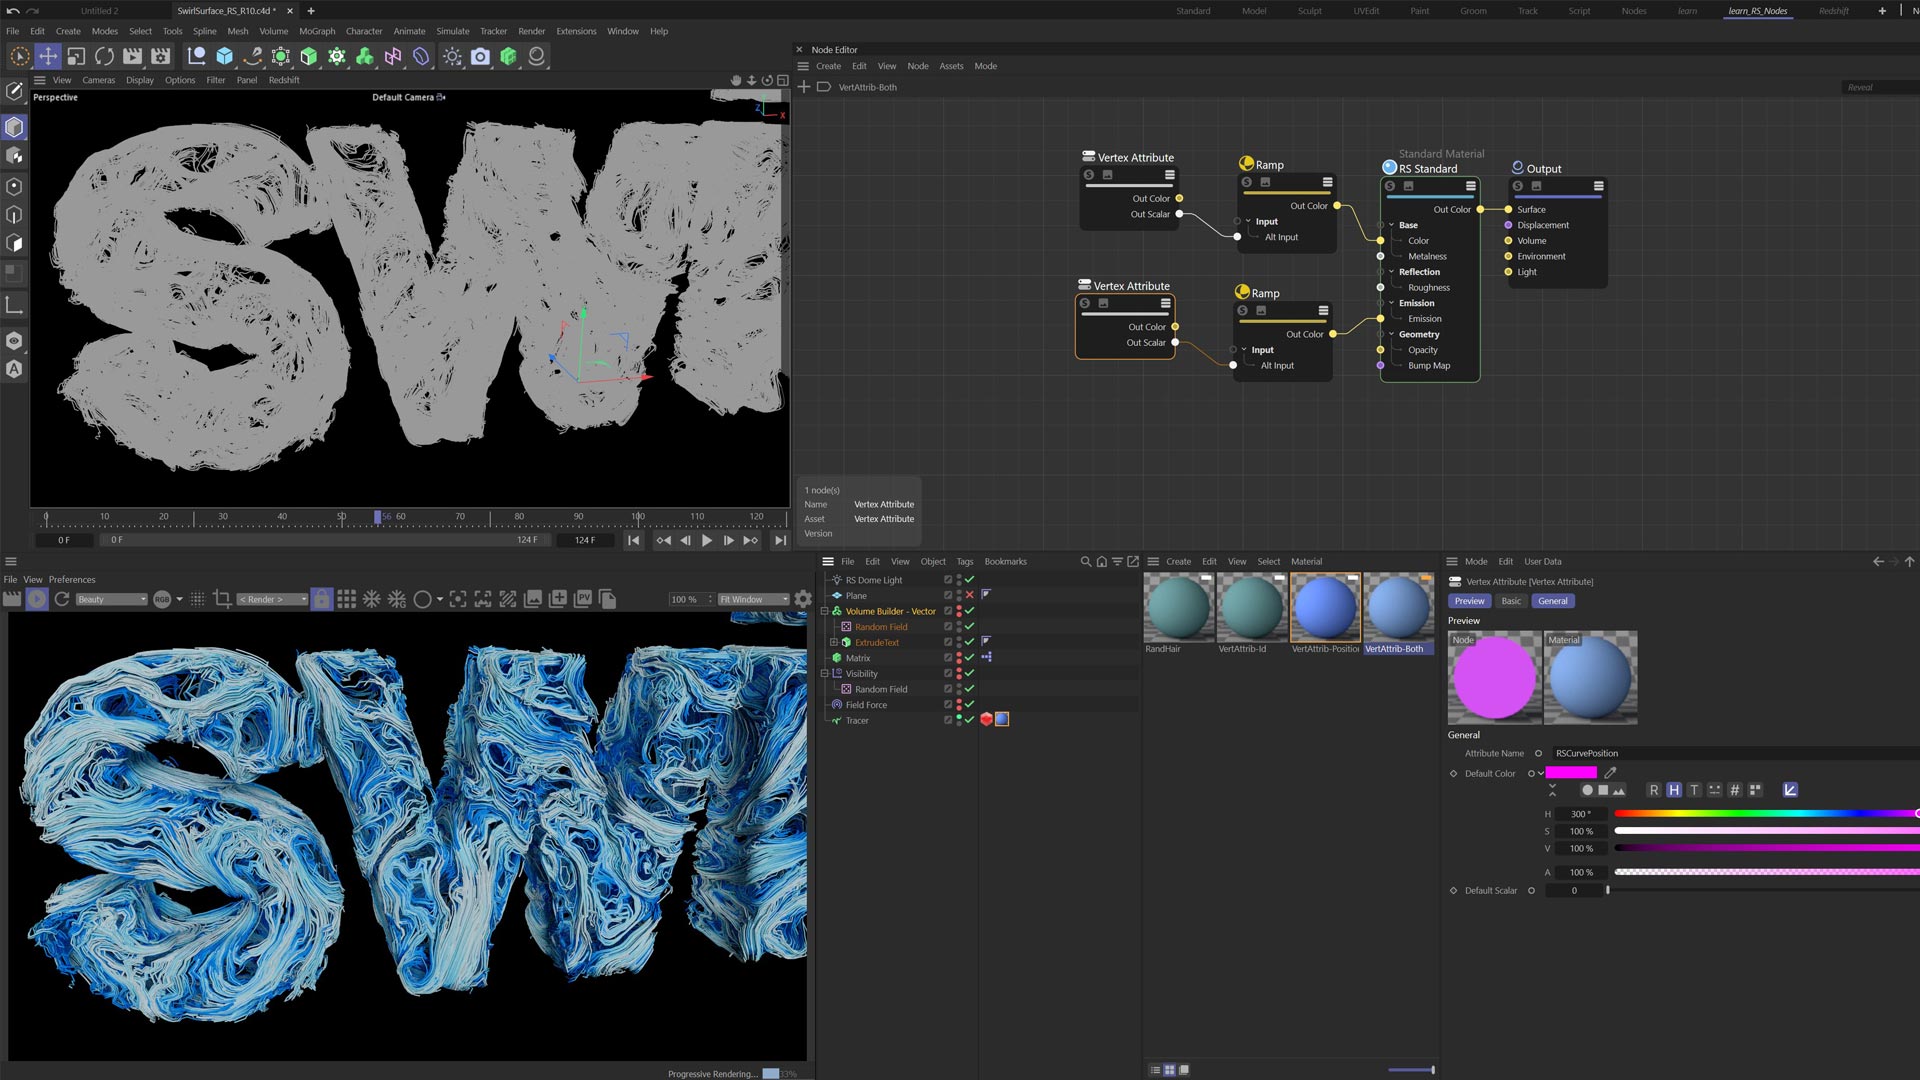
An exploration of vector volumes, fields and forces to drive particle motion.
This tutorial is split into two main parts. The first section looks at creating swirling patterns on the surface of your objects by driving particle motion with vectors defined using noise patterns.
The particles are traced to create splines which swirl across your object’s geometry, we reveal and remove the effect using animated fields.
The second section builds upon the first by creating a similar effect, but this time we use the volume of the object to create a three dimensional effect as the tracer splines twist and turn inside your object filling it with lines.
Redshift has the option to render splines directly without the need to generate actual geometry in your scene. This allows you to work fast and create the geometry at render time.
We explore not only the render options such as Hair Strands or Cylinders, but also how we can read the Vertex Attributes from our Tracer and remap this using Ramps to define the colour of the curves.
By using different noise algorithms, you can change the look considerably, we also look at smoothing the vectors from the noise to change the random erratic motion into smooth and flowing line.
Once we have covered the basics, we develop another material using similar techniques and we encase the result in a bloated and smoothed glassy version of the text which we create using Volume Builder.
We develop one more technique where we hide the Tracer splines and instead use them to clone matrices. We then use Tracer as a spline field to control those matrices.
This results in a twirling, swirling particle effect defining the volume of our object.

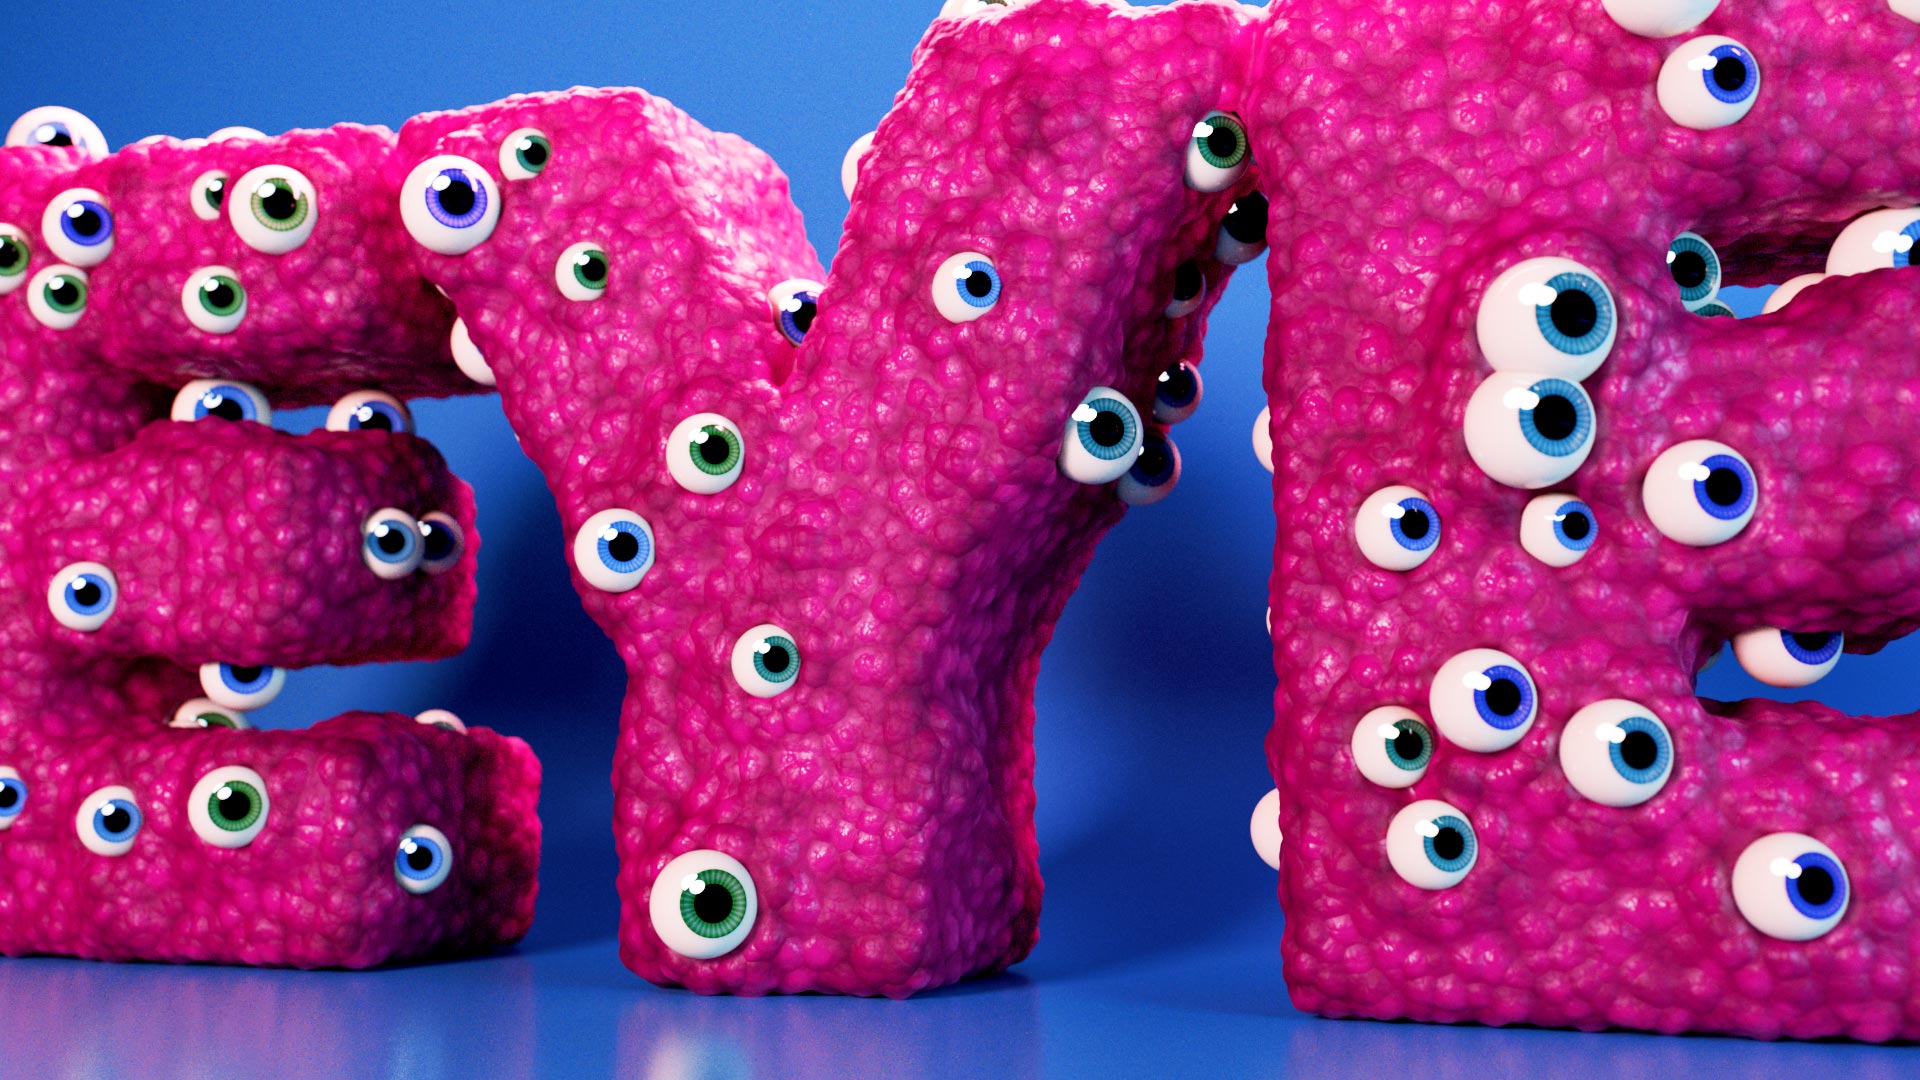
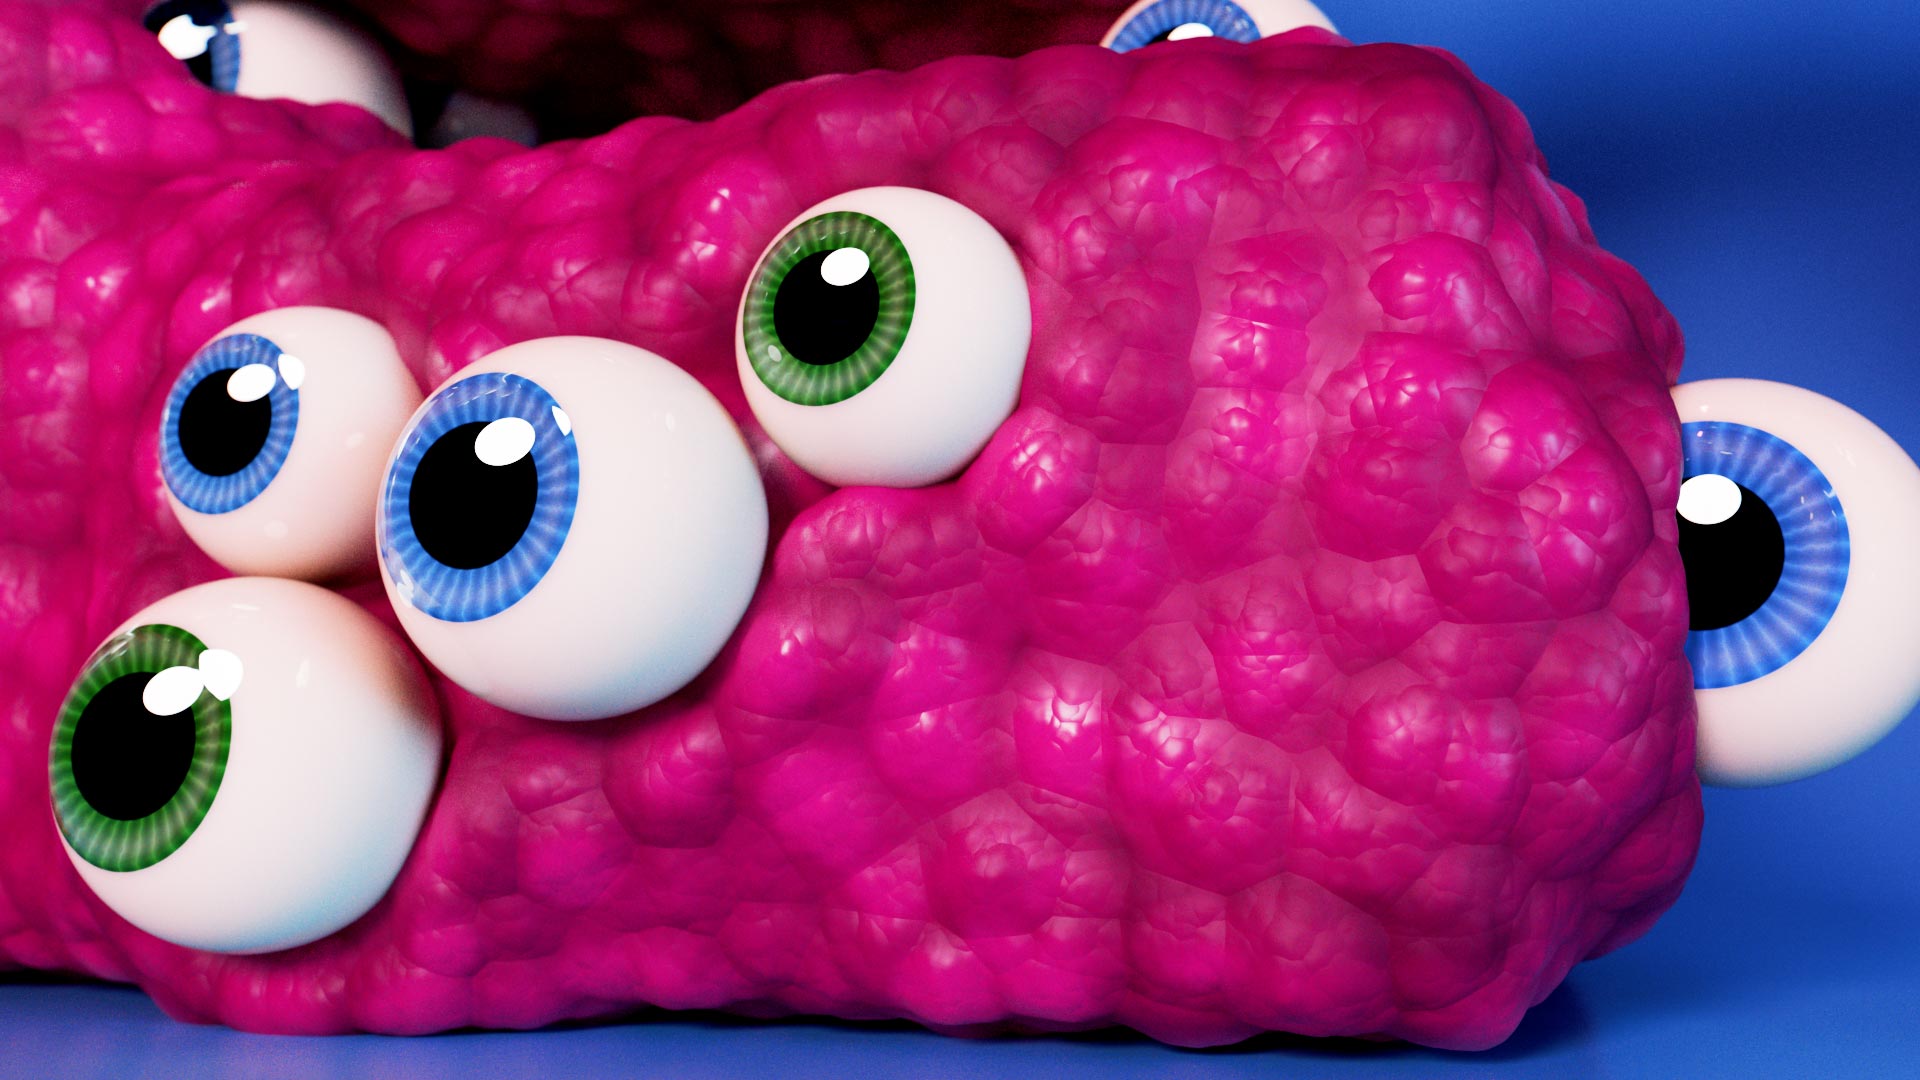
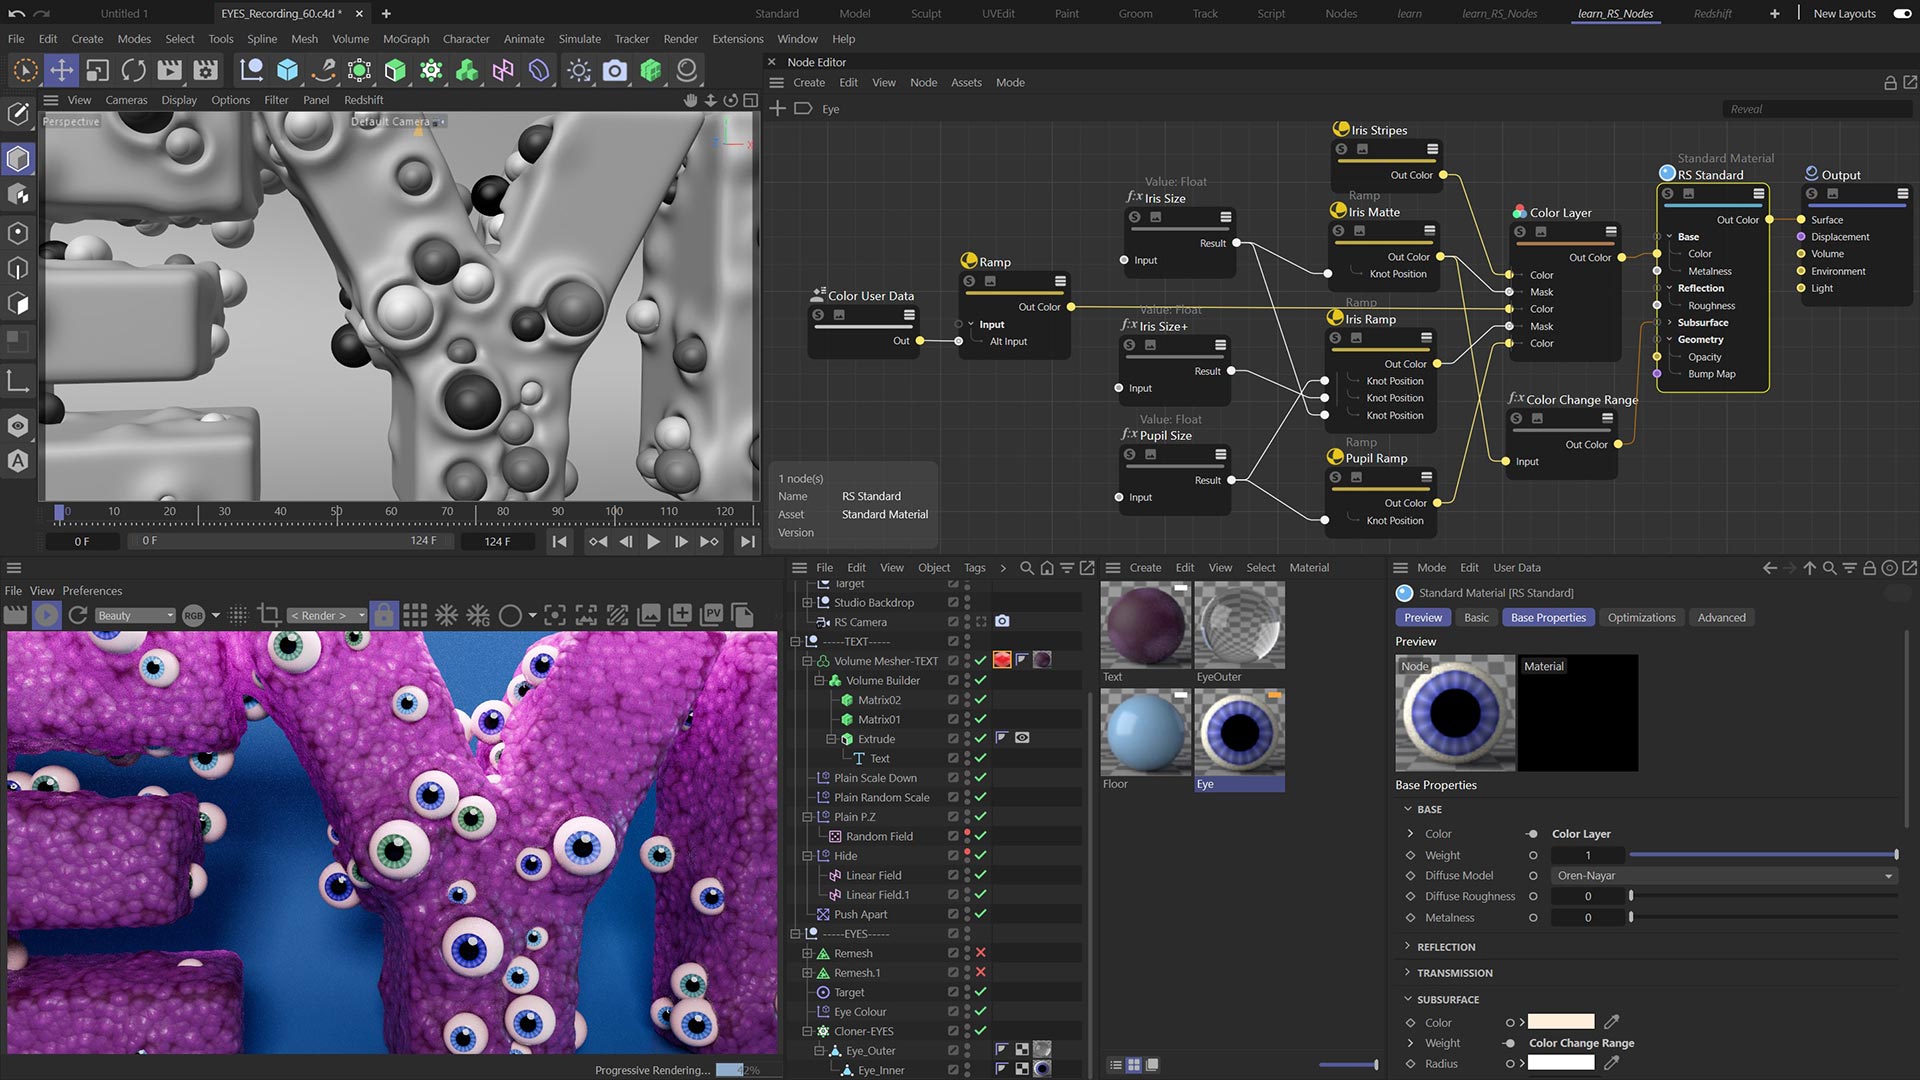
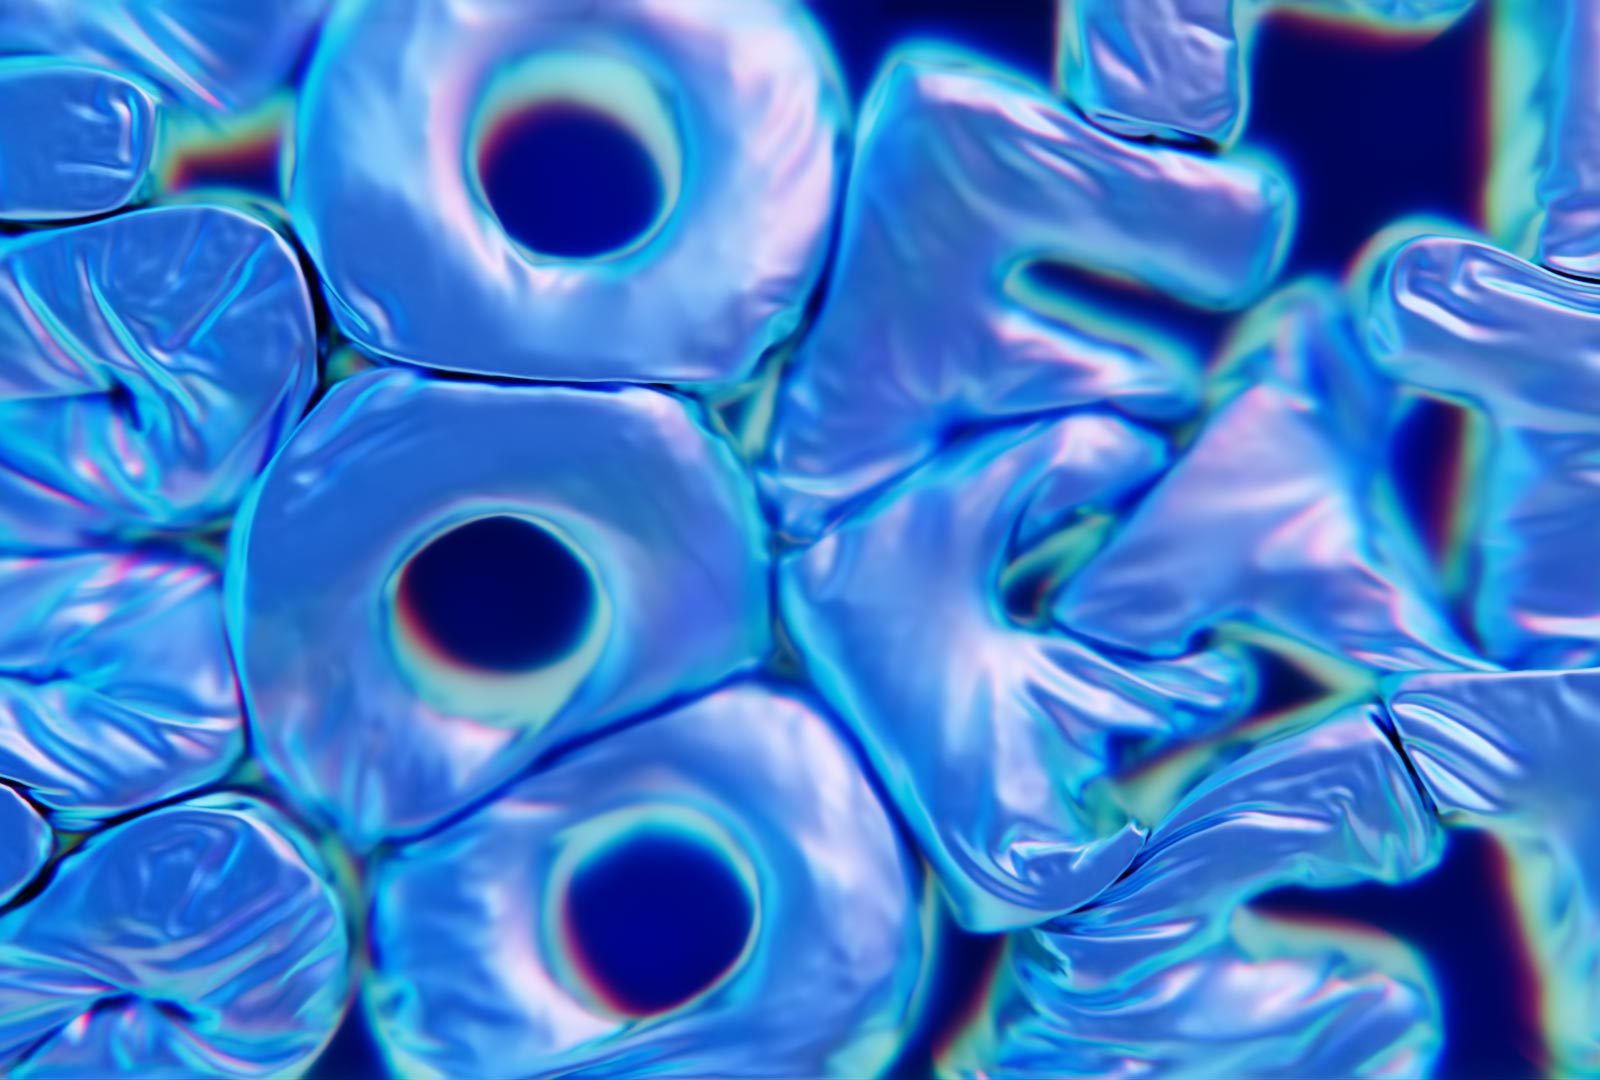
Volume Builders allow for huge flexibility when it comes to modelling and animating. We model some type using Volume Builders and Filters.
We use the Matrix Object to manipulate the volume, creating craters and holes as the matrices animate in and out.
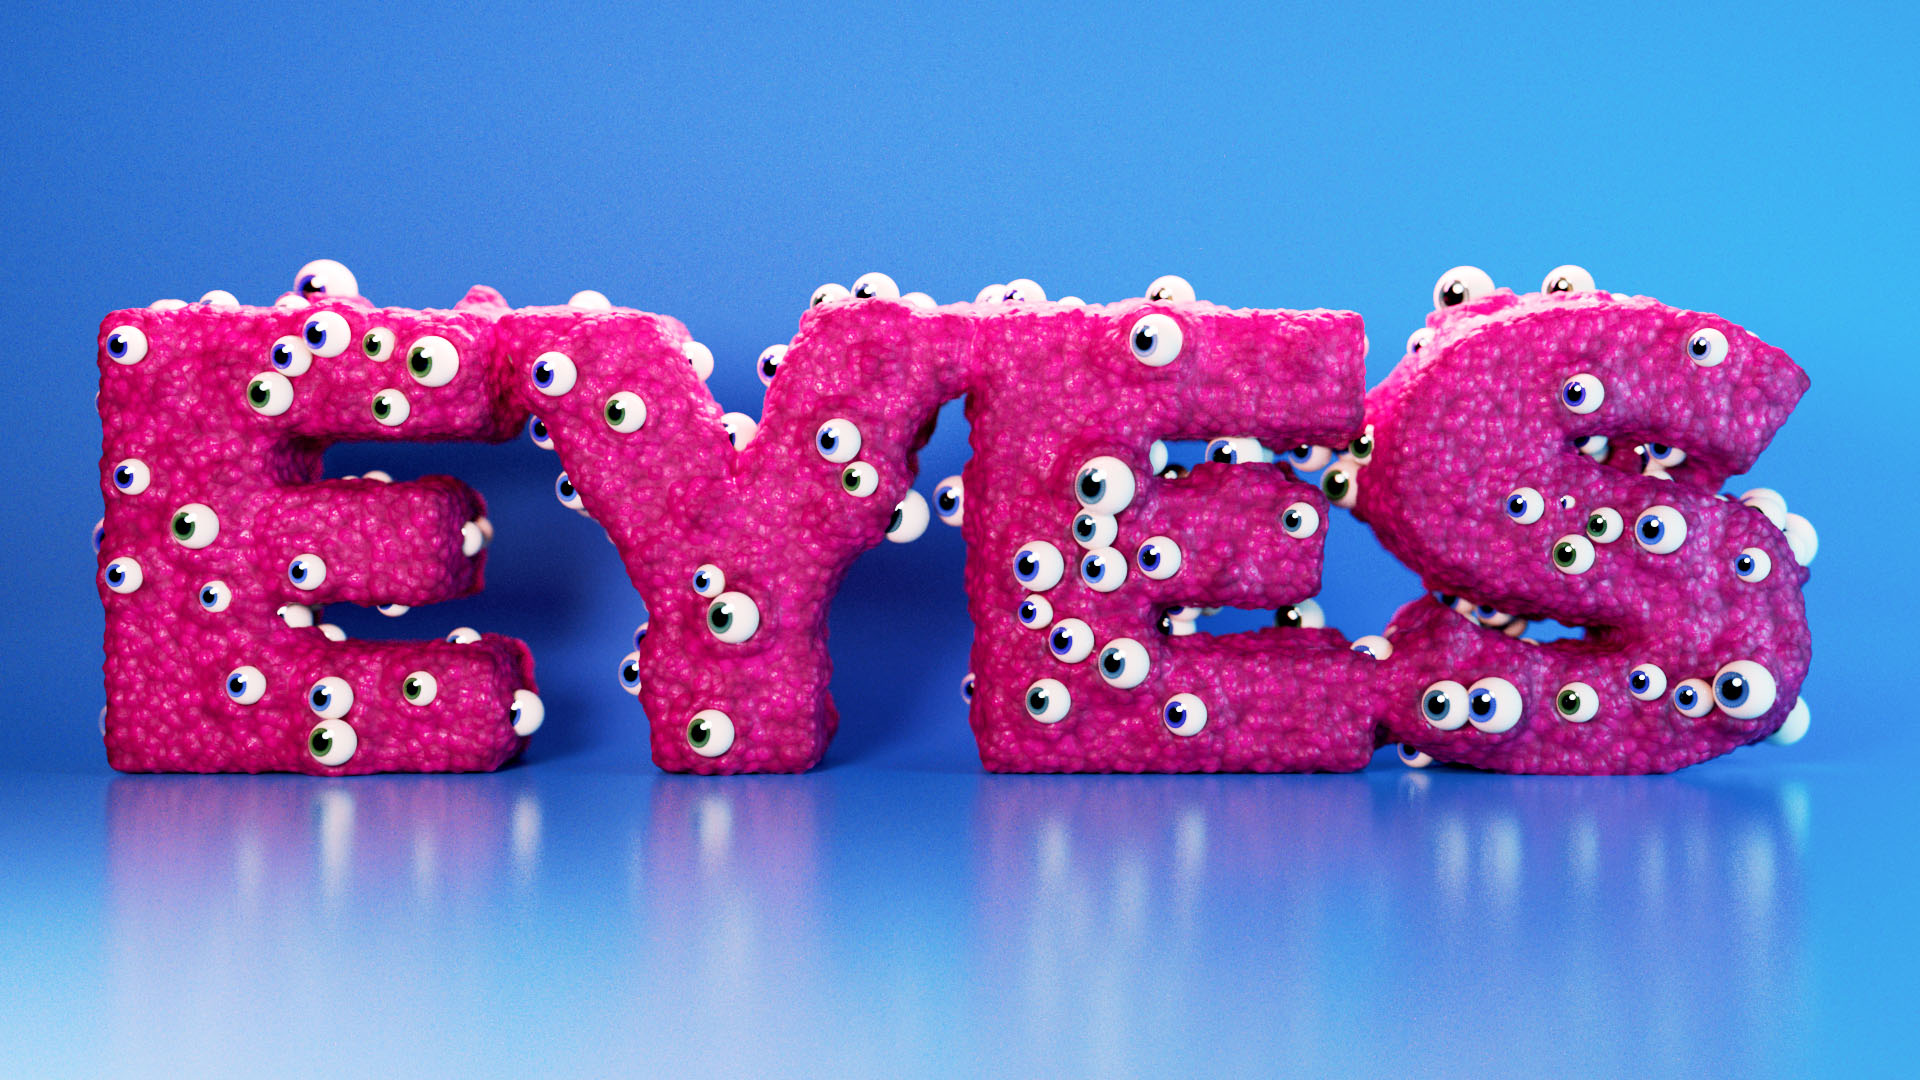
We model a stylised eye, creating two parts, the inner eye with iris and pupil and another layer for the lens. We then distribute the eyes across our model and animate the eyes looking around.
This studio style lighting setup uses a typical 3 point lighting rig, we adapt this and use light linking so we can add specific details to our objects without affecting other scene elements.
The material for the eye is built 100% procedurally in the Redshift node network. We make use of the color user data so that we can remap the colours of the iris so they are a range of colours.
Using a combination of noises for displacement and sub-surface scattering, we build a cartoon scaley skin type material.