learn. Cinema 4D Rigging In One Day
Original price was: $79.00.$55.00Current price is: $55.00.

Tim Clapham returns with learn. Cinema 4D Rigging In One Day a feature packed series aimed to get you up and running with rigging in Cinema 4D.
Dive straight in with a quick-start on the core principles of rigging as a refresher and foundation for the remainder of the course. Tim then takes you on a journey through the various methods available for rigging and controlling your animation set-ups.
This training covers many techniques which are essential parts of the rigging process, including working with deformers, manipulating object hierarchy, morphing geometry and objects, exploration of the constraint tag and building your own set-ups with Xpresso, Cinema 4D’s node based expression language.
Finding the perfect balance of these processes and bringing them together into coherent and manageable set-ups is the key to successful rigging and animation. This course will teach you many real world and production proven techniques to ensure your projects and workflow are both powerful, robust and efficient.
Training Summary
Expert tuition on C4D rigging techniques
Basic rigging principles to advanced setups
Deformers, morphing, constraints, joints, weighting, xpresso & more
Includes all Cinema 4D Project files
21 tutorials over 400 minutes
Recommended requirements
Cinema 4D R19 or above
NB : This course is aimed at general rigging for animation and motion graphics. If you are interested in Character Rigging try this instead.

Duration : 20:00 mins
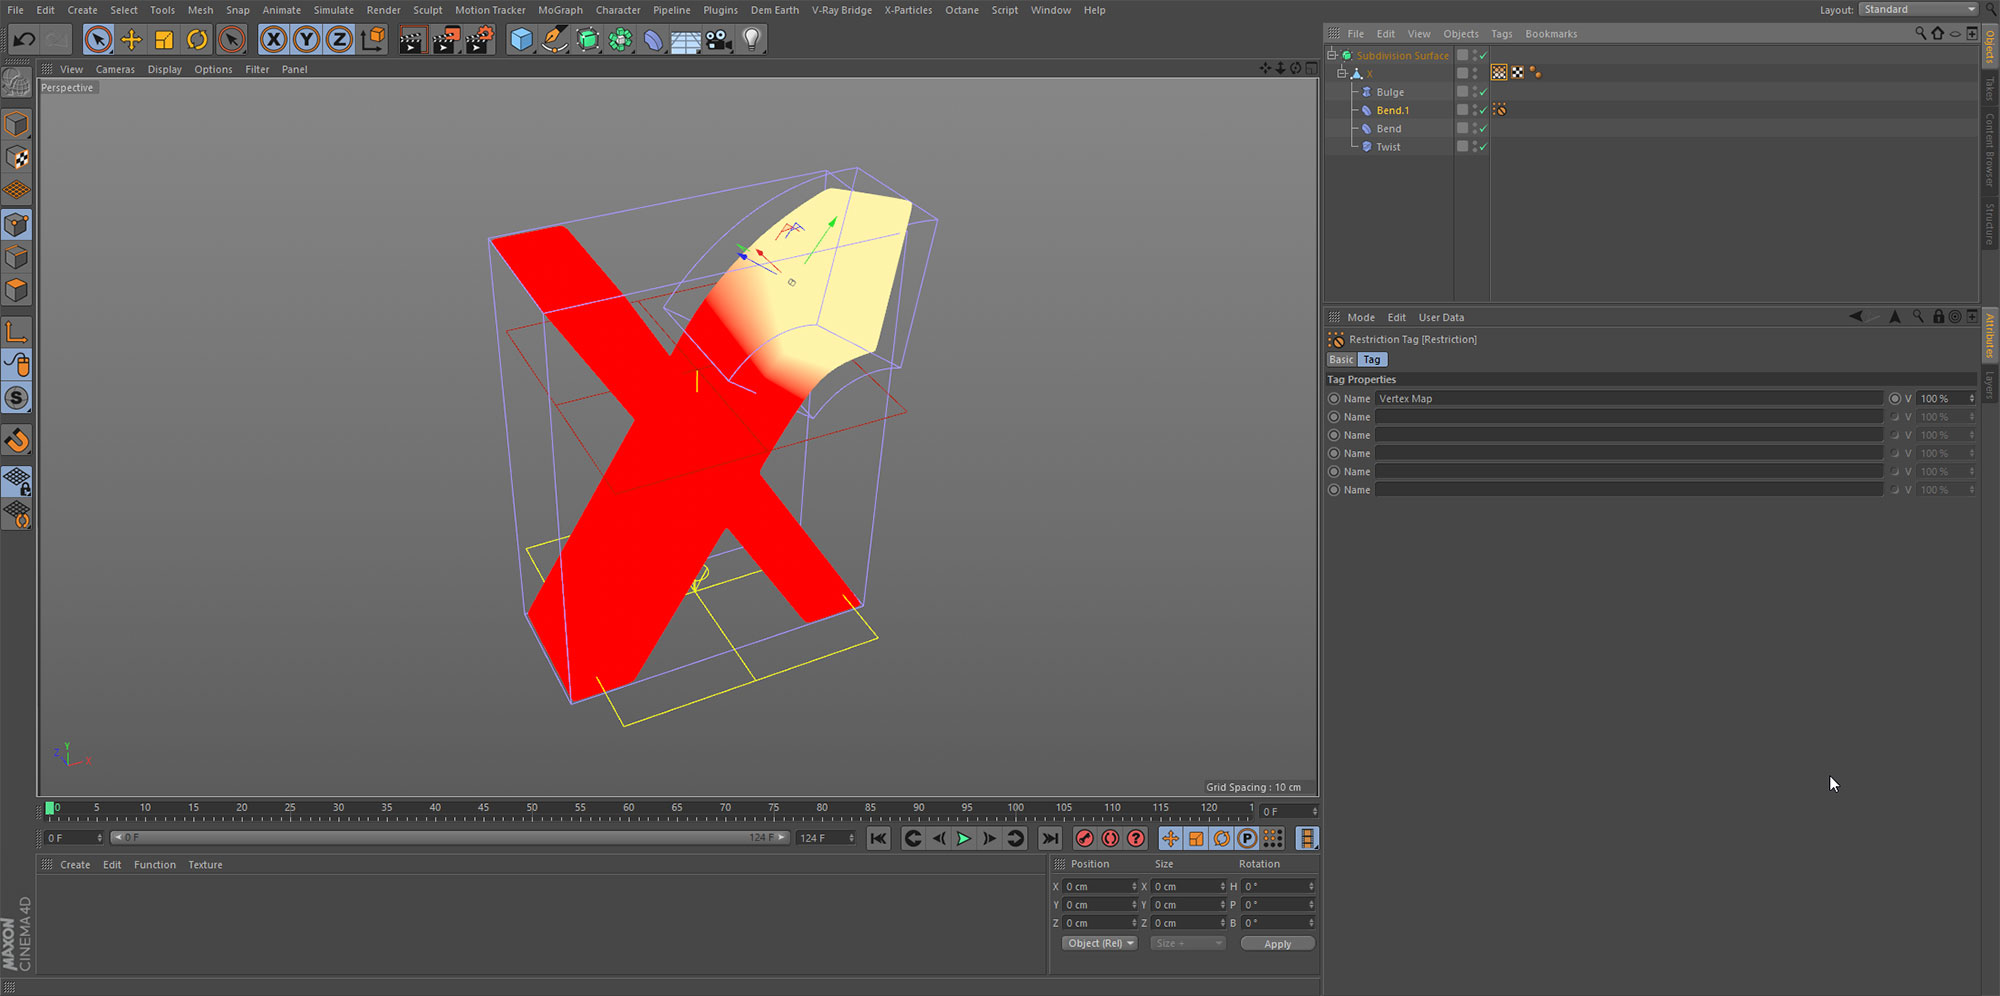
We start with the basics of working with Cinema 4D Deformers, looking at the object hierarchy. Restricting the deformation by
using Falloff or Vertex maps combined with the Restriction Tag.
FEATURES COVERED : Deformers, Falloff, Vertex Maps and Restriction Tag.
Duration : 14:00 mins
A quick look at the best approach for deforming (text) objects generated from splines and how to ensure the mesh topology is adequate for smooth deformation whilst still remaining procedural.
FEATURES COVERED : Text Spline, Extrude Object and Bend Deformer.
Duration : 8:00 mins
In this session we build a very simple piston rig. We set up a simple hierarchy of objects and introduce the position and aim constraints.
FEATURES COVERED : Position and Aim Constraint.
Duration : 5:30 mins
Introducing Xpresso and how we can use expressions to drive one objects parameter from a value on another object. We build our first expression in two clicks, then open the Xpresso editor to investigate the expression that has been created.
FEATURES COVERED : Set Driver, Set Driven, Xpresso – Object Node and Range Mapper Node.
Duration : 19:30 mins
This chapter is your introduction to the Pose Morph Tag. Starting with a relative point morph, we then move on to discover the other point morph options, looking at Absolute and also Rotational Morphing
FEATURES COVERED : Pose Morph Tag
Duration : 18:00 mins
In the following four tutorials, we build a rig which allows us to animate the individual vertices of a spline. First we explore point level animation and examine the limitations of this technique. We then create an Xpresso set-up which allows us to control the spline points by linking the spline vertices to the position of null objects.
FEATURES COVERED : PLA, Xpresso Object & Point nodes and Interaction Tag.
Duration : 14:00 mins
Improving on the Xpresso we built in part one, we reconstruct a similar expression but this time using Xpresso to iterate through the object hierarchy. This makes the set-up more efficient and scalable. We then expand on this by releasing the objects from their hierarchy and using the ObjectList node to link them into the iteration.
FEATURES COVERED : Xpresso Hierarchy, ObjectList and Object Index node.
Duration : 22:00 mins
Expanding on the flexible rig we have made for animating splines, we rework the object hierarchy so that it is simple to attach the spline to any object ensuring the spline is attached at right angles and does not intersect the object it is connected to. We then add some Xpresso to automatically keep the null objects in the correct place between each other. To finish up, we remove the Xpresso and use constraints to add some dynamic secondary motion to the spline for natural and realistic motion.
FEATURES COVERED : Xpresso Mix node, Spring Constraint and Bake Objects function.
Duration : 16:00 mins
In part four we build an alternative rig for controlling splines using Spline Dynamics and Spline Dynamic Constraints. This is a very similar approach to the previous rig, but it doesn’t offer quite as much control. Also, this technique requires Cinema 4D Studio, as the Hair module includes the Spline Dynamics feature.
FEATURES COVERED : Spline Dynamics Tag, Hair Constraint Tag, Wind Particle Force and Caching Spline Dynamics.
Duration : 45:00 mins
Rigging a robot’s antennae using a combination of Joint Objects with Skin Deformers. Joints are one of the principle methods of building rigs due to their hierarchical nature and precise control.
In this tutorial we build a simple chain of joints which we bind to the mesh using a Skin Deformer, then we set up a Dynamic IK chain so that the joints animate automatically based on the parent movement. This creates a natural wobble and feeling of inertia which is useful for many things, such as a cartoon dog’s tail, a flag pole blowing in the wind or an aerial bending with the motion of the vehicle.
With one set-up working, we use the Mirror Tool to transfer a copy of our rig to the opposite antenna. We also explore an alternative method of achieving a similar result using the MoSpline Object, combined with a Jiggle Deformer.
FEATURES COVERED : Joint Tool, Spline To Joints Conversion, Naming Tool, Bind Command, Weight Tag, Skin Deformer, Weight Manager, Weight Tool, Dynamic IK, Mirror Tool, MoSpline and Jiggle Deformer.Duration : 14:00 mins
After jumping straight in and building a Dynamic IK rig for the Robot’s Antennae, we step back a little and examine the basics of Inverse Kinematics (IK). As a key element of rigging, understanding IK is essential for building efficient and stable rigs. In this tutorial we cover the creation of a basic IK rig, building the hierarchy, introducing Goal Objects and stabilising the rig with Pole Vectors.
FEATURES COVERED : Inverse Kinematics Tag, Position Constraint with Xpresso, Protection Tag and Pole Vector.
Duration : 37:00 mins
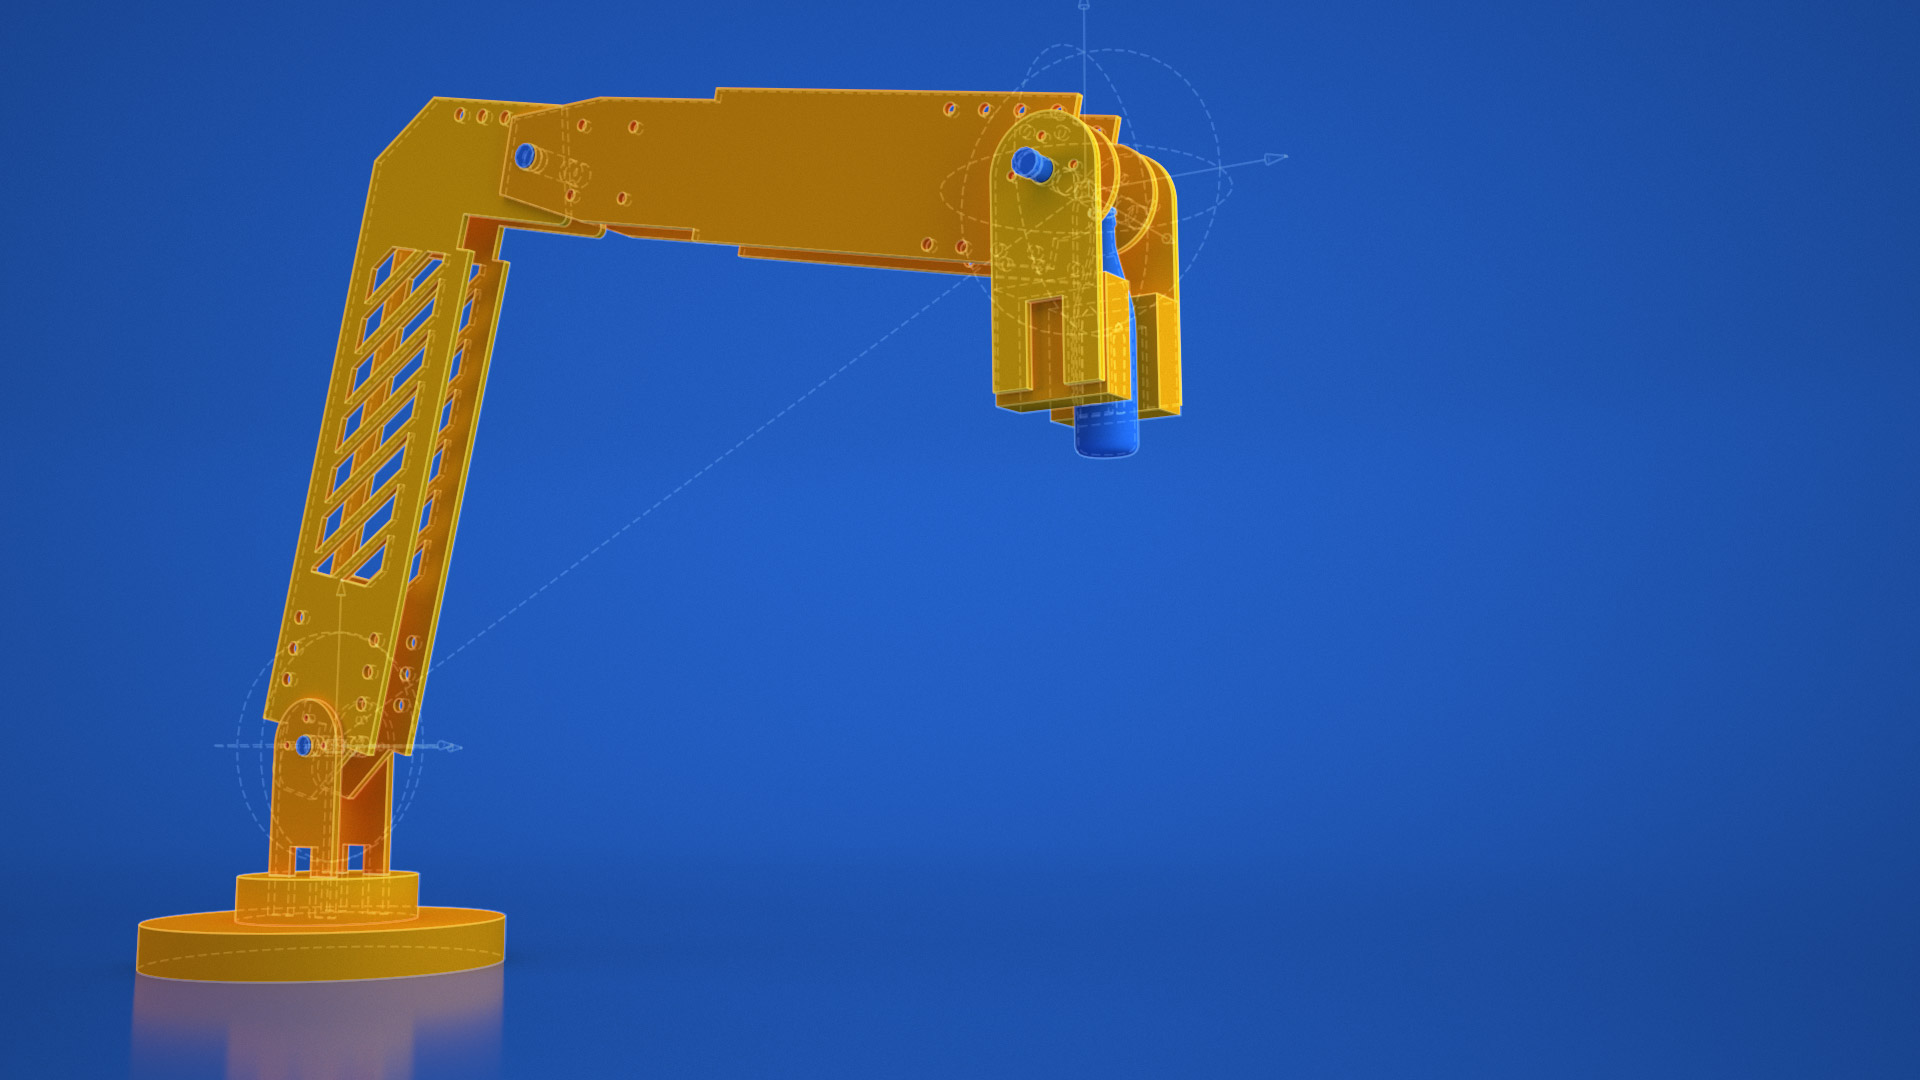
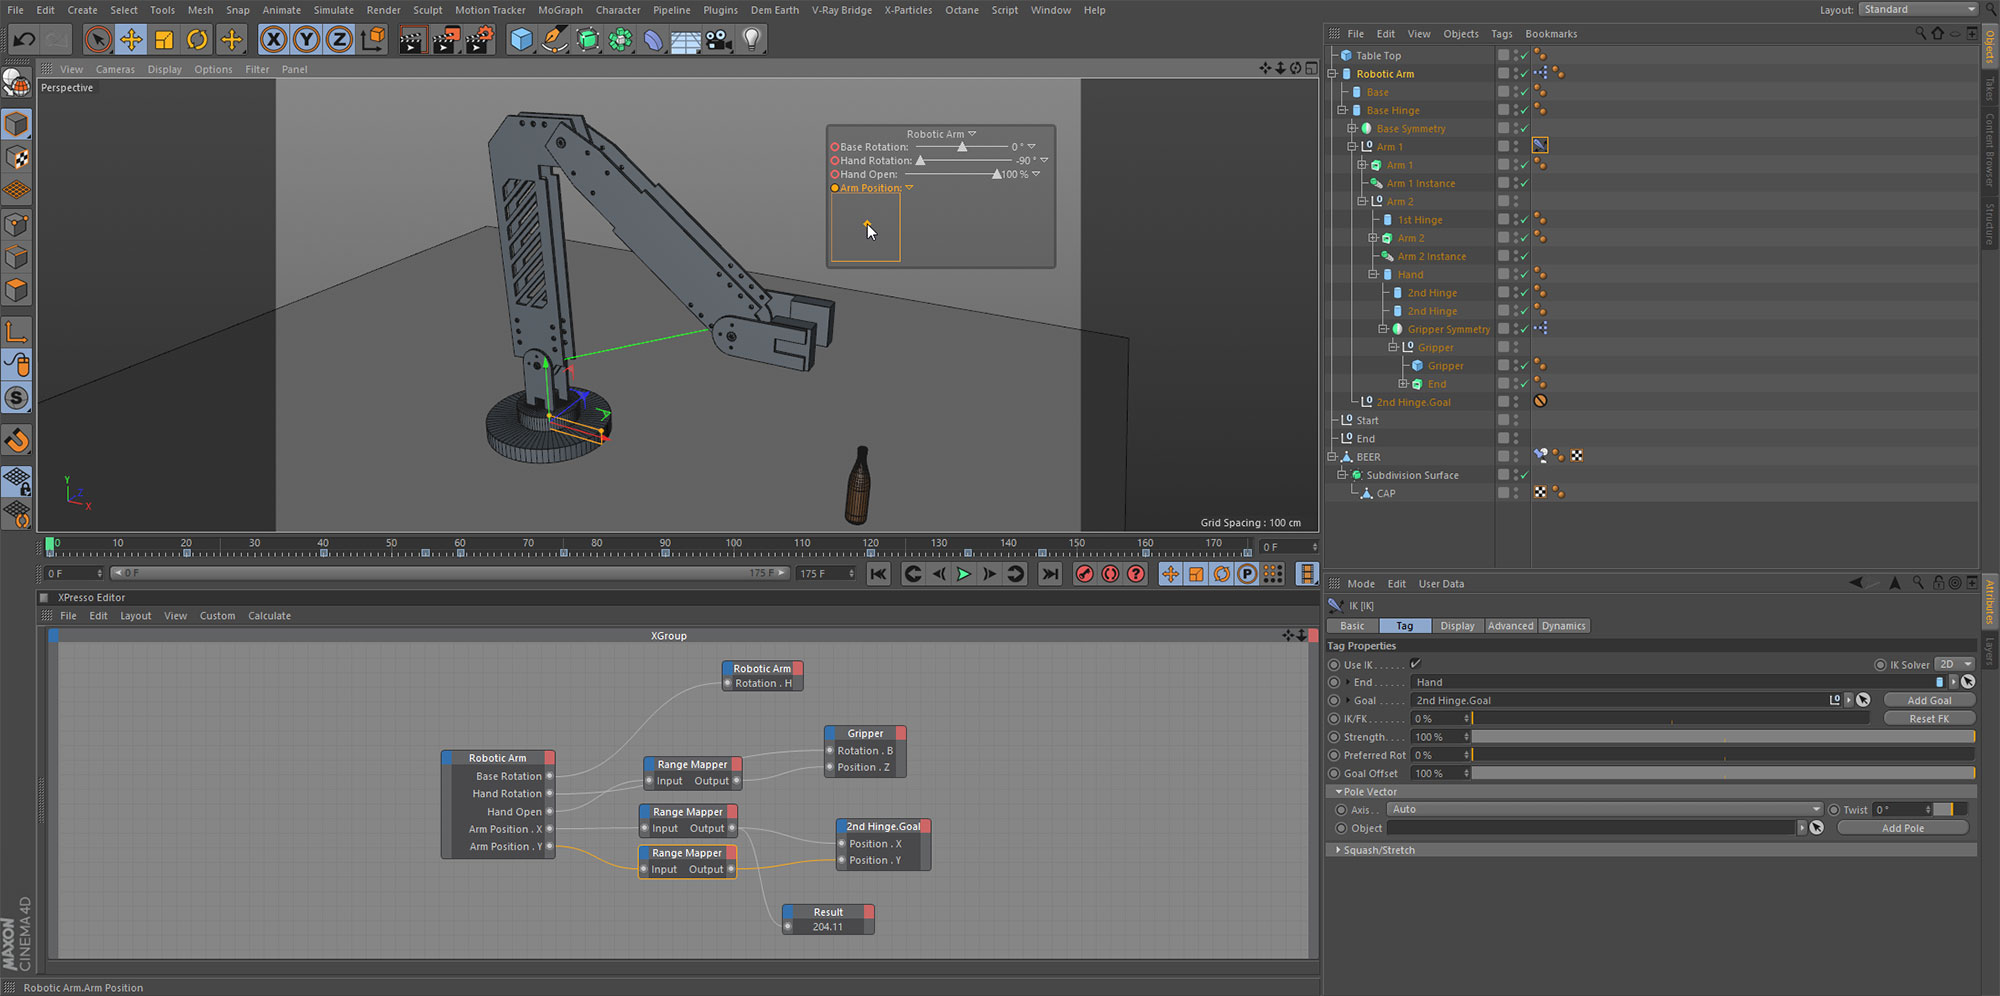
Building upon the Basic IK tutorial, this lesson takes us on the next steps of building a mechanical IK rig. Starting with a more complex model, representative of a real world project, we examine the scene and build the suitable hierarchy for the Robotic Arm. The arm is then controlled by linking custom user data to our IK chain, via Xpresso. Once complete, the rig is animated to pick up an object and drop it in a new position using a Parent Constraint.
FEATURES COVERED : Object Manager Hierarchies, IK Tag, User Data, Data Types, UI Elements, HUD, Xpresso and Parent Constraint.
Duration : 24:00 mins
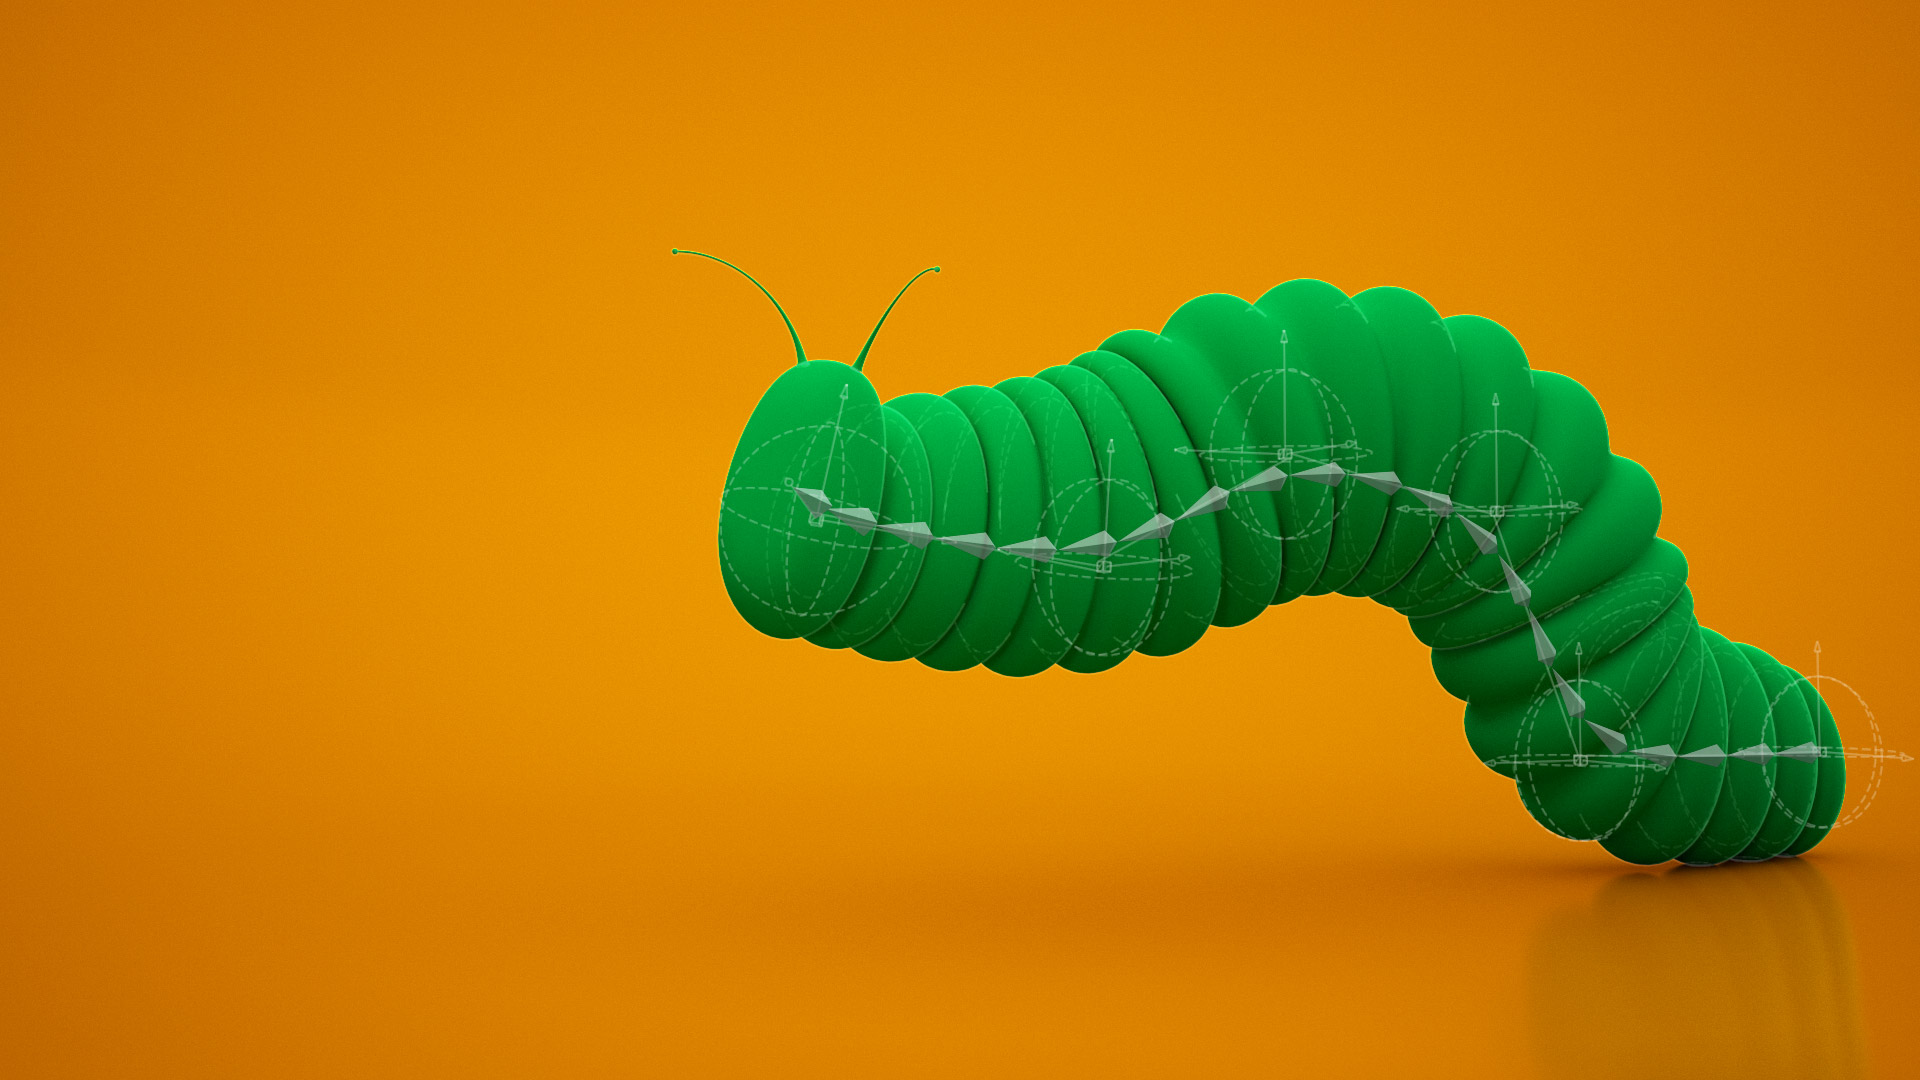
Learn how to manipulate long chains of joints by using IK Spline. With this technique it is possible to align your joints to a spline and control the complete chain using a few handles. By combining IK Spline with constraints and Xpresso, we automate part of the process to facilitate a smoother animation workflow.
The example we build is used as a rig for a caterpillar, but this technique is perfect for controlling any long object, such as an animals tail, octopus tentacle or electrical cable.
FEATURES COVERED : Snapping, Joint tool, IK-Spline, Bind, Skin Deformer, Weight Tag, Position Constraint, Xpresso – Distance Node and Range Mapper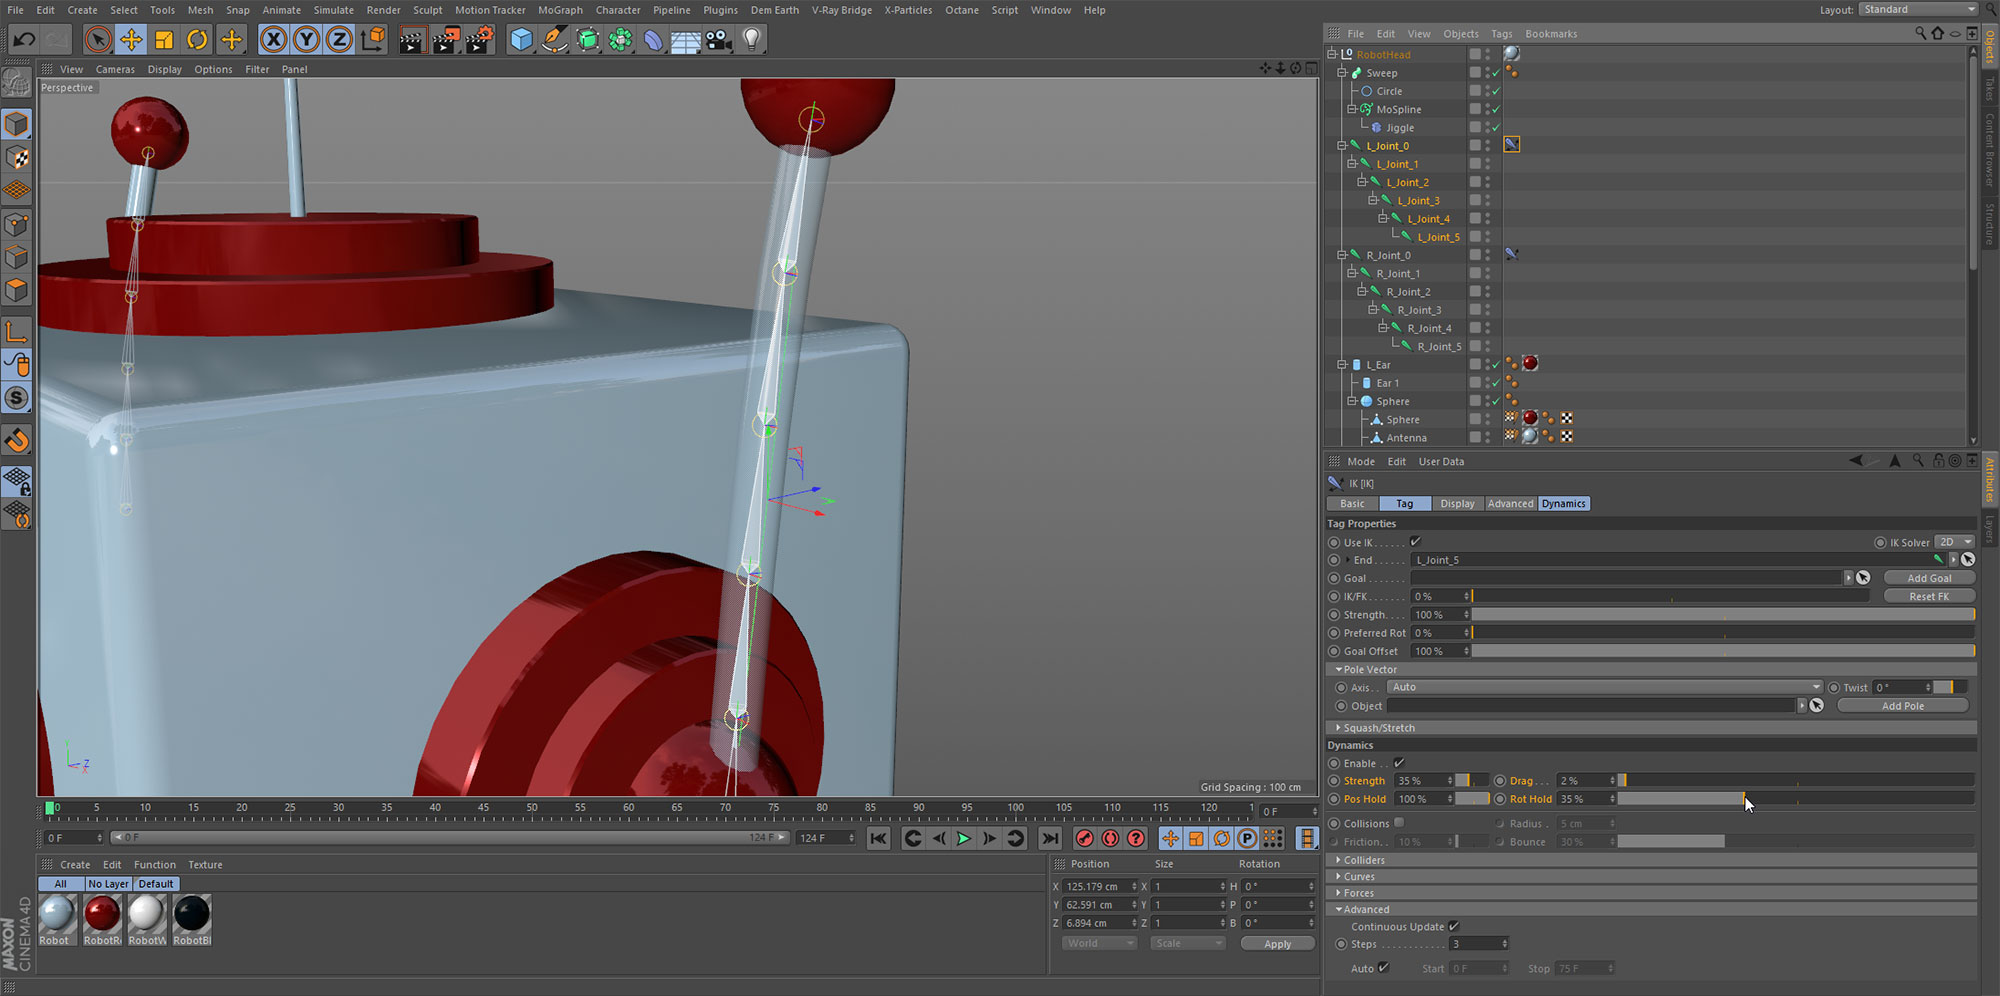
Duration : 18:00 mins
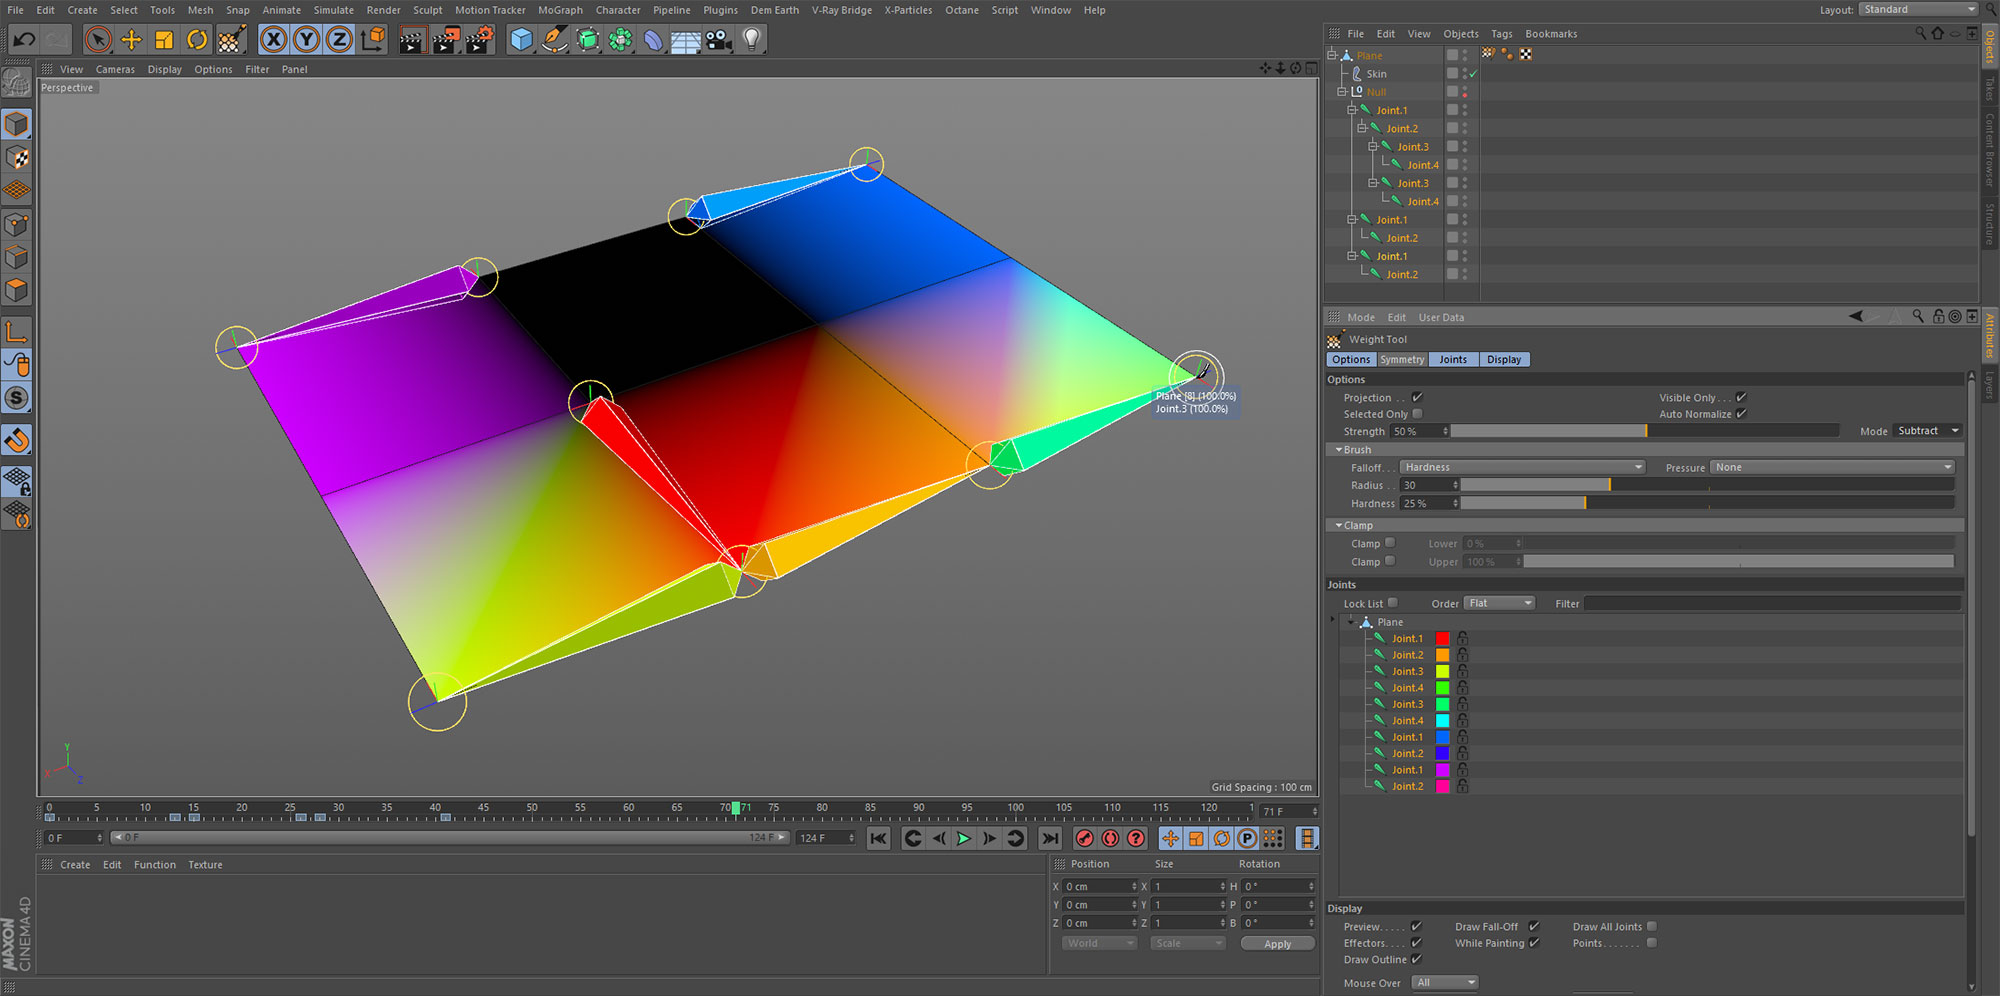
Working with joint chains and skin deformers requires the joints to be weighted to the vertices of the mesh via the weight tag. This process is crucial for smooth and accurate deformation. Using a simple joint chain, we build a basic rig for unfolding geometry and we then weight the joints manually using the weight tool. Using this step by step approach will ensure that you have a solid foundation of weighting workflow in Cinema 4D.
FEATURES COVERED : Joint Tool, Snapping, Skin Deformer, Weight Tag, Weight Tool and Weight Manager.
Duration : 12:00 mins
In the second part of the weighting tutorials, we build a slightly more complex rig which allows us to fold geometry in three different directions. This process involves several small hierarchies of joints and the weighting is once again applied manually using the weight tool.
FEATURES COVERED : Joint Tool, Snapping, Skin Deformer, Weight Tag and Weight Tool.
Duration : 23:00 mins
In the basic weighting tutorials we explored a method of unfolding geometry using joints. This lesson expands upon this by unfolding geometry with thickness. This requires a more complex set-up as each fold must contain an adequate number of edges to create a smooth fold without collapsing or intersecting the polygons.
Once the basic rig is assembled, we add some user data combined with Xpresso to control multiple joints simultaneously to make the rig animation friendly.
FEATURES COVERED : Joint Tool, Weight Tool, Skin Deformer, User Data Manager and Xpresso Object List.
Duration : 07:00 mins
A quick look at the MoSpline Turtle Mode and how it can also be used for creating and unfolding geometry. Lindenmeyer or L-Systems are often used for generative growth, especially for natural branching of plant and trees, the MoSpline Turtle is a complete L-System built into the MoSpline Object. We only touch upon the power of the L-System by using a simple rule and premise to create a linear spline which grows and unfolds. This spline can then be used to create geometry which in turn can be cloned and deformed to create more complex growing objects.
FEATURES COVERED : MoSpline Object.
Duration : 35:00 mins
In this feature packed lesson we expand upon our IK-Spline knowledge and build a flexible page turn rig. By using a combination of IK-Spline for controlling multiple joint chains and Hierarchical Morphing for posing the joints, we create a rig that offers a great level of control for both animation and art direction, yet the rig is easy to use and manipulate.
FEATURES COVERED : Edge To Spline, IK-Spline, Naming Tool, Bind, Weight Tool, Weight Tag, Edge Cut, Jiggle Deformer, Vertex Maps, Pose Morph – Position, Rotation & Hierarchy Morphing and Absolute Morphs.
Duration : 10:00 mins
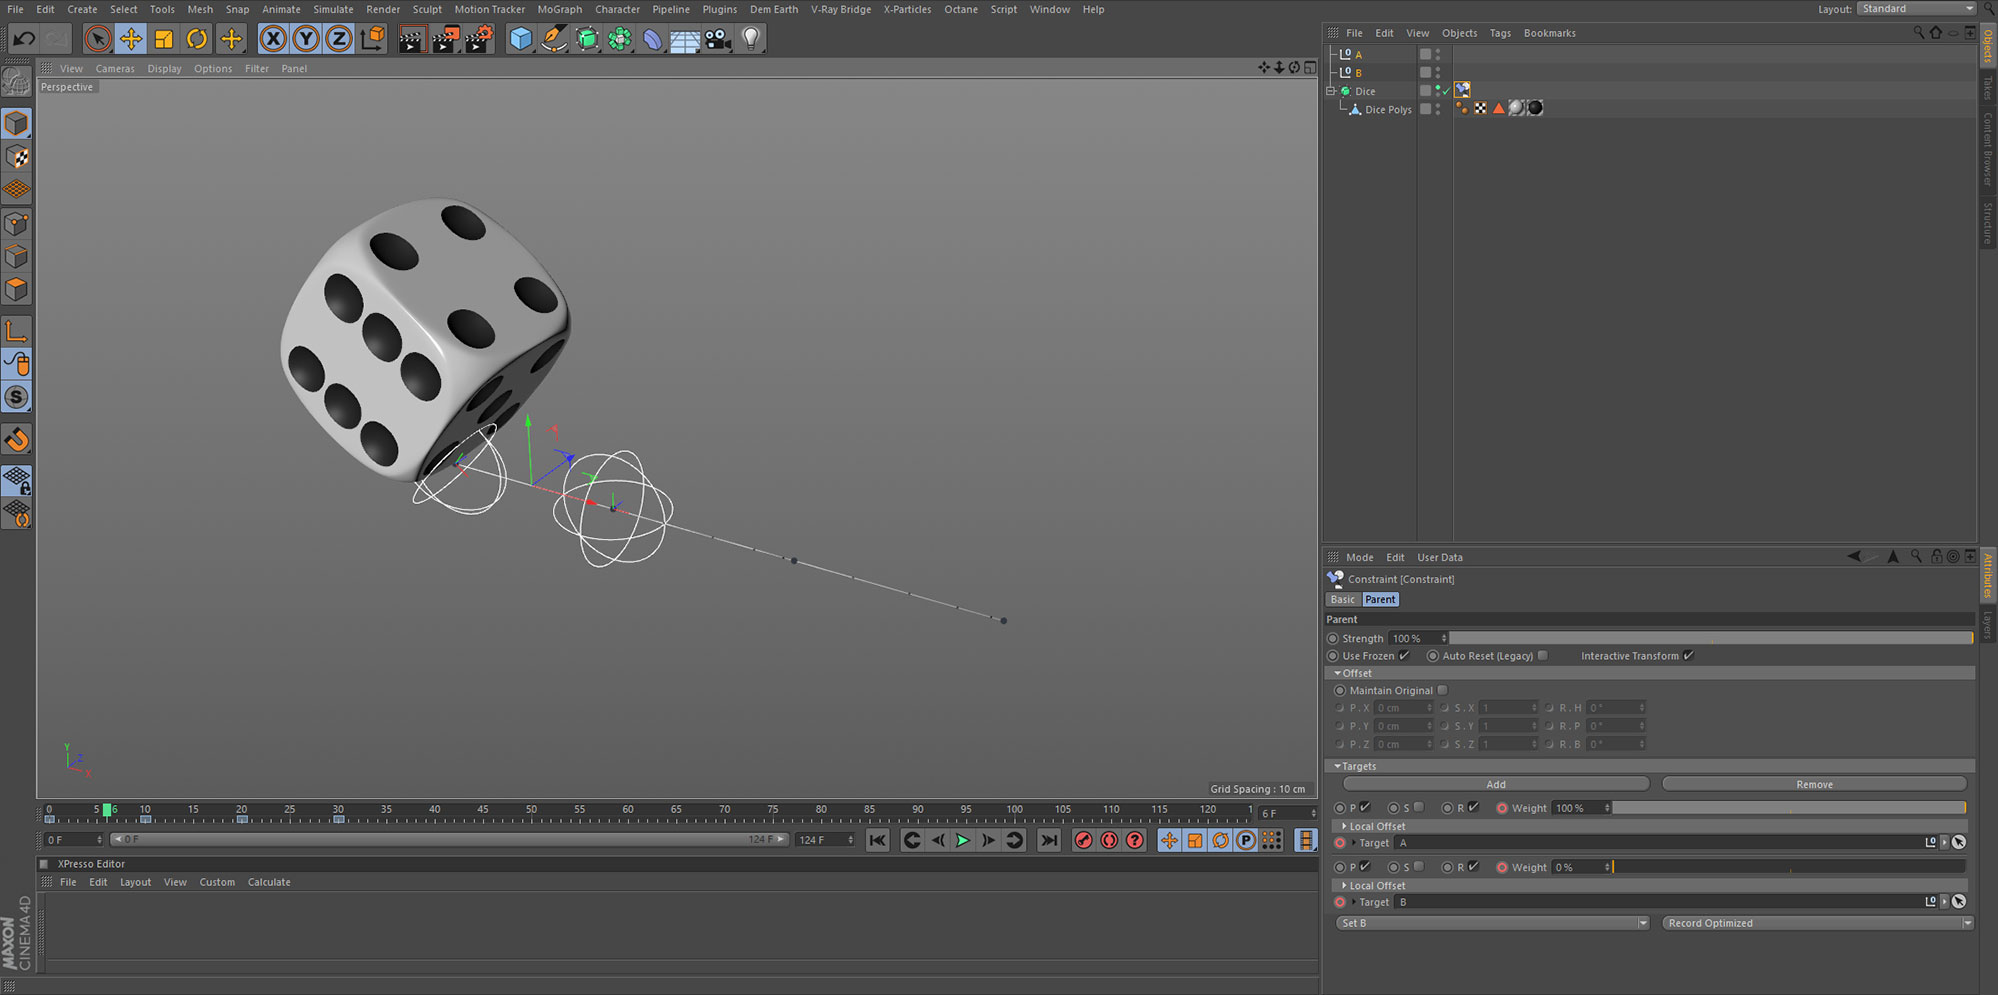
In this quick tip tutorial, we examine two separate methods of achieving the same result. To roll a cube requires that we rotate around each corner consecutively, this lesson demonstrates two possible solutions to this problem, one using joints and the other constraints.
FEATURES COVERED : Joint Tool and Parent Constraint.
Duration : 19:00 mins
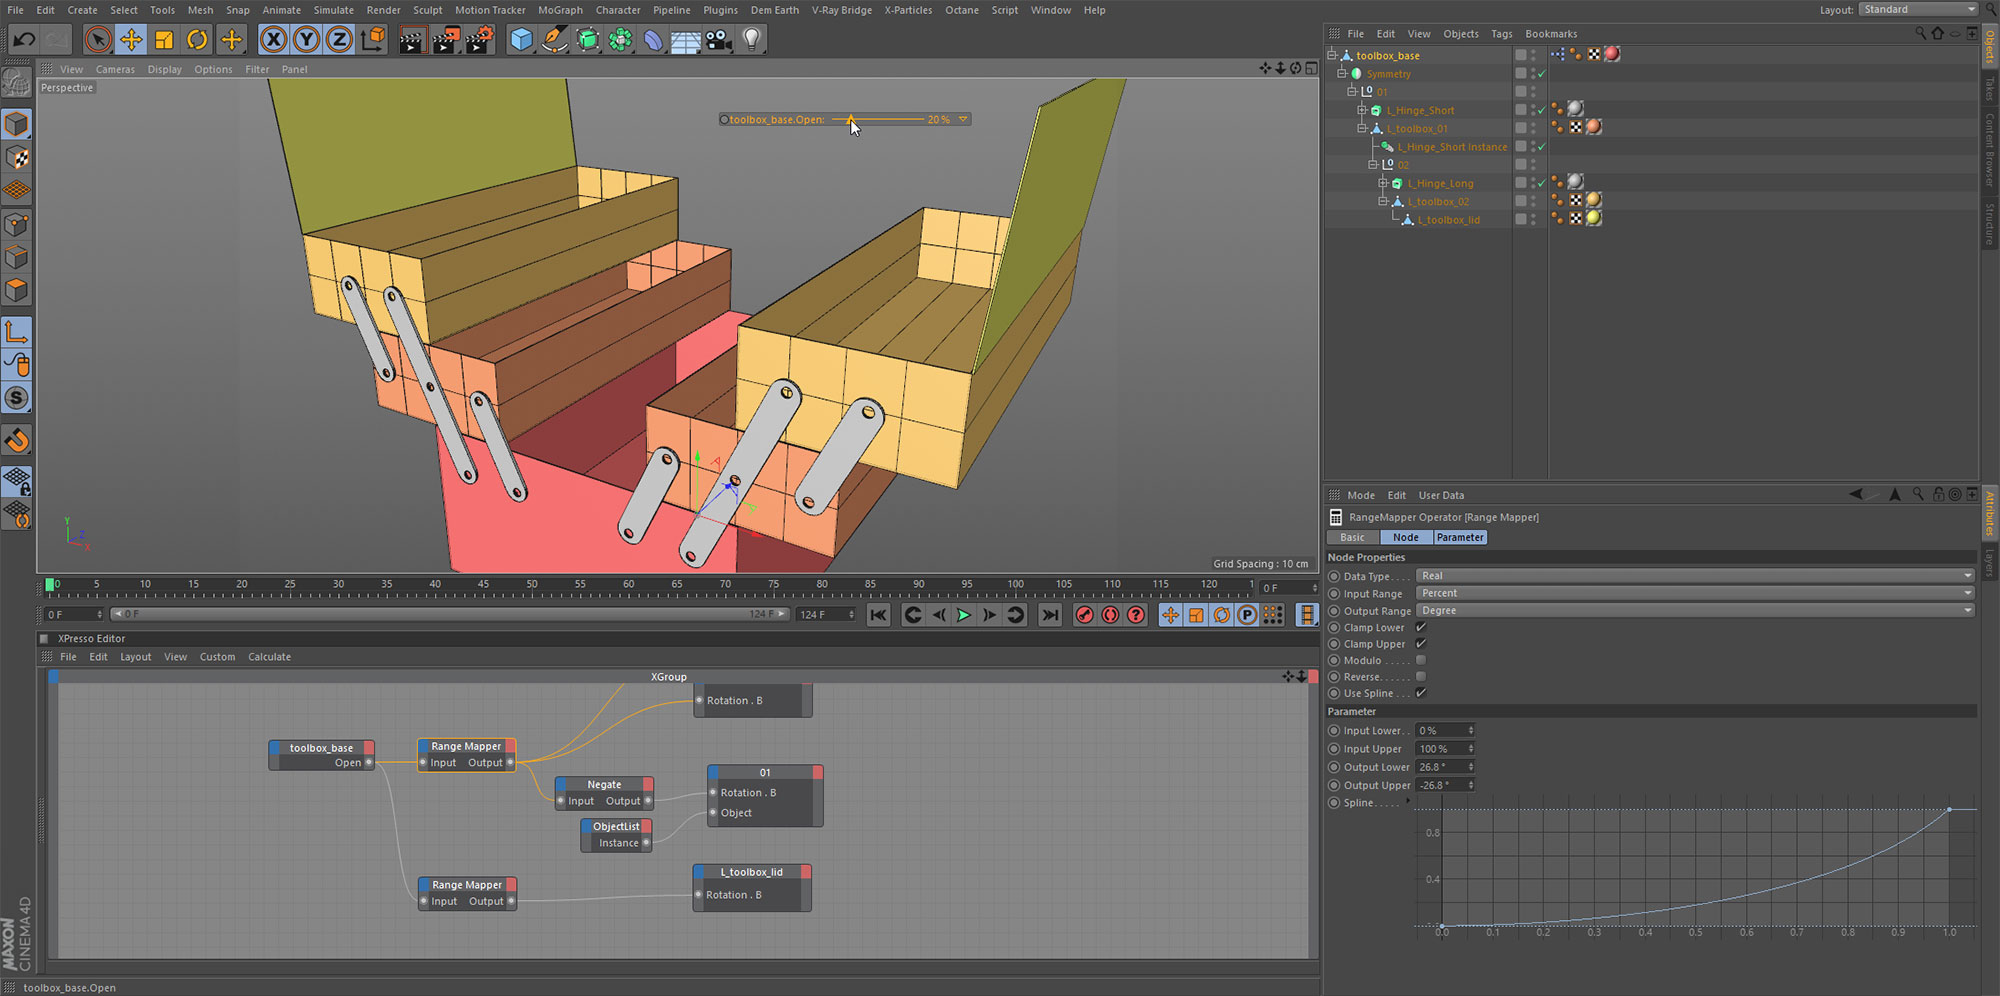
In this lesson we create a cantilever toolbox simply by using the correct object hierarchy and axis location. We link the rotation values of the various parts together using Xpresso and control the opening and closing of the toolbox with one slider control. This set-up demonstrates how you can easily rig rigid objects, simply by breaking it down into individual components and tackling the problem using a step-by-step process.
FEATURES COVERED : Object Hierarchy, Axis Tool, Xpresso – Object List, Range Mapper and Object Nodes.
Duration : 24:00 mins
The CMotion Object is designed for automatically cycling parameter values, this makes it great for creating automatic motion for machines, robots and even for simple characters. We look at the principles behind driving parameters using CMotion and then create a mechanical walk for a robot.
FEATURES COVERED : CMotion, Position Constraint.