Learn Houdini Vol. 2
$60.00
Welcome to Volume 2 of Adams Learn Houdini Tutorial series. After covering the basics of the Houdini interface and general concepts in Volume 1, we are now ready to dive into some more complex setups. In this volume, we are going to go through three great examples, ranging from easy to hard, to add to your Houdini learning.
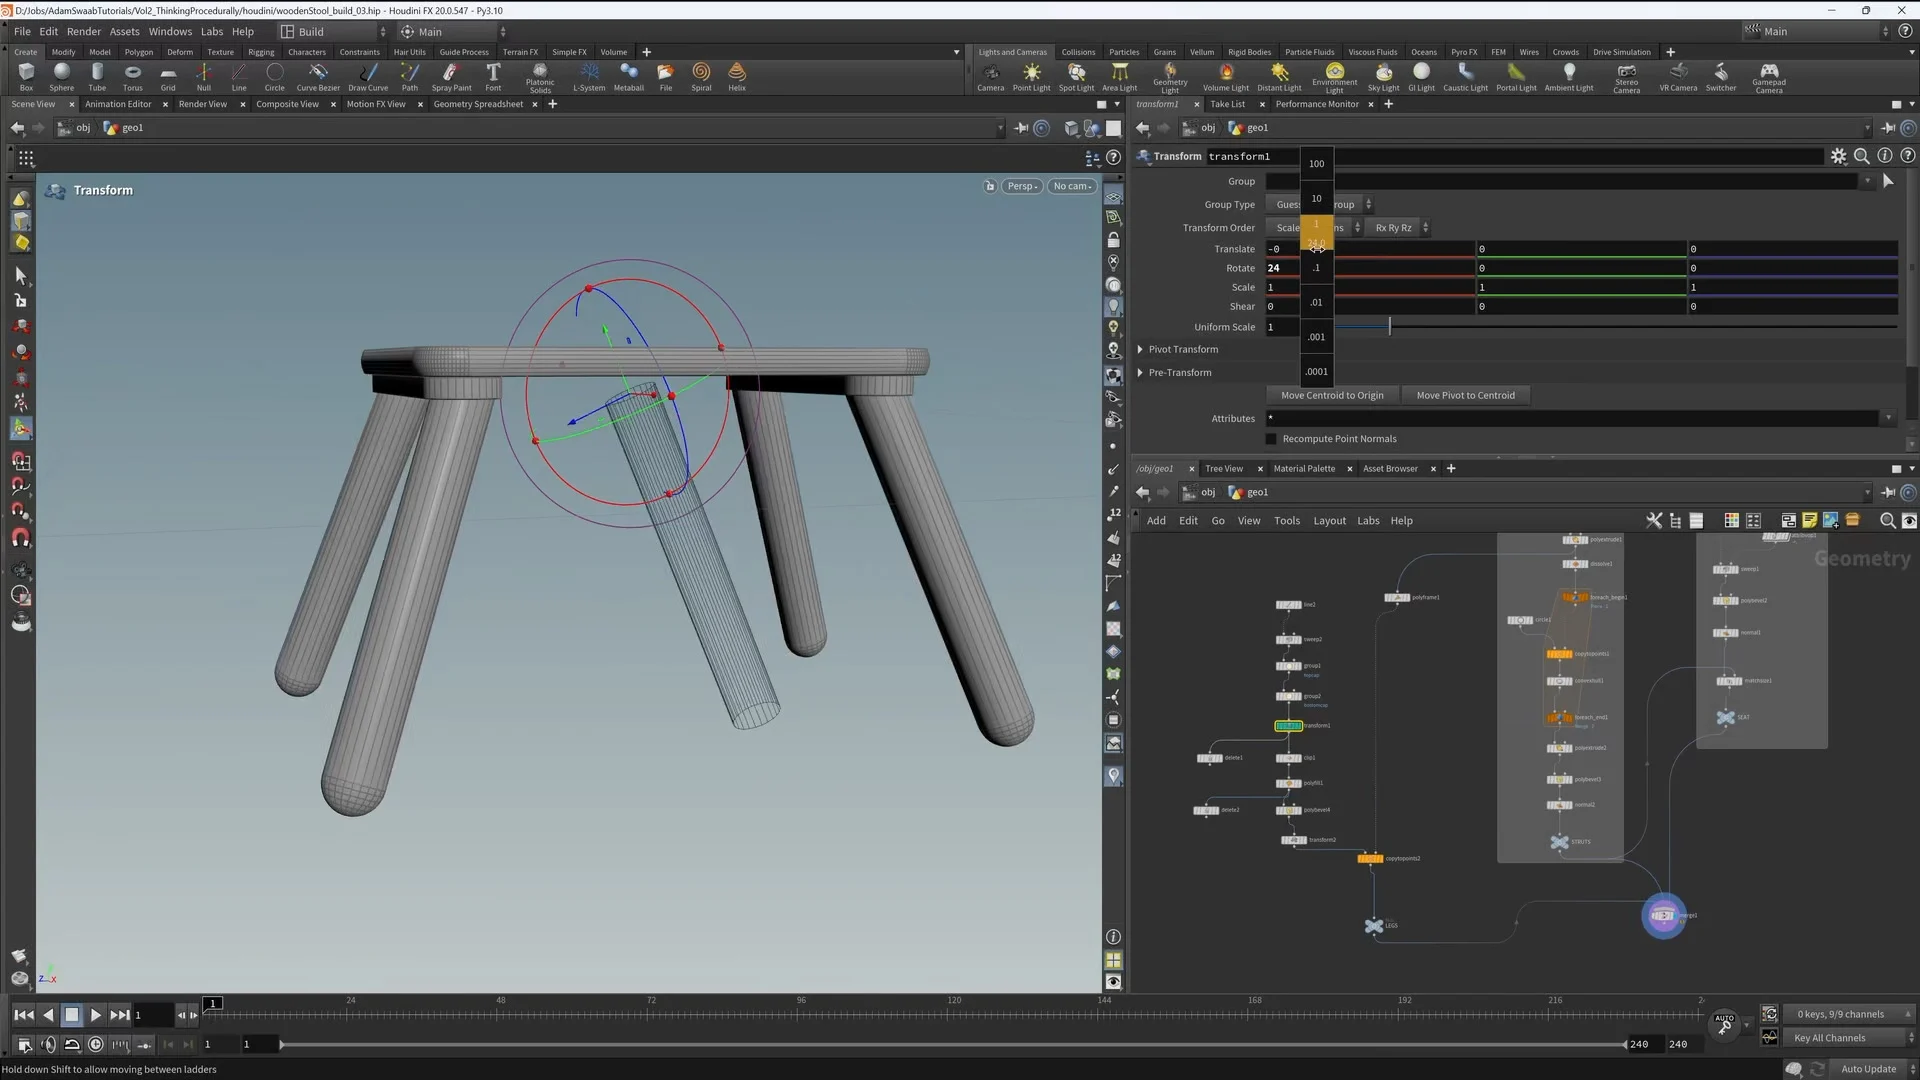
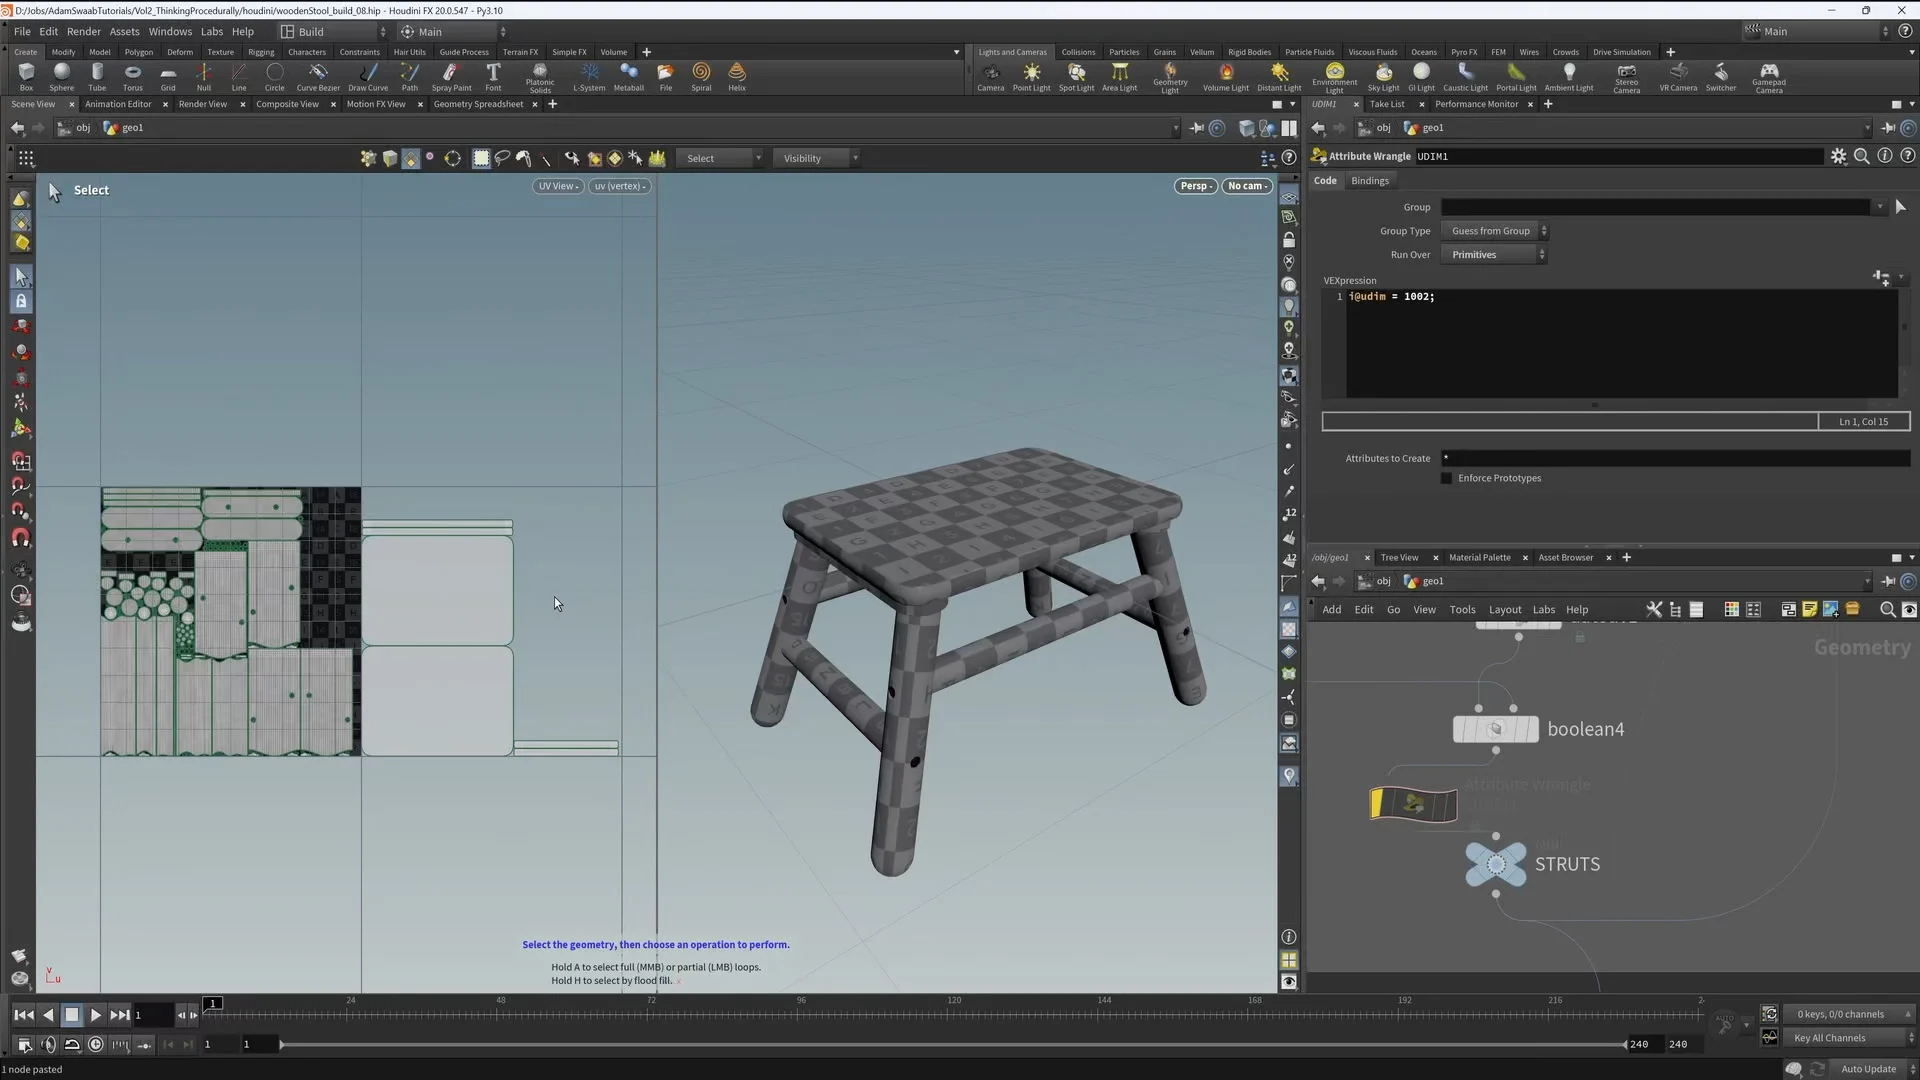
In the first example, we are going to use a lot of nodes and techniques to model a wooden step-stool in SOPS. It may sound simple, but there’s a lot of really nice techniques in here that will extend to future models you will build in Houdini.
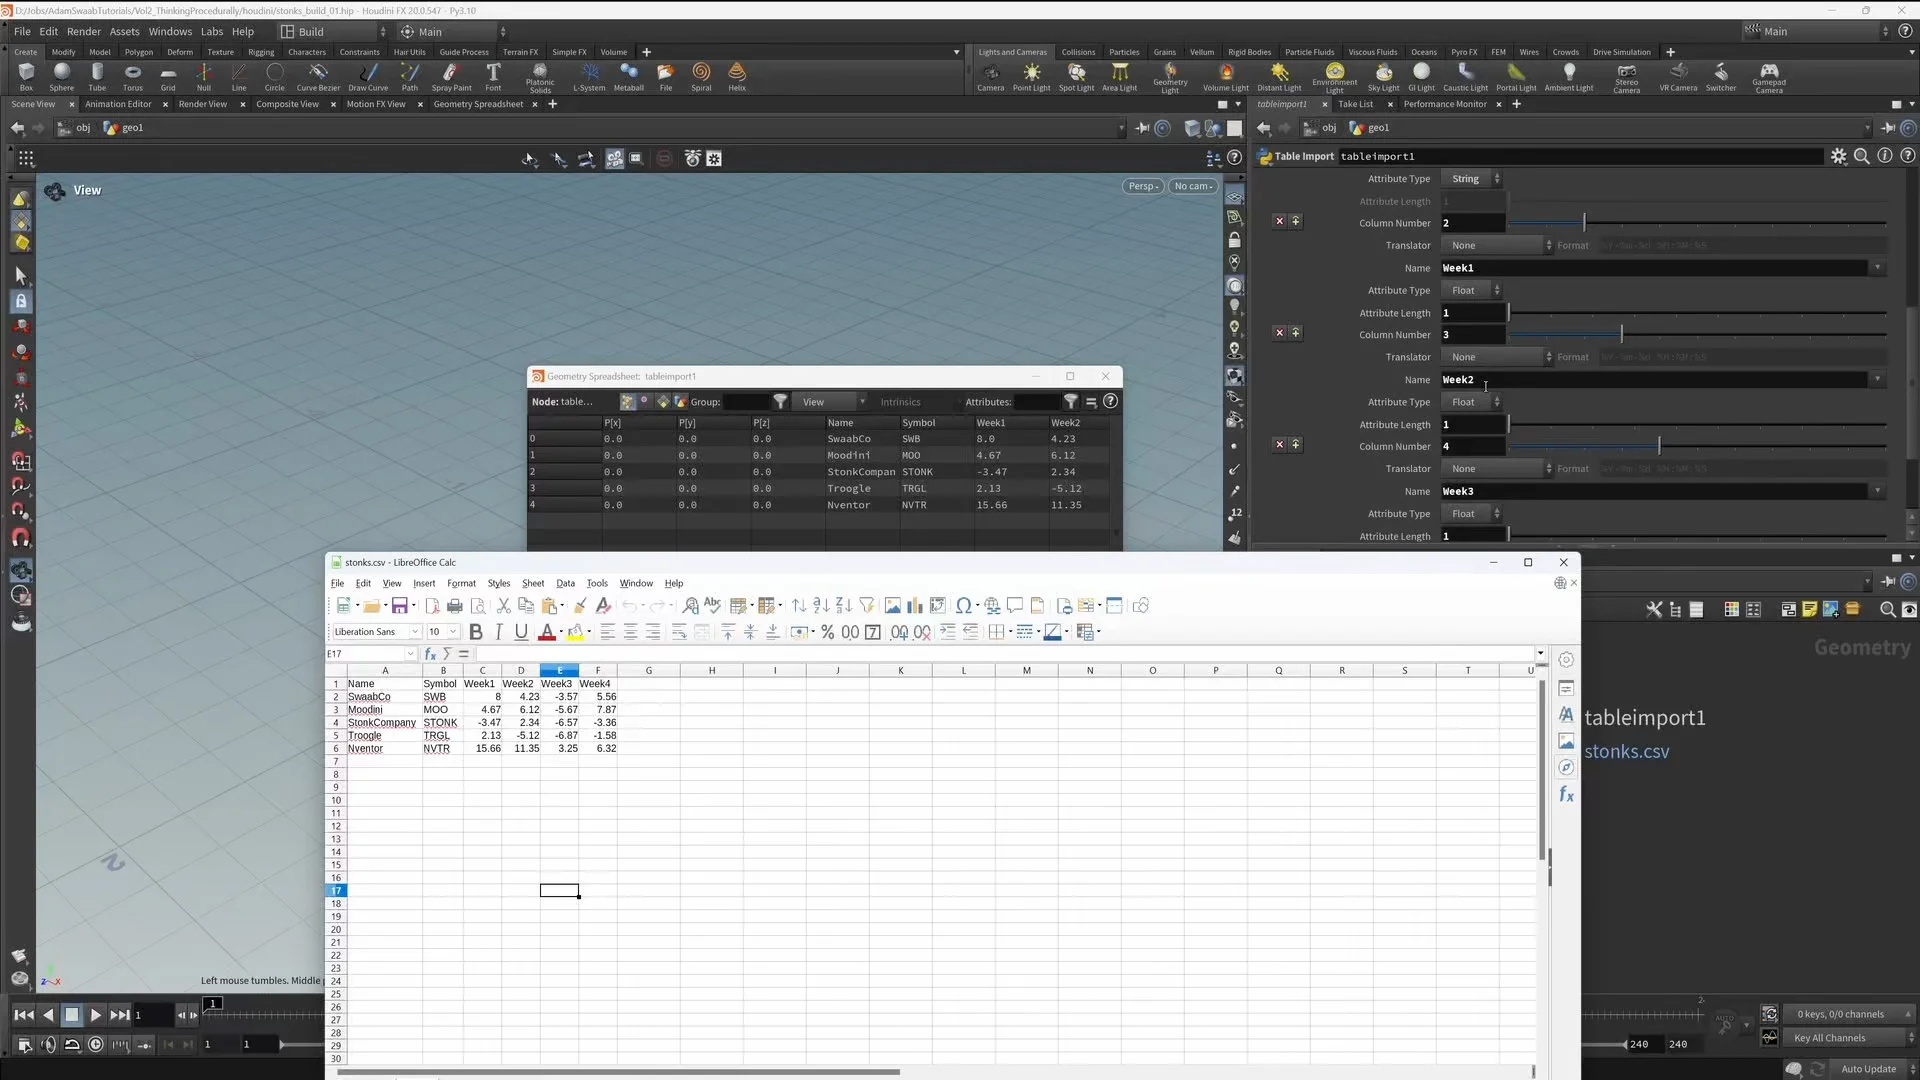
Our second example dives into data-driven setups and procedural animation. We will import stock performance data generated from a CSV file, and create a setup that visualizes the data and animates the stocks’ performance from week to week.
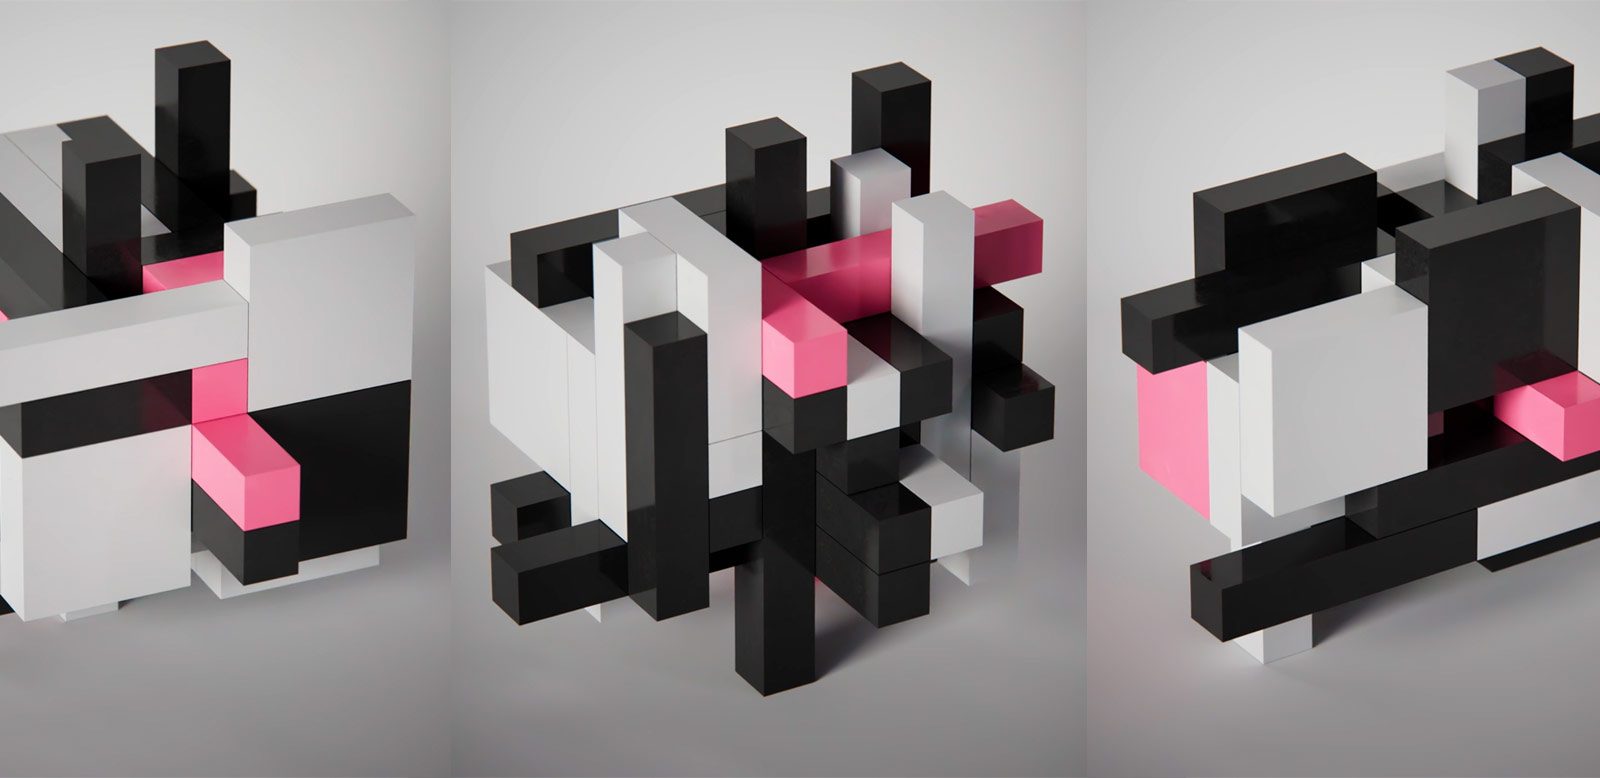
And, finally, we’ll take a look at a complex space-filling algorithm that uses some tricky for-each loop setups. This scene will go all the way to a final render in Karma XPU in Solaris.
There’s a little something in here for all skill levels of Houdini!
Training Summary
Features three great projects
Deepen your understanding of Houdini.
Procedural modeling
Data-driven animation
Space-filling algorithm
Rendering in Solaris
Karma XPU
Recommended requirements
Houdini 20
Some 3D experience
A brief introduction to what we will be covering in this volume of tutorials.
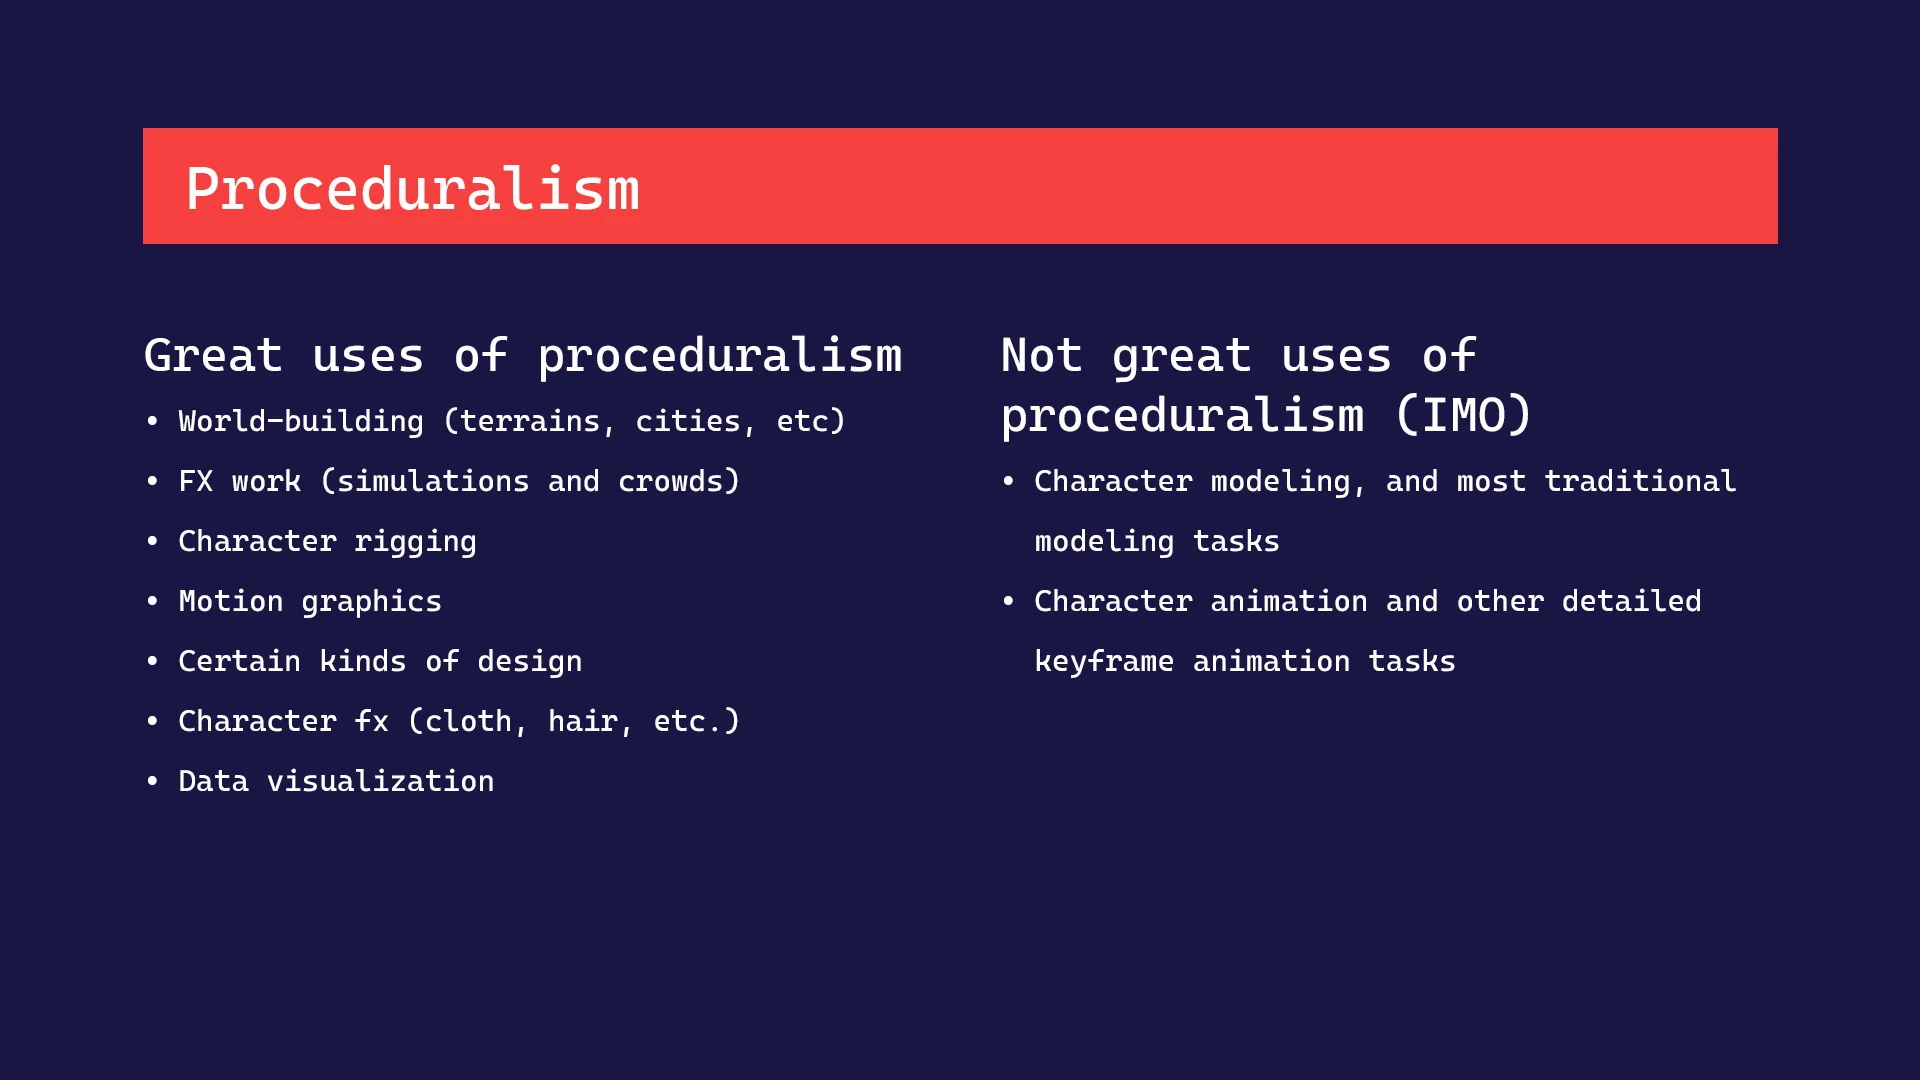
This chapter is a short slideshow/lecture about the pro and cons of working procedurally. What is proceduralism good for? What is it not so good for? And, how you should change your thinking into a procedural mindset when you start a project in Houdini?
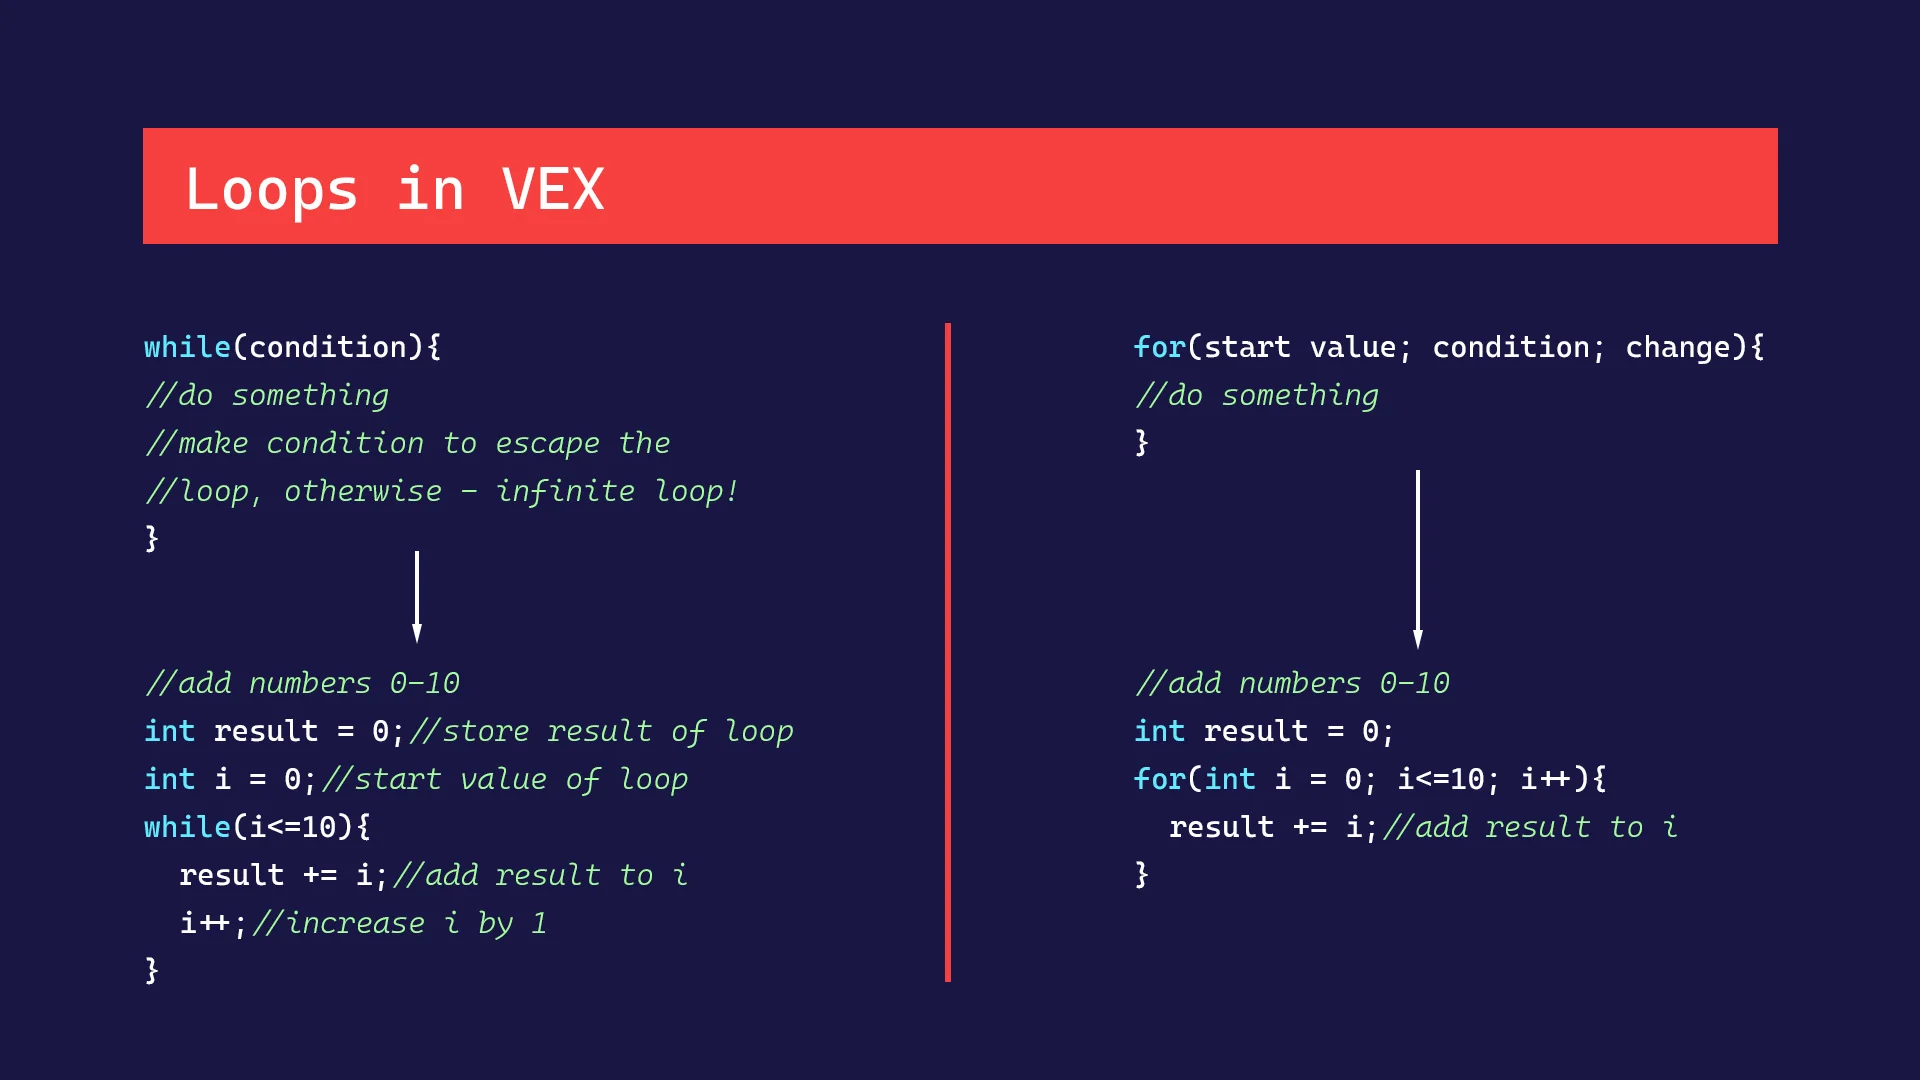
We will be writing a fair bit of vex code in in this tutorial series. But, fear not – even if you haven’t had much coding experience, Adam tries and make it easy and accessible. Vex is one of the foundational things to understand when using Houdini. Yes, you can get by without it for a while – but, to become really efficient and proficient with Houdini, you’ll want to dive in and learn a little bit of coding. In this chapter, Adam goes over some of the vex syntax and discuss important functions and concepts that we’ll need in the lesson.
A short intro chapter showing what we will cover in this part of the tutorial. For our modeling demo, we will be using a variety of procedural techniques to build a wooden step stool.
We set up our project, bring in references, and start building the seat.
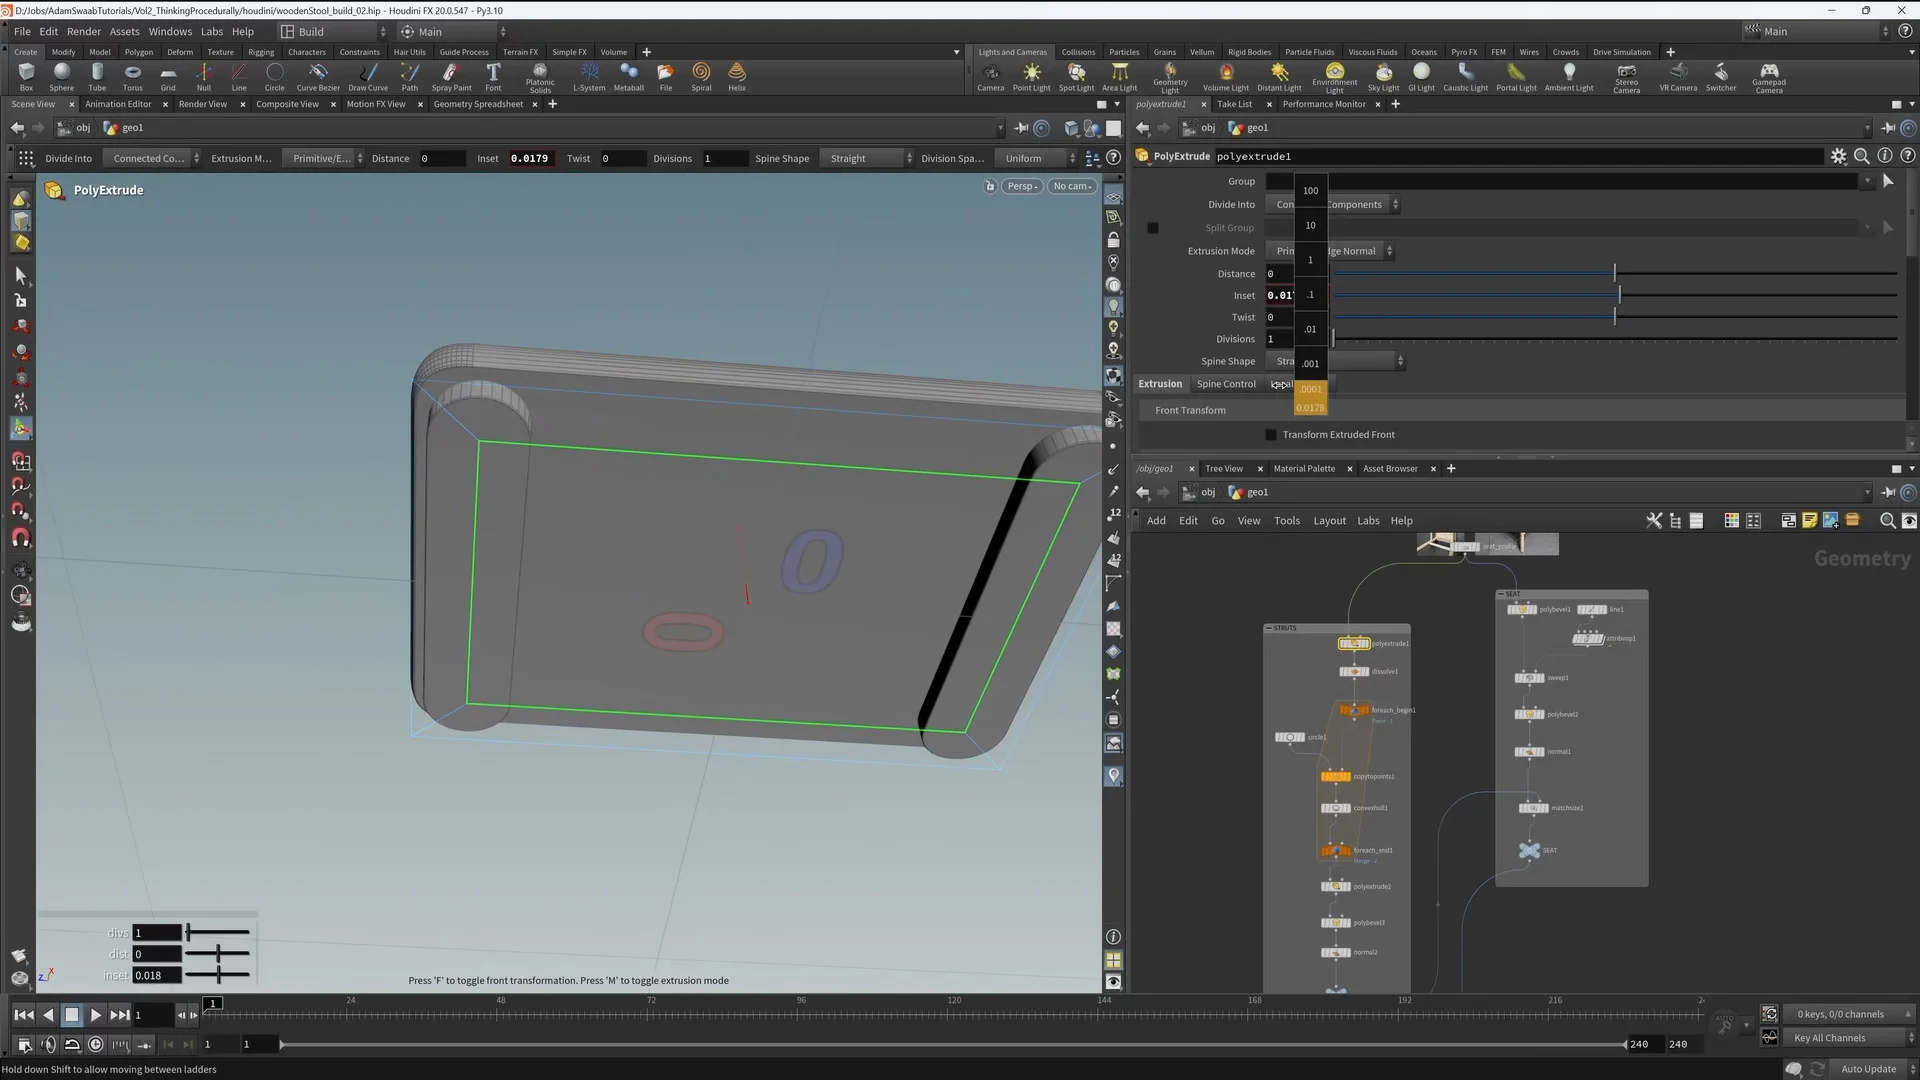
We build the legs and crossbars for the wooden stool. (Sample chapter below)
We add hex bolts, using procedural methods to position them correctly on our model.
We set up UVs for all the components of our model. The UVs are done procedurally, and we look at how to use UDIM tiles as well as a single UV map space.
A short intro chapter showing what we will cover in this part of the tutorial.
We bring our CSV table data into Houdini, extract some of the key data points from it, and set up our base geometry.
In this chapter, we create a procedural animation system that will animate our data from state to state – without keyframes. And, because we will use this system multiple times, we turn it into a Houdini Digital Asset (HDA).

After setting up the data blocks and data animation, we extract text from our CSV file, convert it into 3D text, and procedurally place it in our layout.
Finally, we need to appropriately frame our layout for our camera. We look at procedural methods to normalize or data and limit it within our camera’s view angle.
A short intro chapter showing what we will cover in this part of the tutorial.
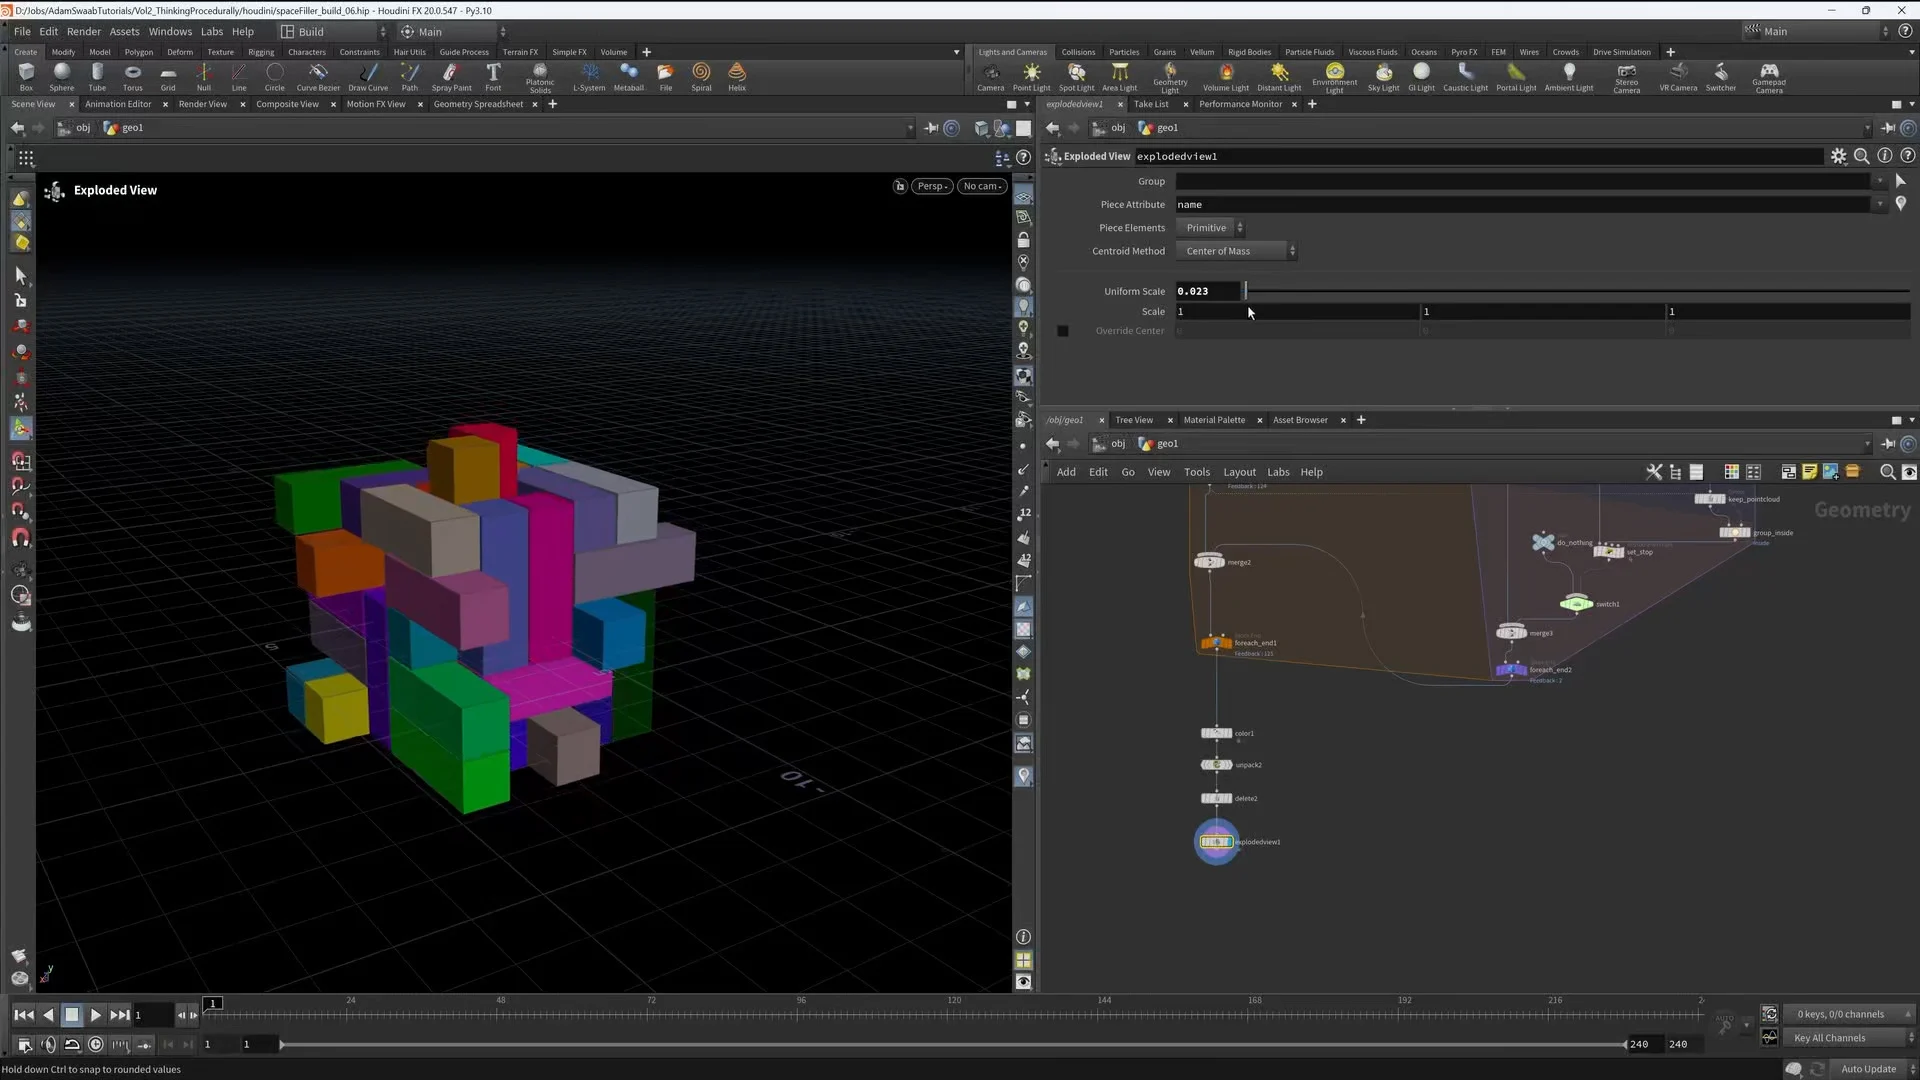
In this chapter, we set up our initial geometry library, point cloud, and for-each loop framework.
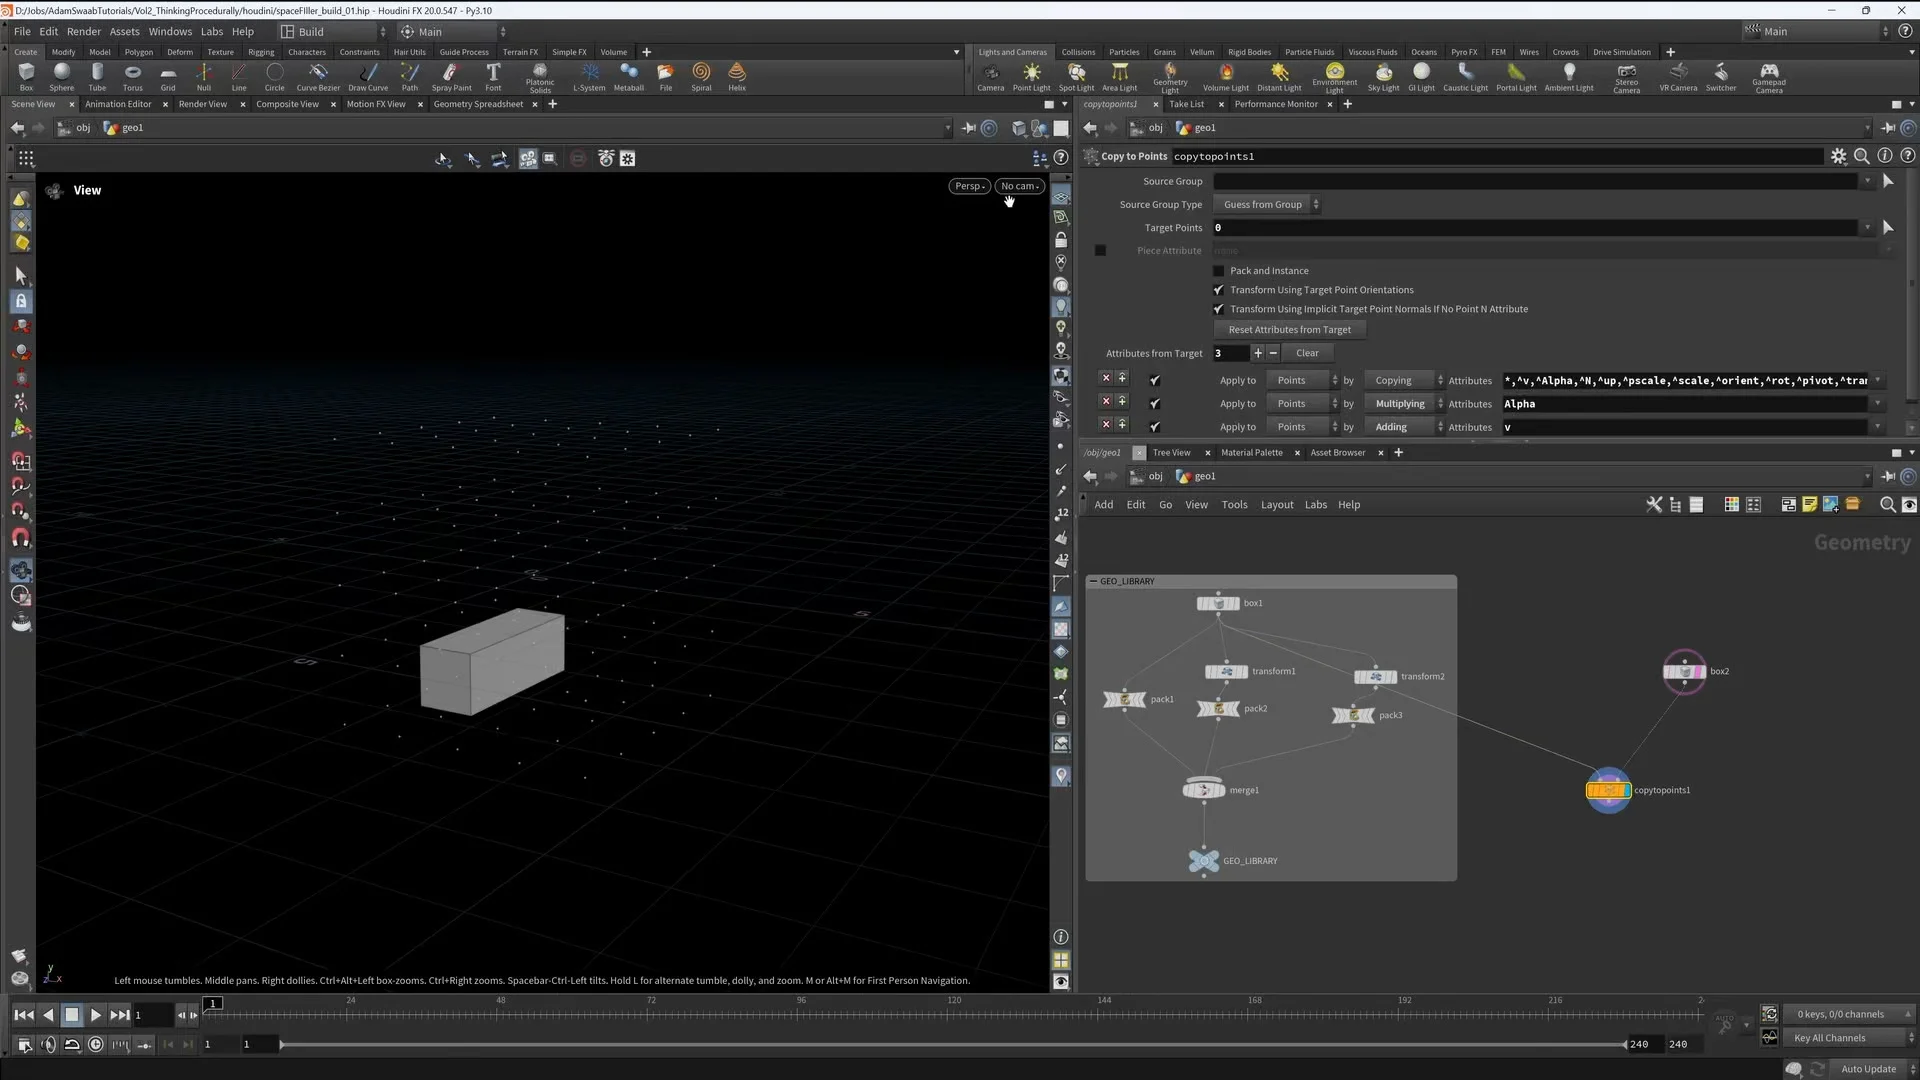
Adam explains the collision detection method we will use for this setup and implement it in our scene file.
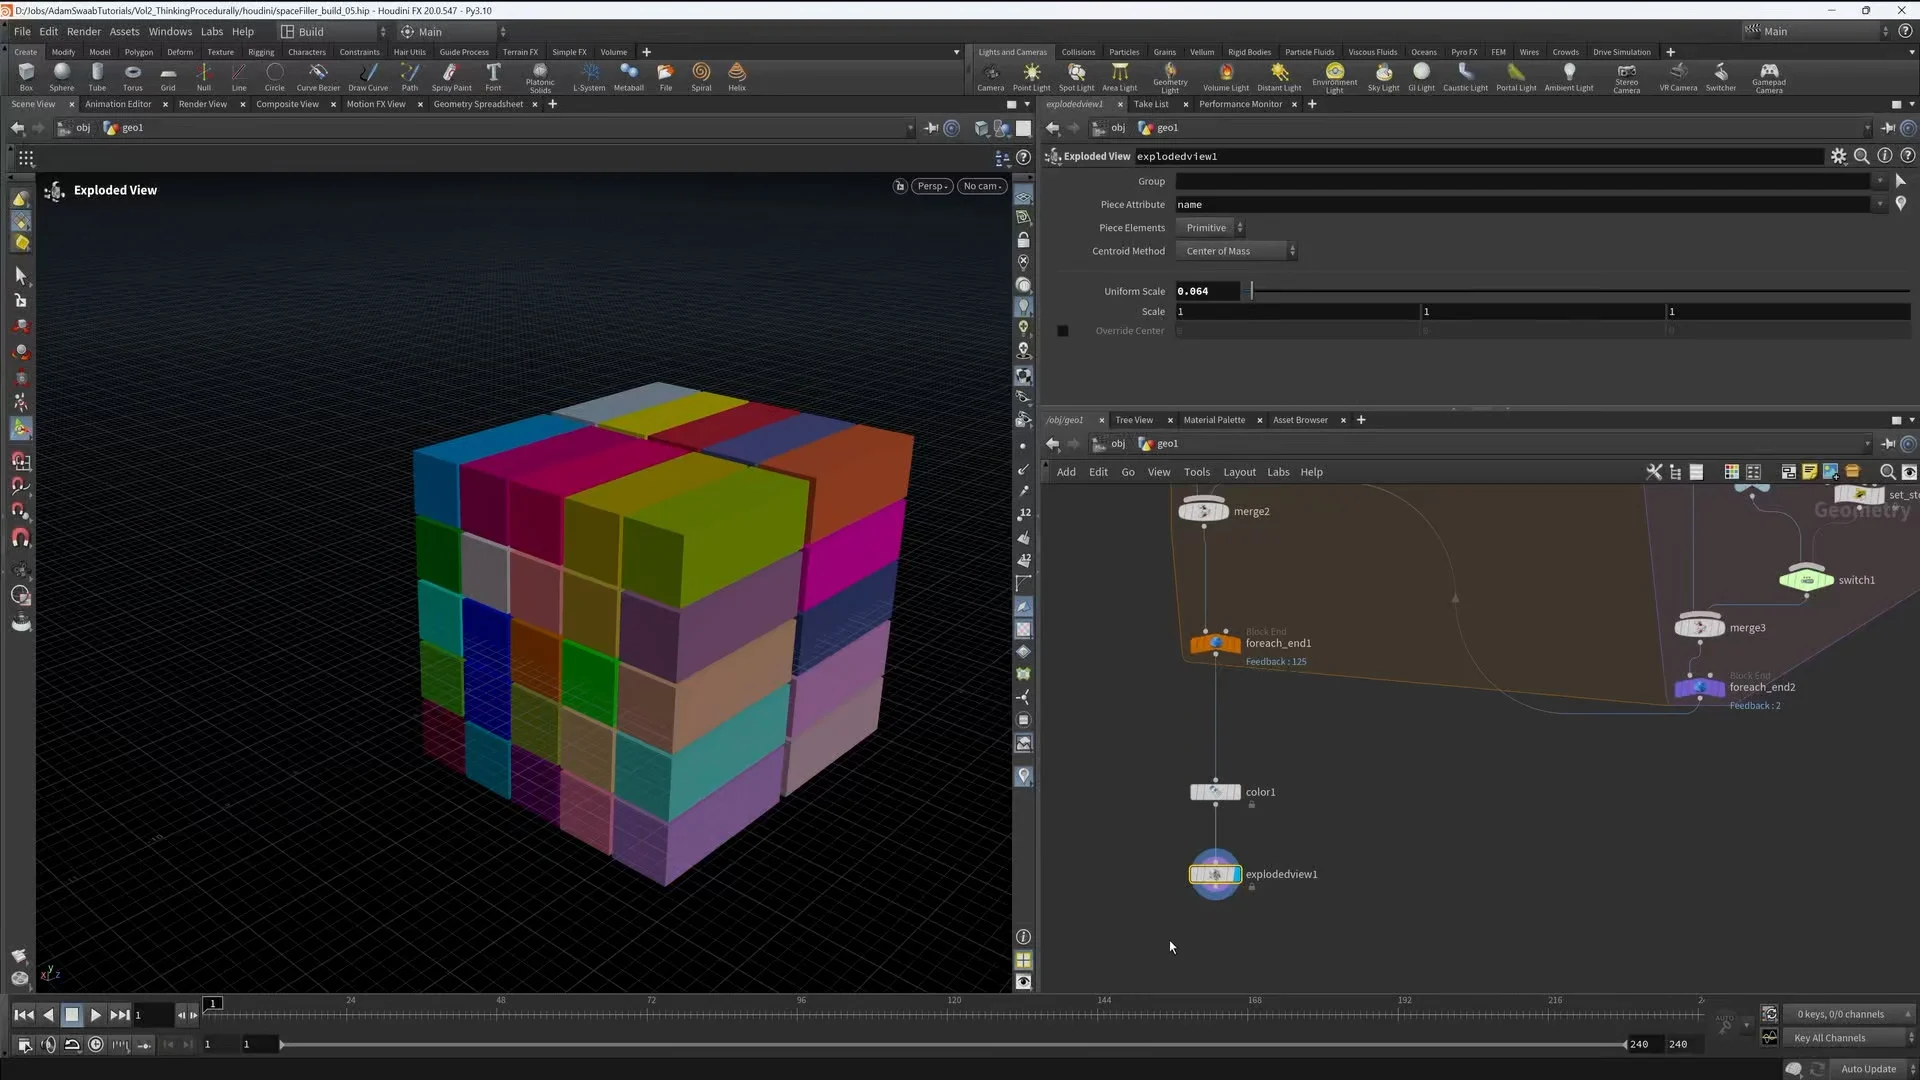
We now add randomization and finish the rest of the setup to the algorithm.
Now, we are ready to render. We assign random materials to our blocks and begin to set up our scene for rendering in Solaris, using Karma XPU.
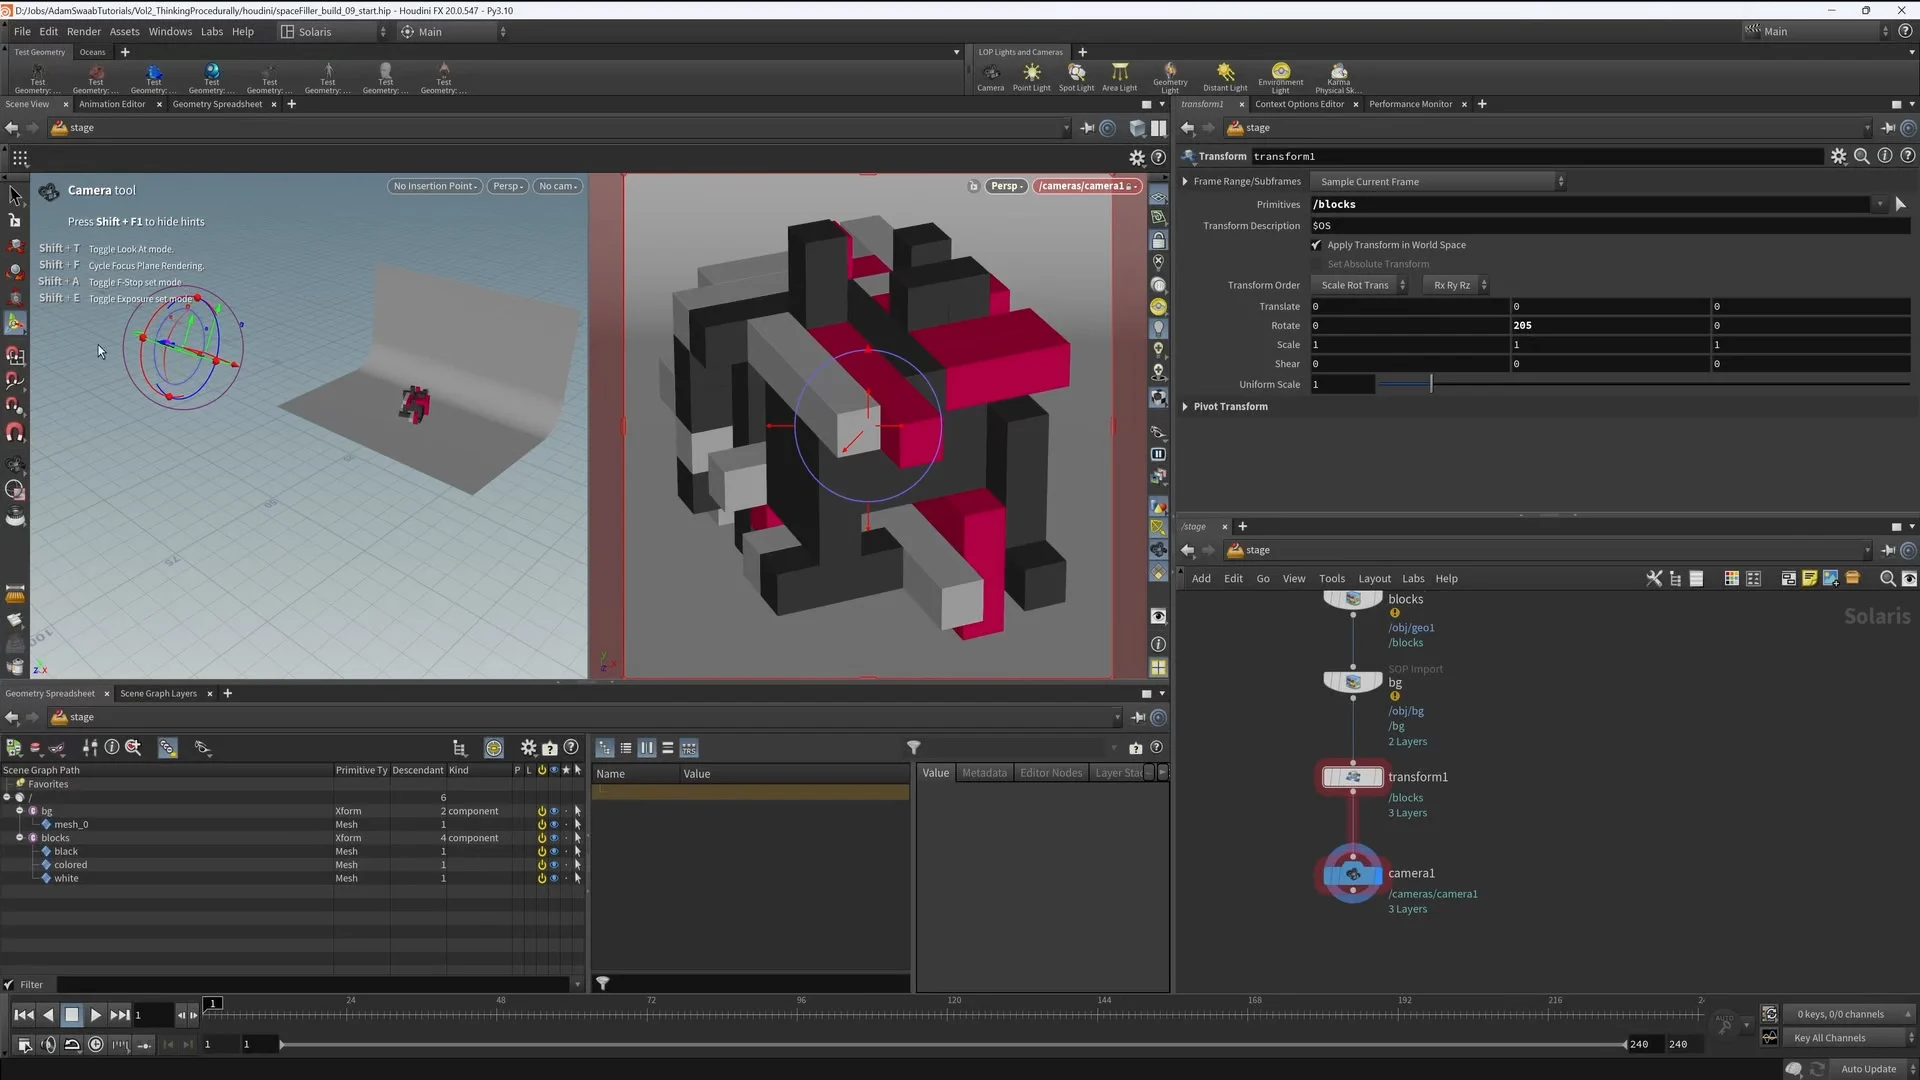
We add some subtle touches and refinements to our materials.

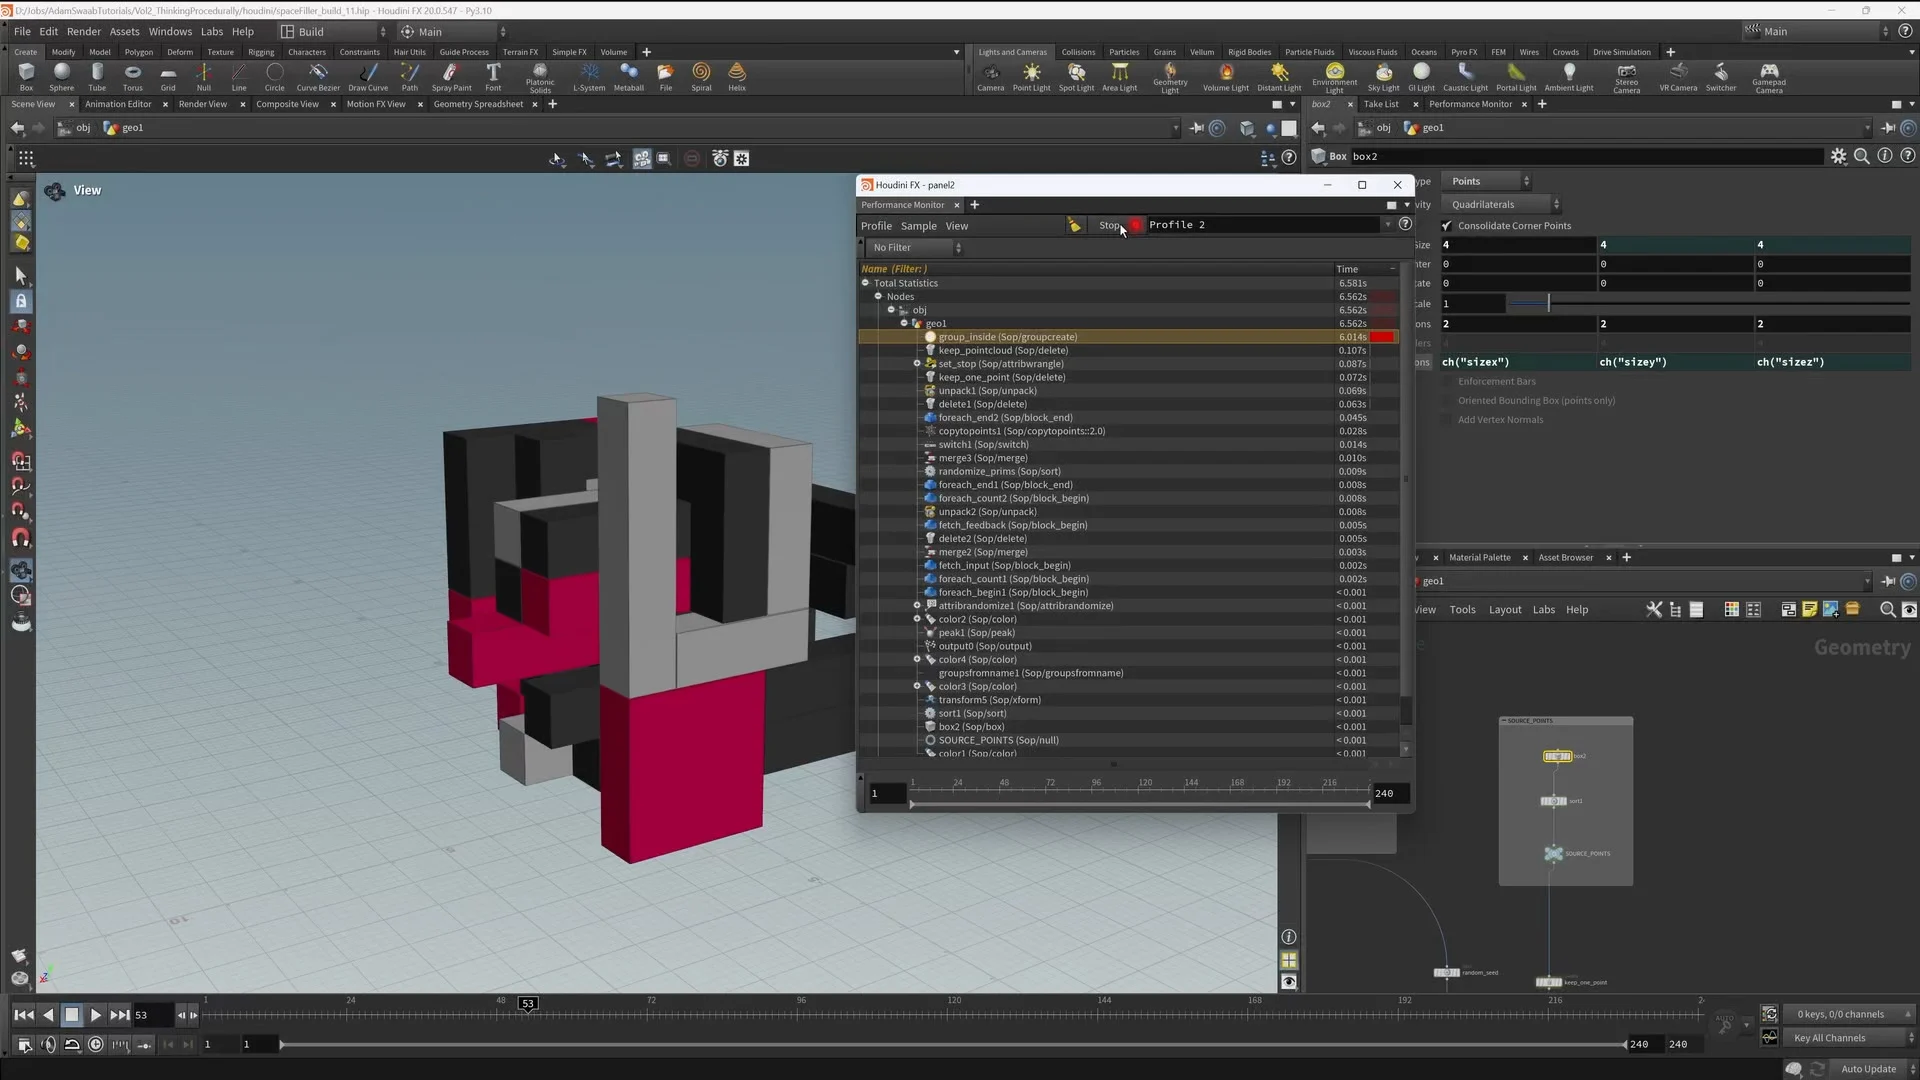
Finally, we add a turntable in LOPS, set up a physical lens shader on our camera, and render our scene. We also look at some optimizations we can make to our SOPS setup, for a much faster evaluation of our algorithm, using the performance monitor to help us understand our bottlenecks.
A short addendum, where I show the expression I used to randomize our random seed at every second mark in our timeline.
Learn how to create MIDI files from custom collision data in this Houdini training.
Modelling, simulation, collision detection, MIDI creation, plus lighting, texturing and rendering with Redshift.

Volume 3 of Adam Swaab's Learn Houdini Tutorial series. Making Things Move With Nodes and Code
Learn Houdini Volume 4 is an introduction to one of the most mystifying parts of Houdini - USD and Solaris.