
`
The Cinema 4D Field Force was introduced in R21 and is a great new tool with many applications. This tutorial runs through a simple setup where we use the Field Force to guide some particles along splines and then expand upon this by using the tracer itself as a field to control Mograph parameters.
Cinema 4D Field Force
Create the scene
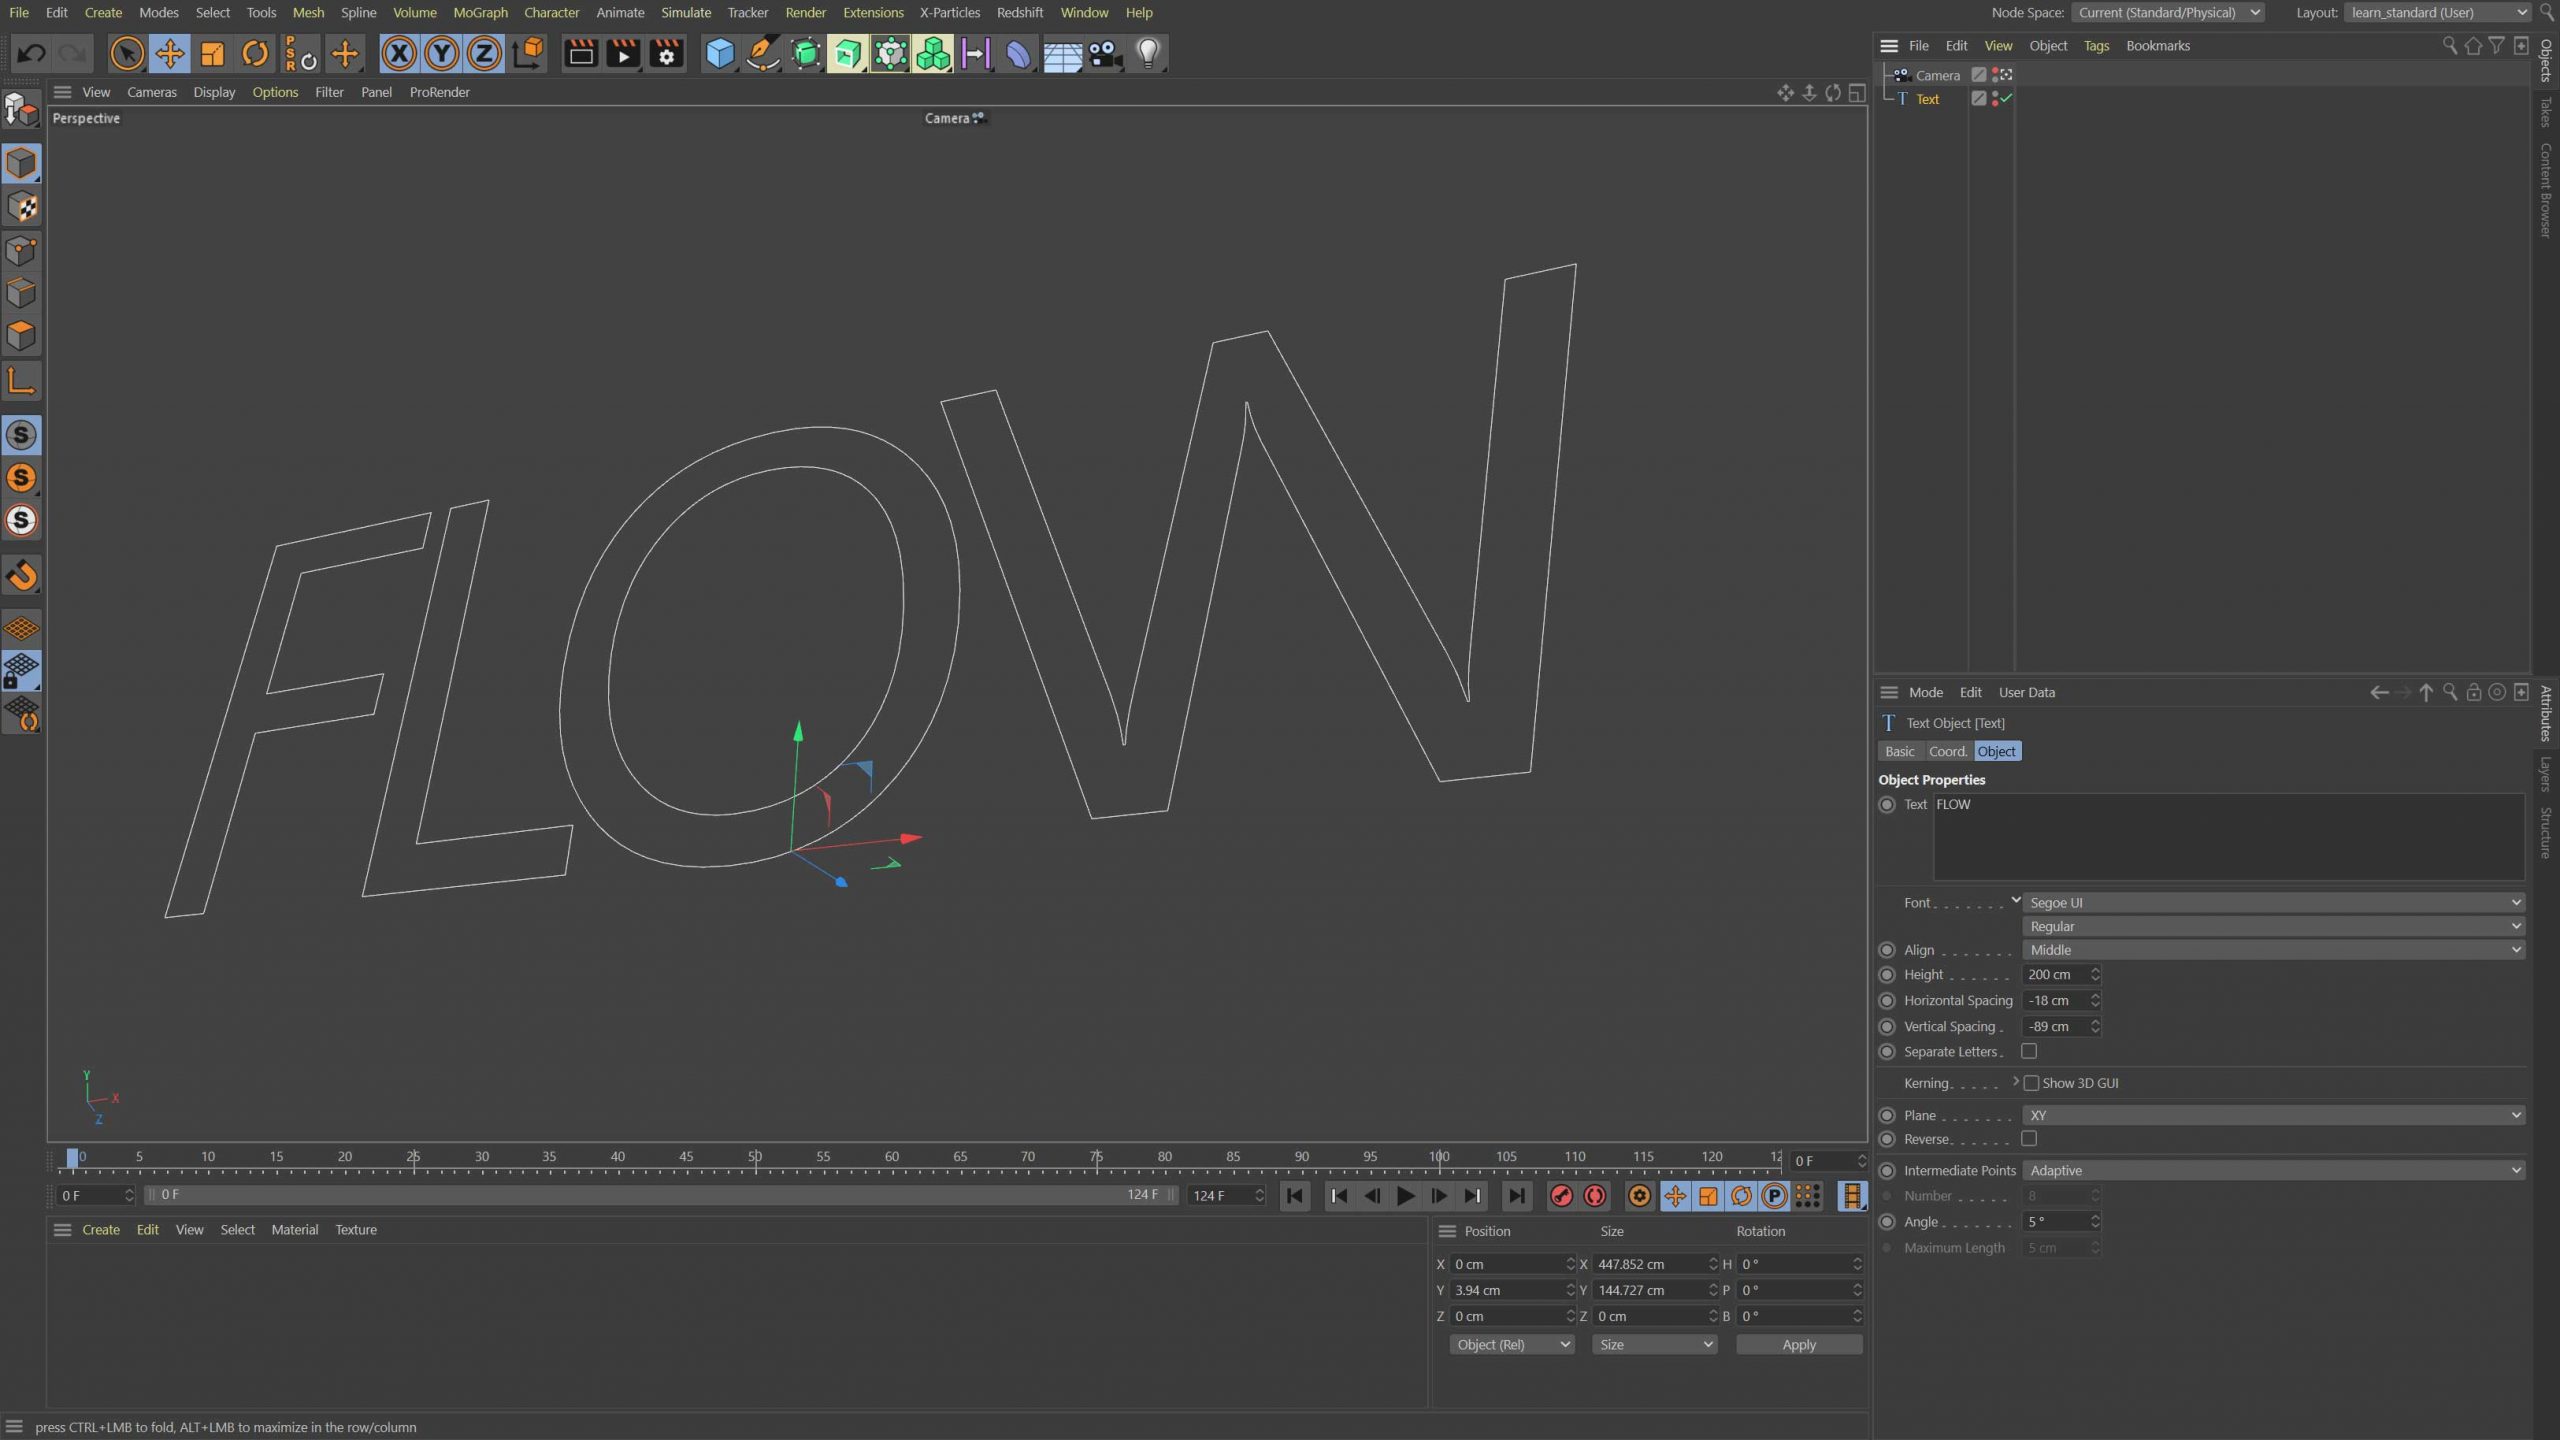
Create a new C4D document, I used 1920×1080, 25fps with a total duration of 250 frames. Start by adding in a Text object or any other spline you’d like to use. The nice thing using a text spline is that you keep things procedural, so you can easily edit the text to change it or even animate the text mid-animation for some interesting transitions.
Add an Emitter
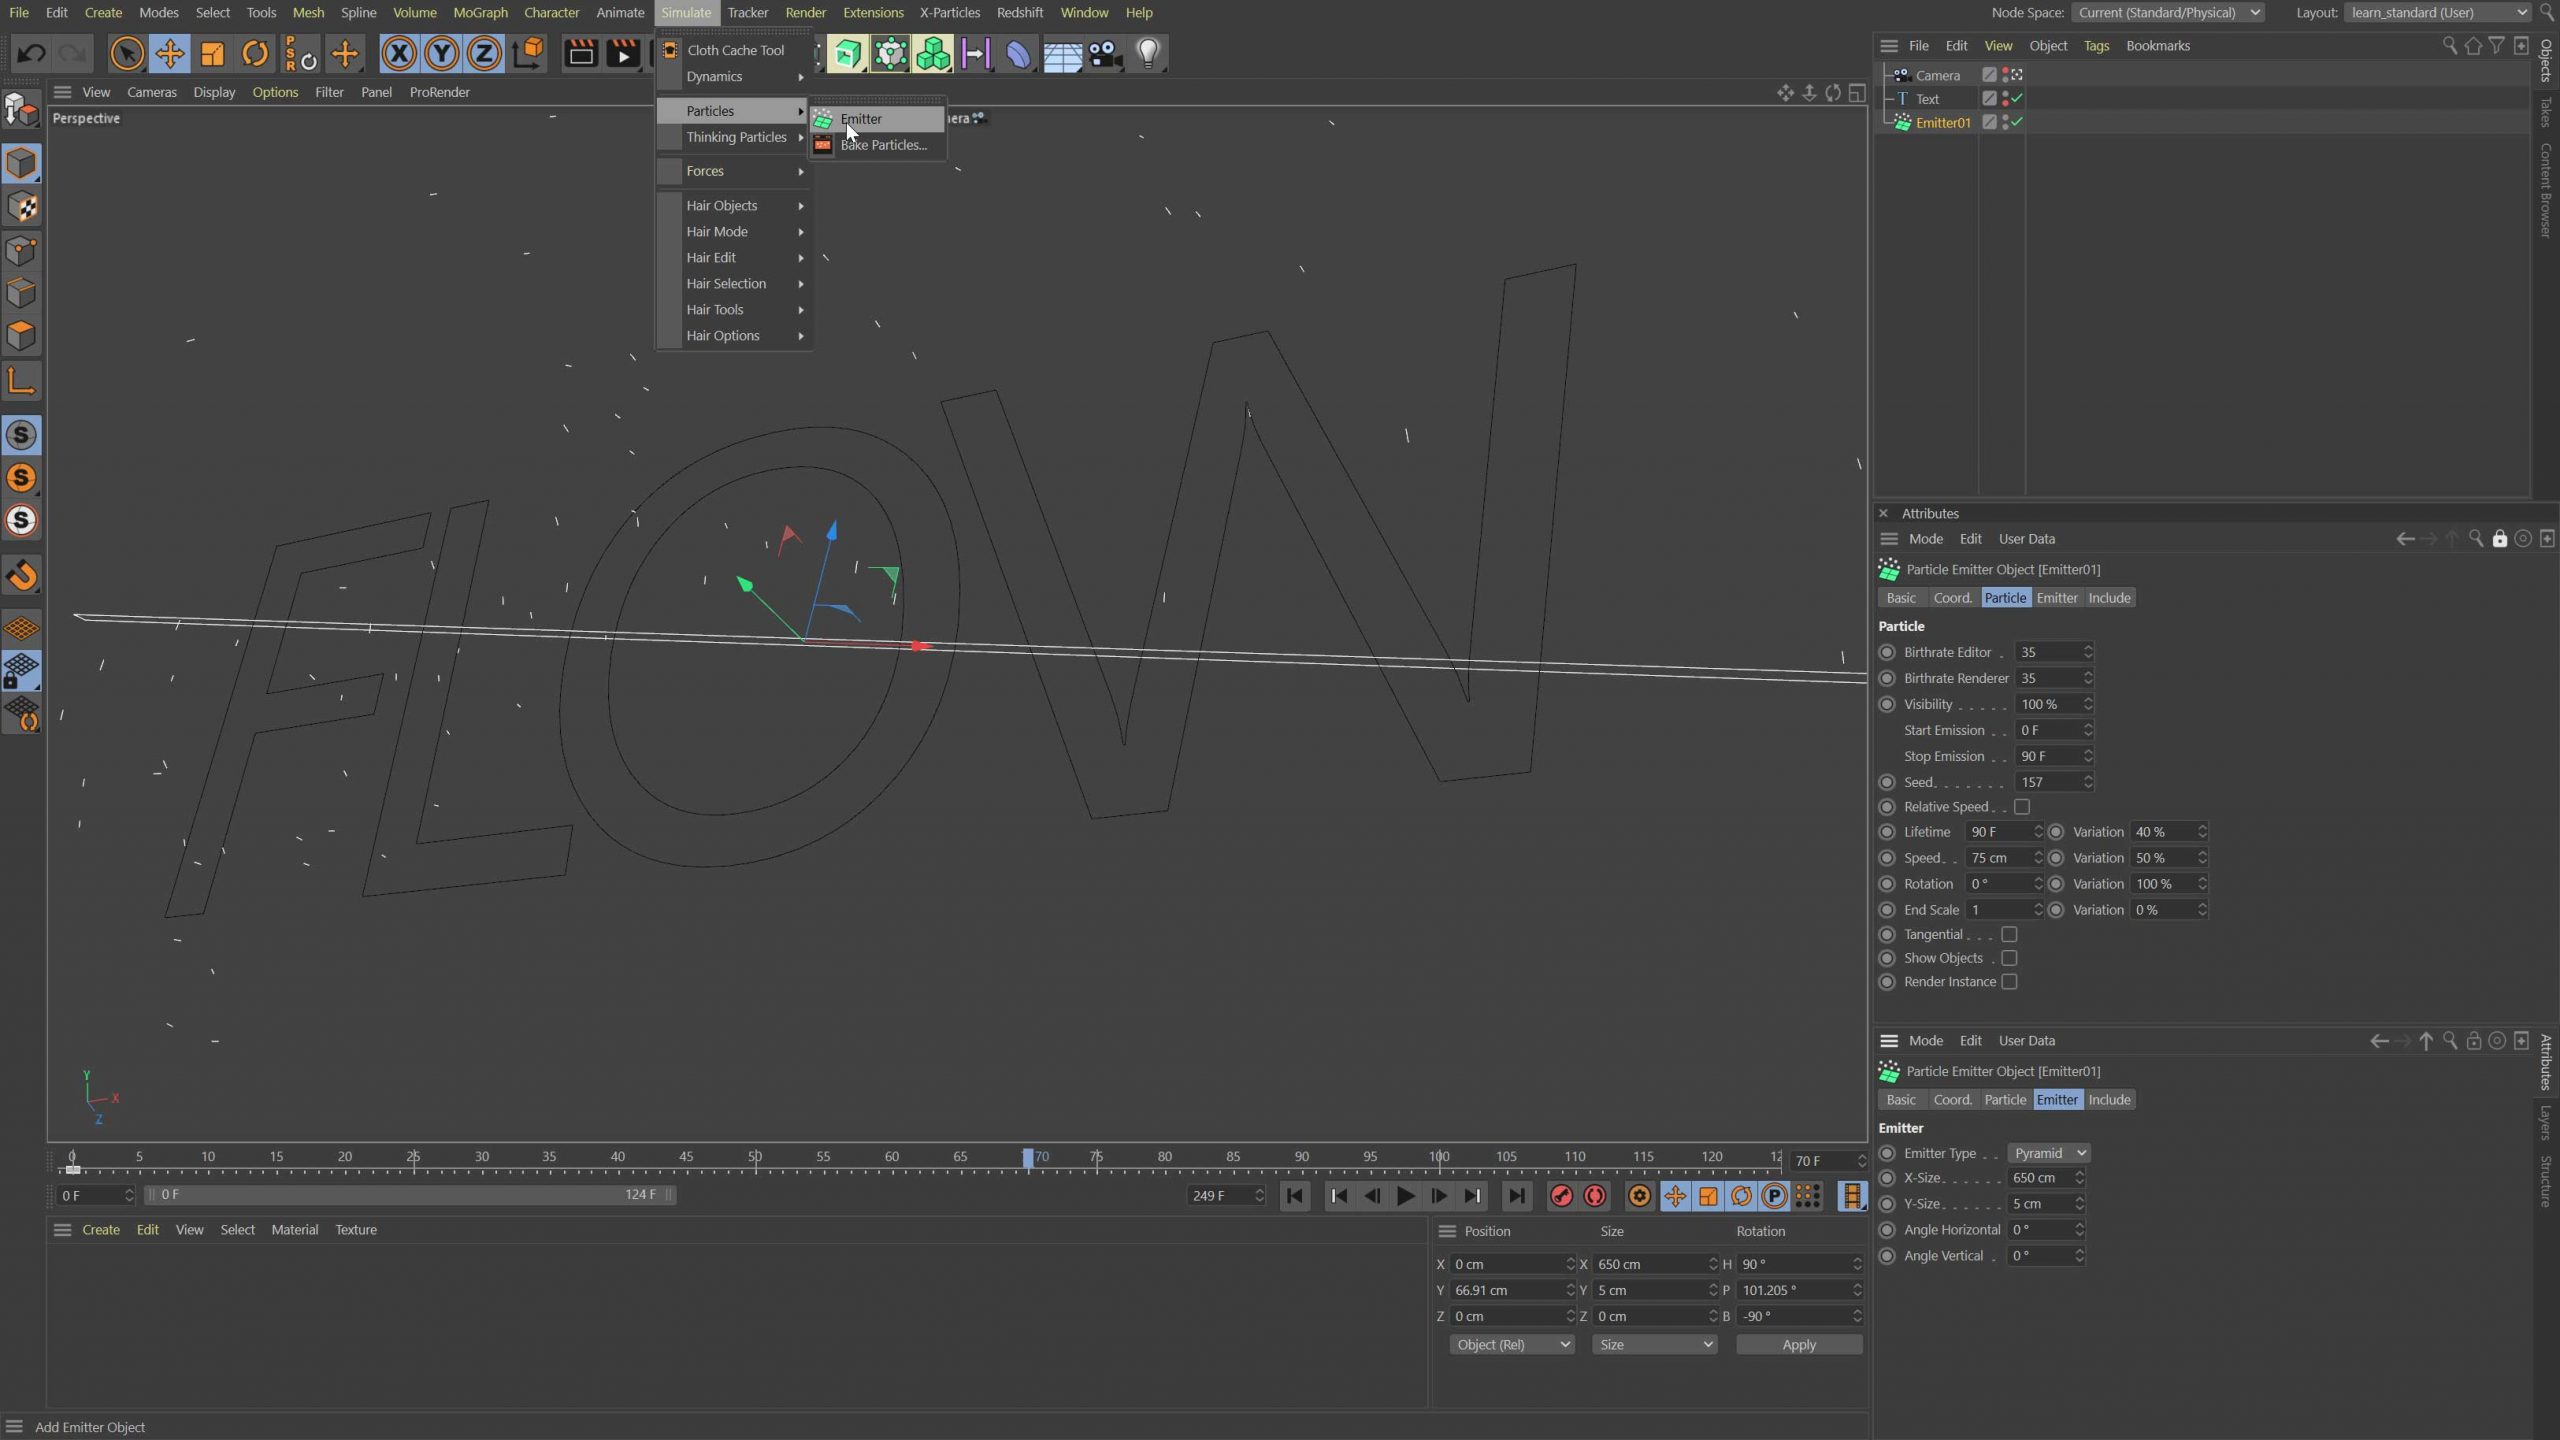
Next add a particle emitter from the Simulate – Particles Menu. This effect works fine with the regular particle system, in fact the field force object adds a lot of power to Cinema 4D’s rather dilapidated particle system. The emitter I used is long and thin so that it extends beyond the length of the spline. Place the emitter so that it is in the centre of the type and then animate the Rotation Pitch from 0 – 360°. In the screenshot above you can see the settings I used for the Emitter, feel free to play around with these values for different results.
Add the Field Force
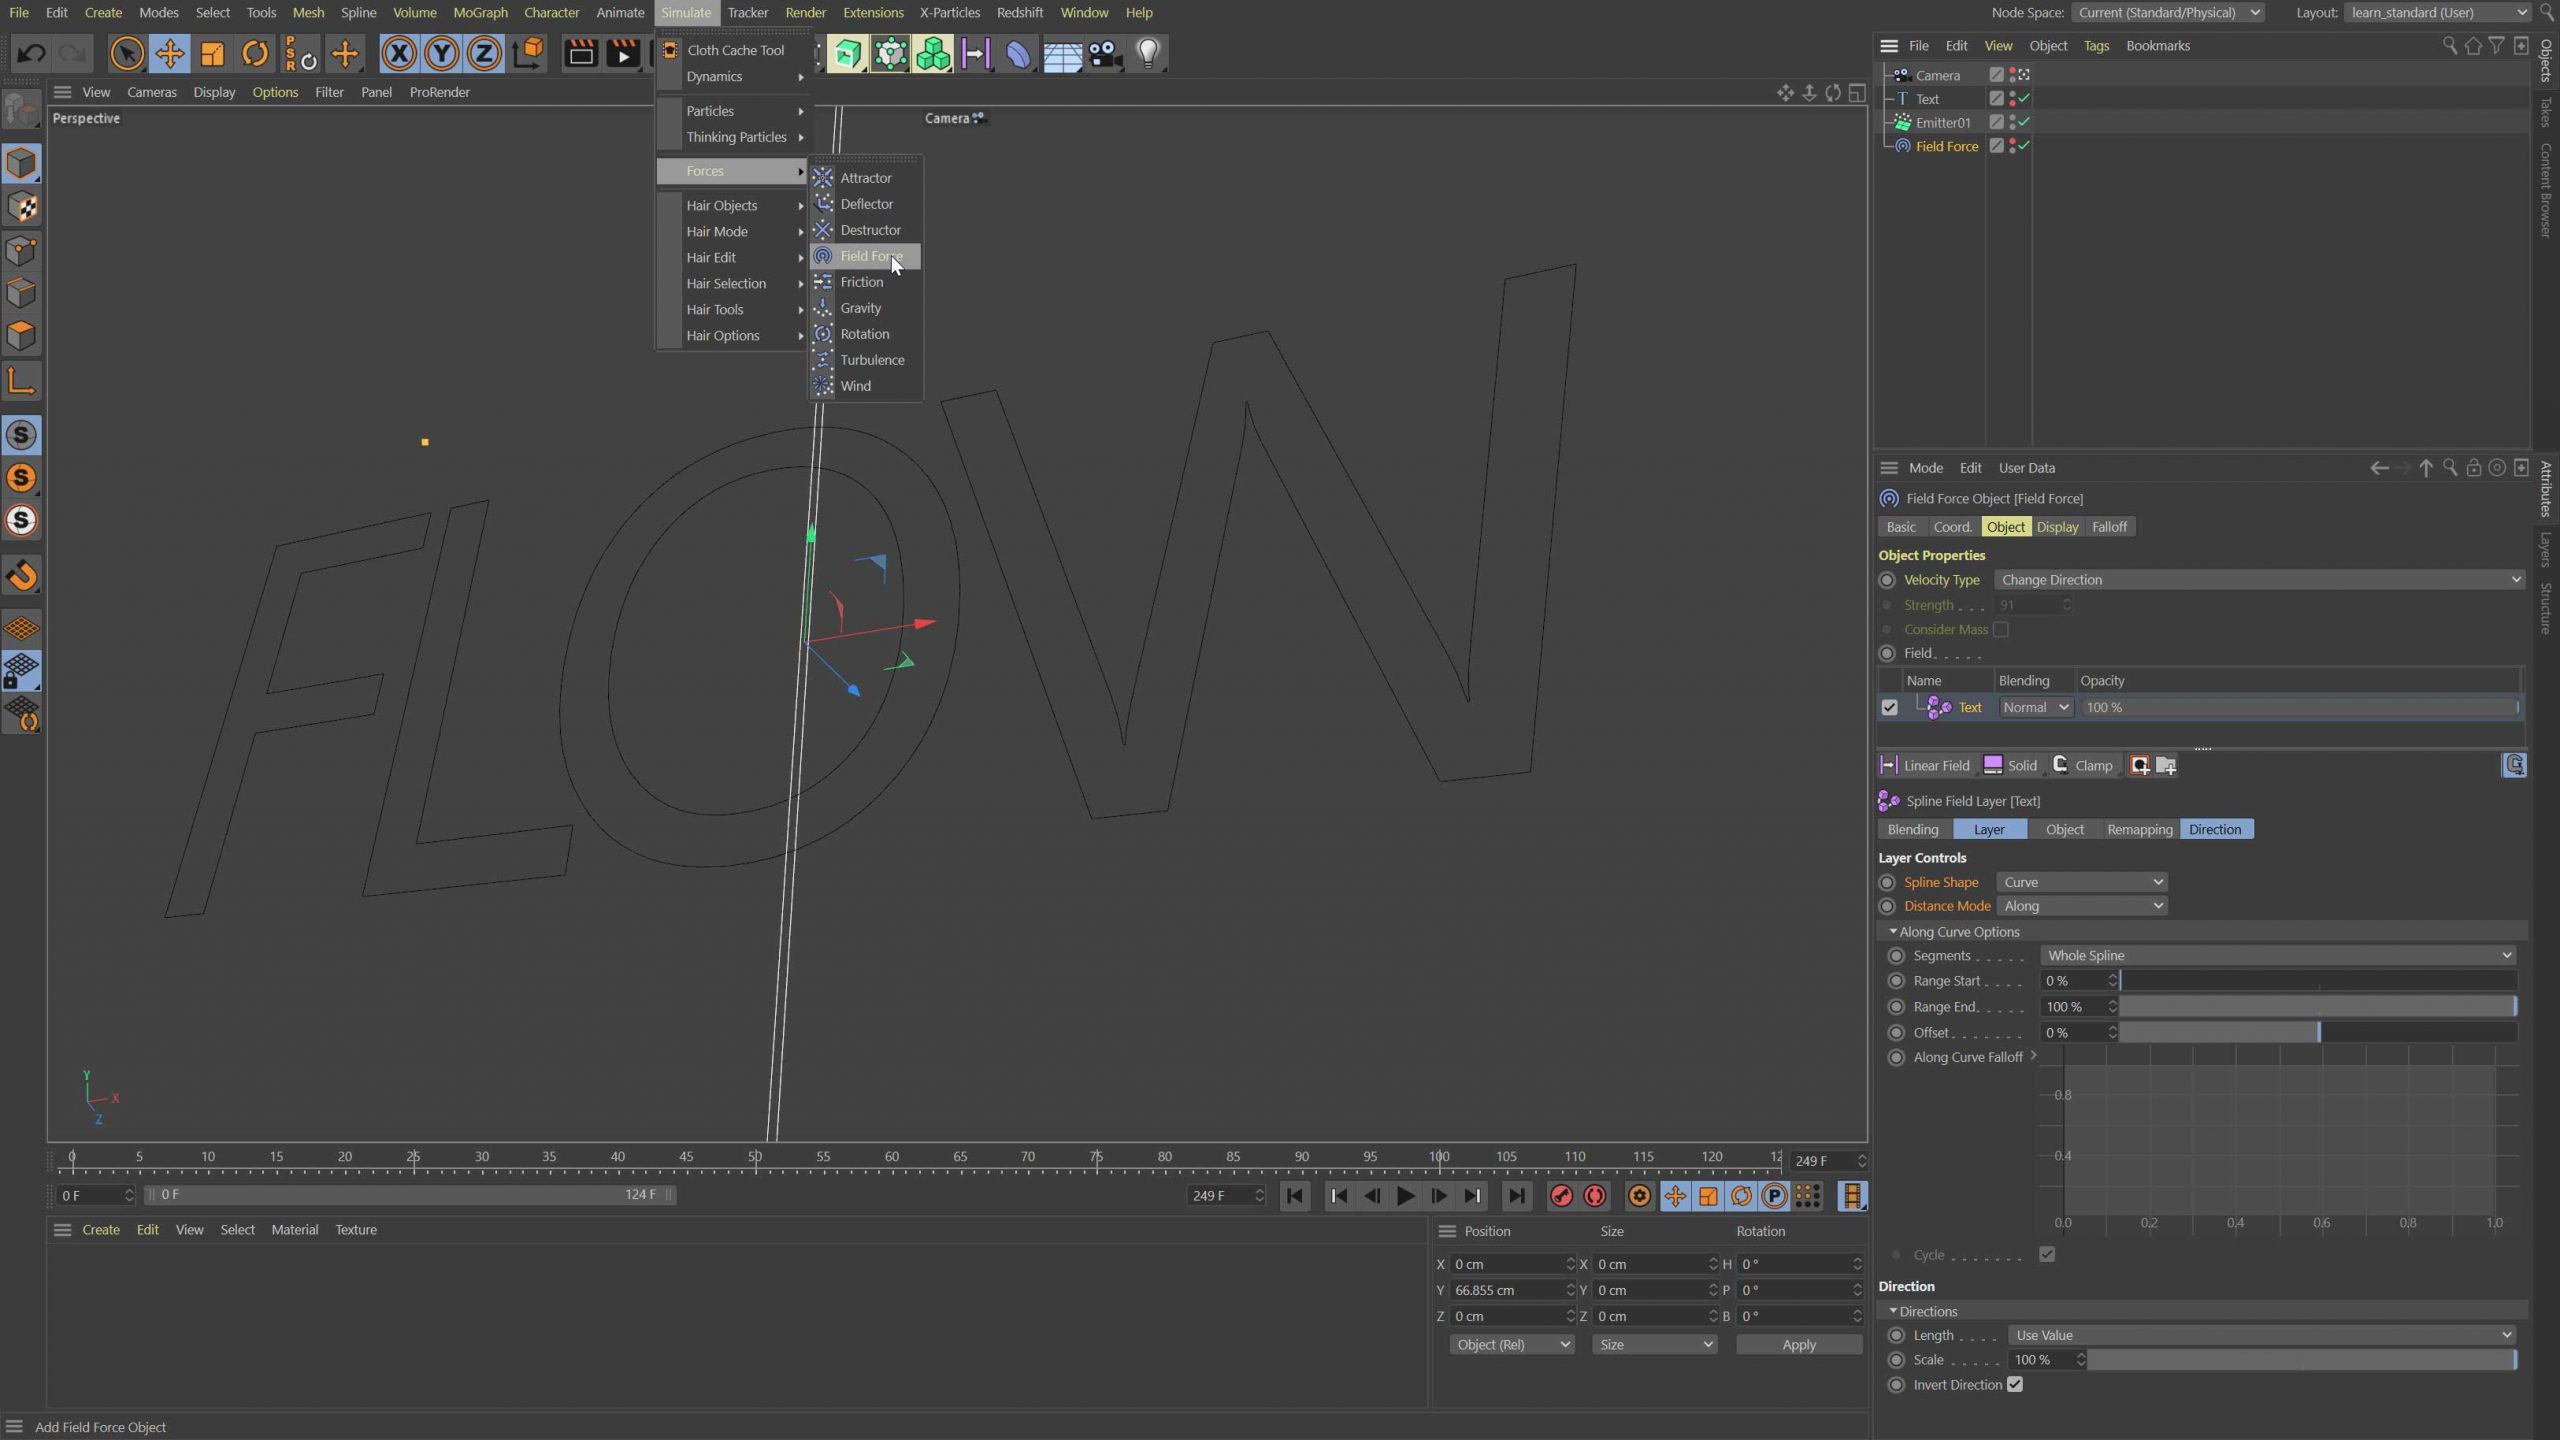
From the Simulate Menu, choose Force – Field Force to add the Field Force Object to your scene. Set Velocity Type to change direction and then drag and drop the Text Spline into the Field list under the Object Tab. With the Text Spline selected in the Field List, the parameters for this Field will appear underneath. Choose Curve for Spline Shape and Along for Distance Mode.
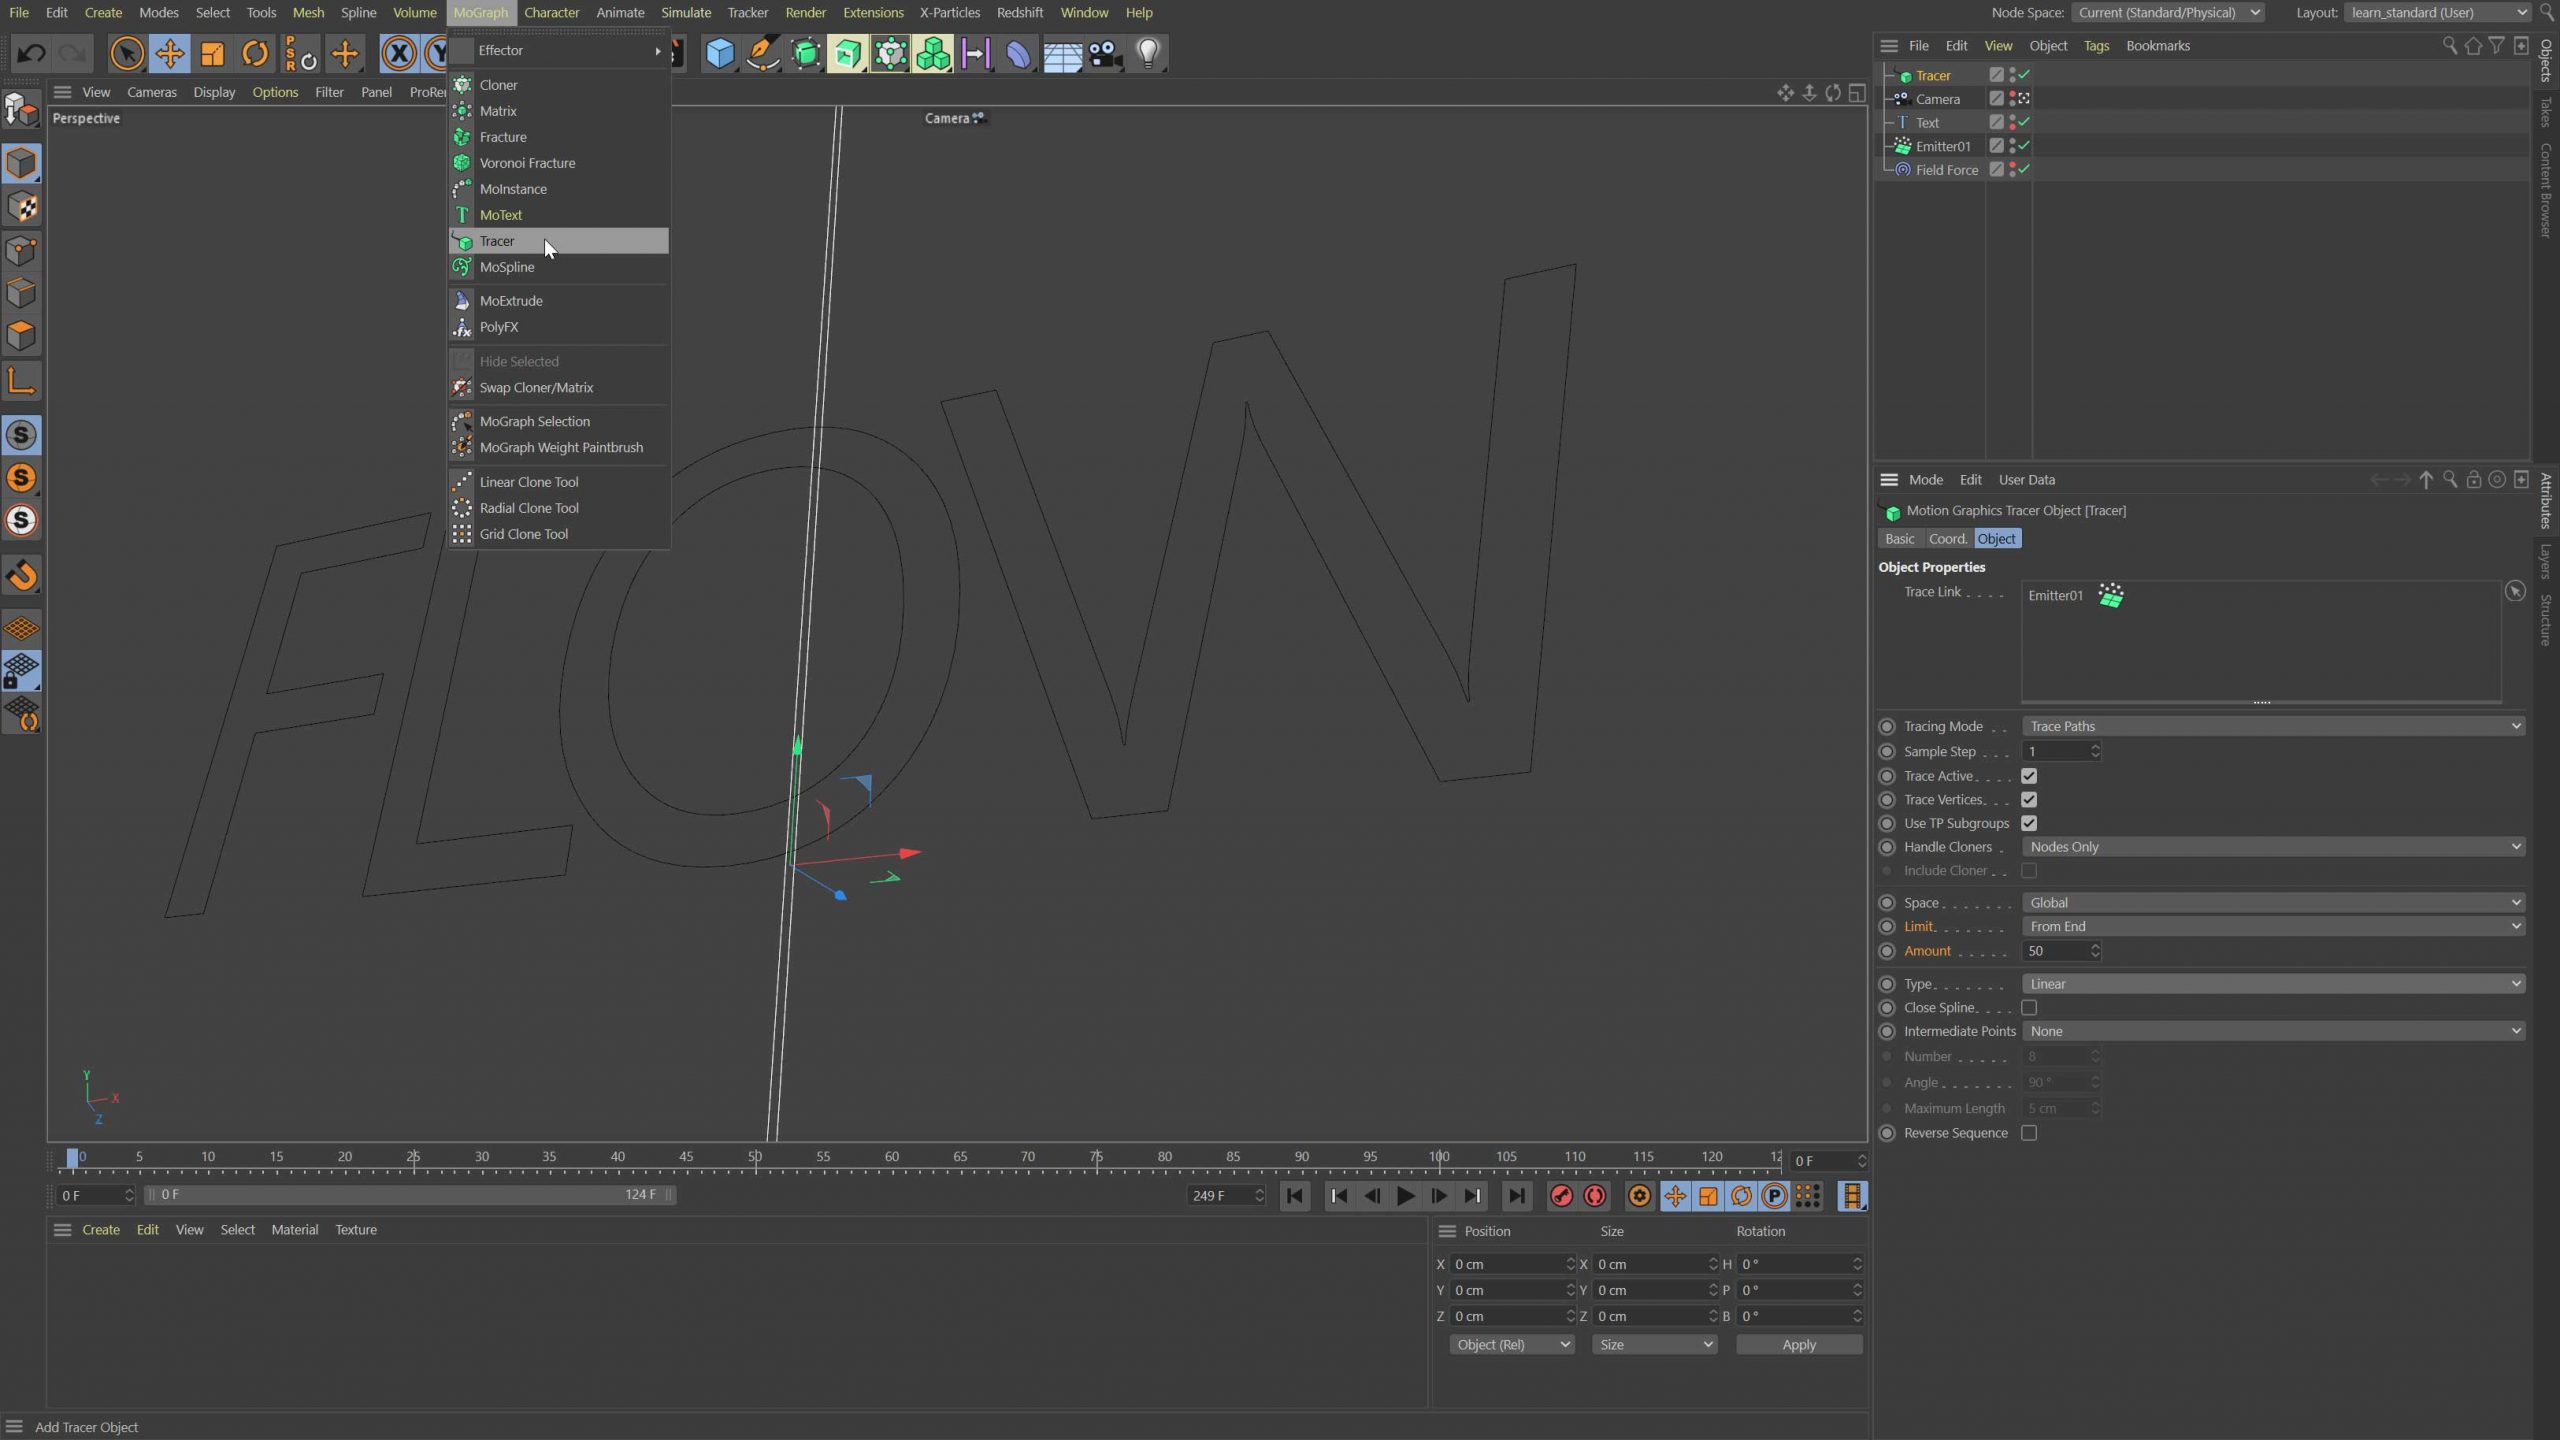
When you press play you should see the particles start to flow around the shape of the letters. Select the Emitter in the Object Manager and then add in a Tracer Object from the Mograph menu. Set the Tracer Limit From End and Amount to 50 frames. Now when you play through you should see the Tracer generating splines from the particle movement.
I then took the Emitter and Tracer and duplicated them so that I had four emitters and tracers generating splines. The only parameter you need to change here is the Seed value on each Emitter, they need to be unique so that the particles differ between emitters. One quick way to do this for multiple objects is to select them all in the Object Manager and then in the Seed parameter type ‘num*2’. This a great way to change multiple parameters with one formula. Cinema 4D uses the object index when you type ‘num’ in a formula. Using this formula results in seed values 0, 2, 4, 6 for our four emitters.
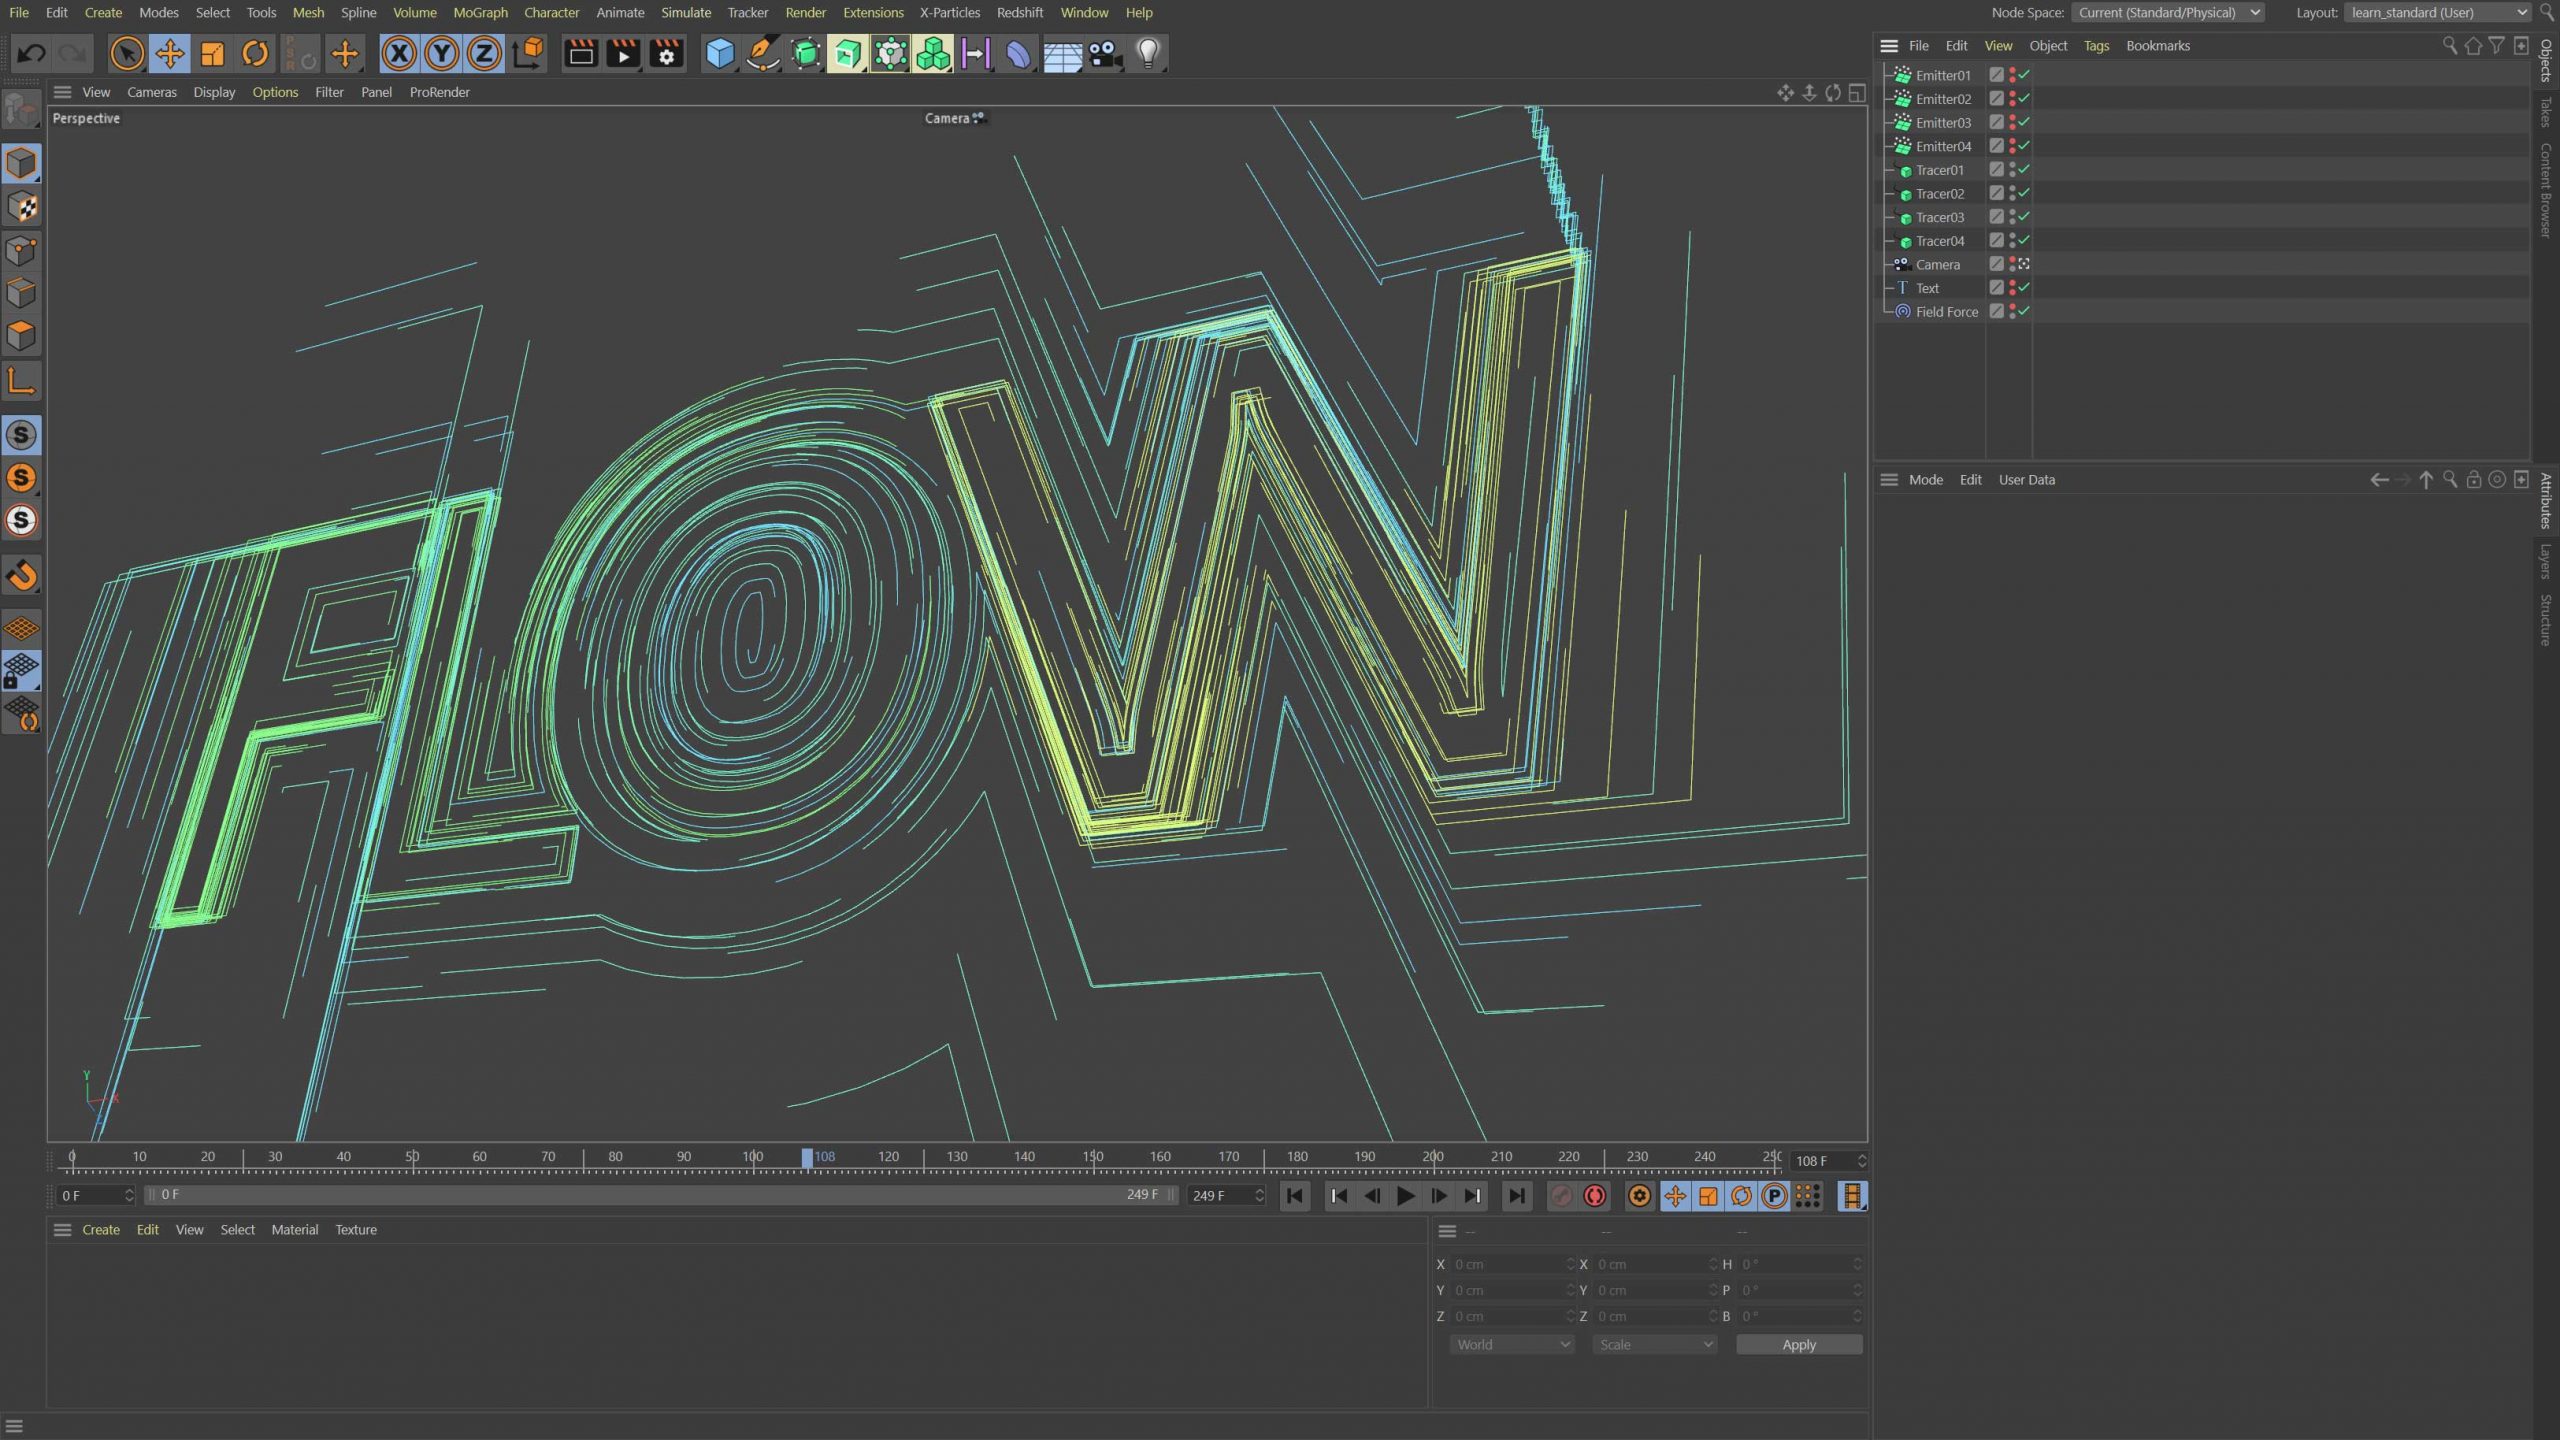
Now if you hide the emitters and the text spline, you will see something like this. I used the Display Colour in the Tracer objects Basic Tab to give each spline a unique colour.

Now you have these all splines being generated, there are so many things you can do with them. You could just render the result as it is, using either Hair to render the splines or if you use a third party renderer, most of them offer a solution for spline rendering.
Alternatively, you could clone objects onto the splines to create some interesting effects, especially as the splines grow and shrink. I’ll leave it up to you to experiment with these things, the route I’m going to take is to use the Tracer objects as Spline Fields to further control some Mograph objects.
Using the spline with fields
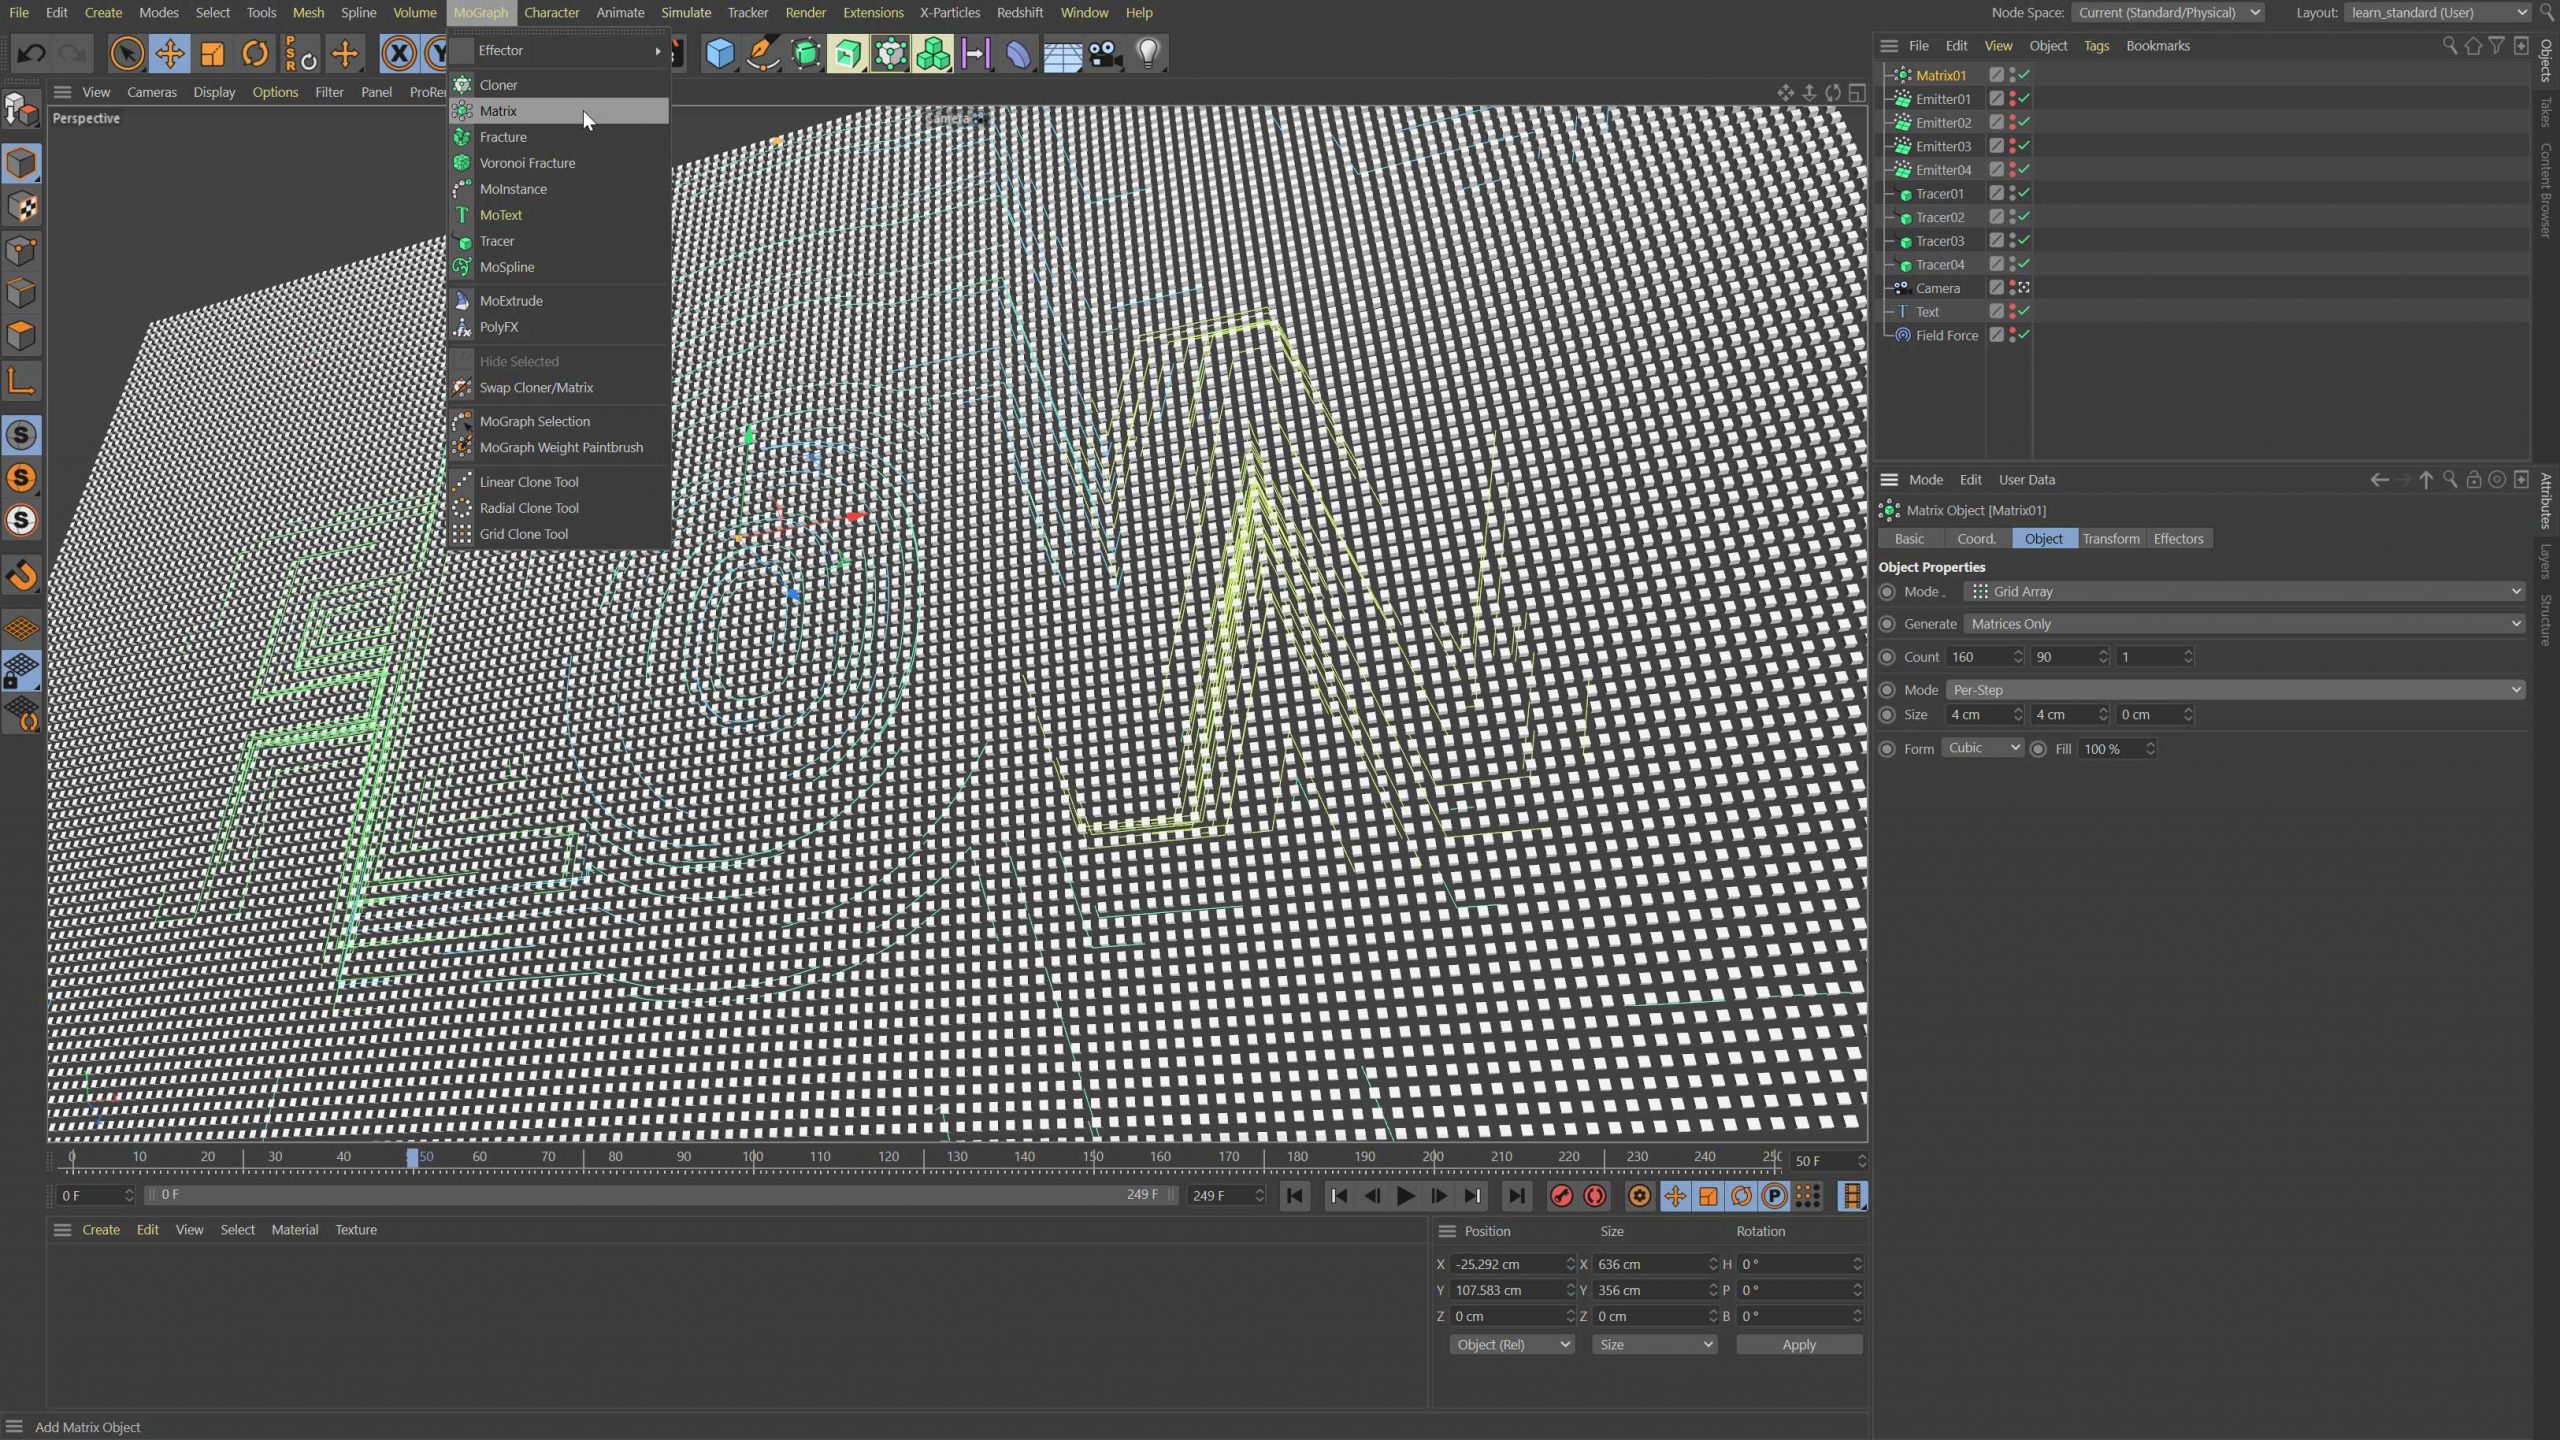
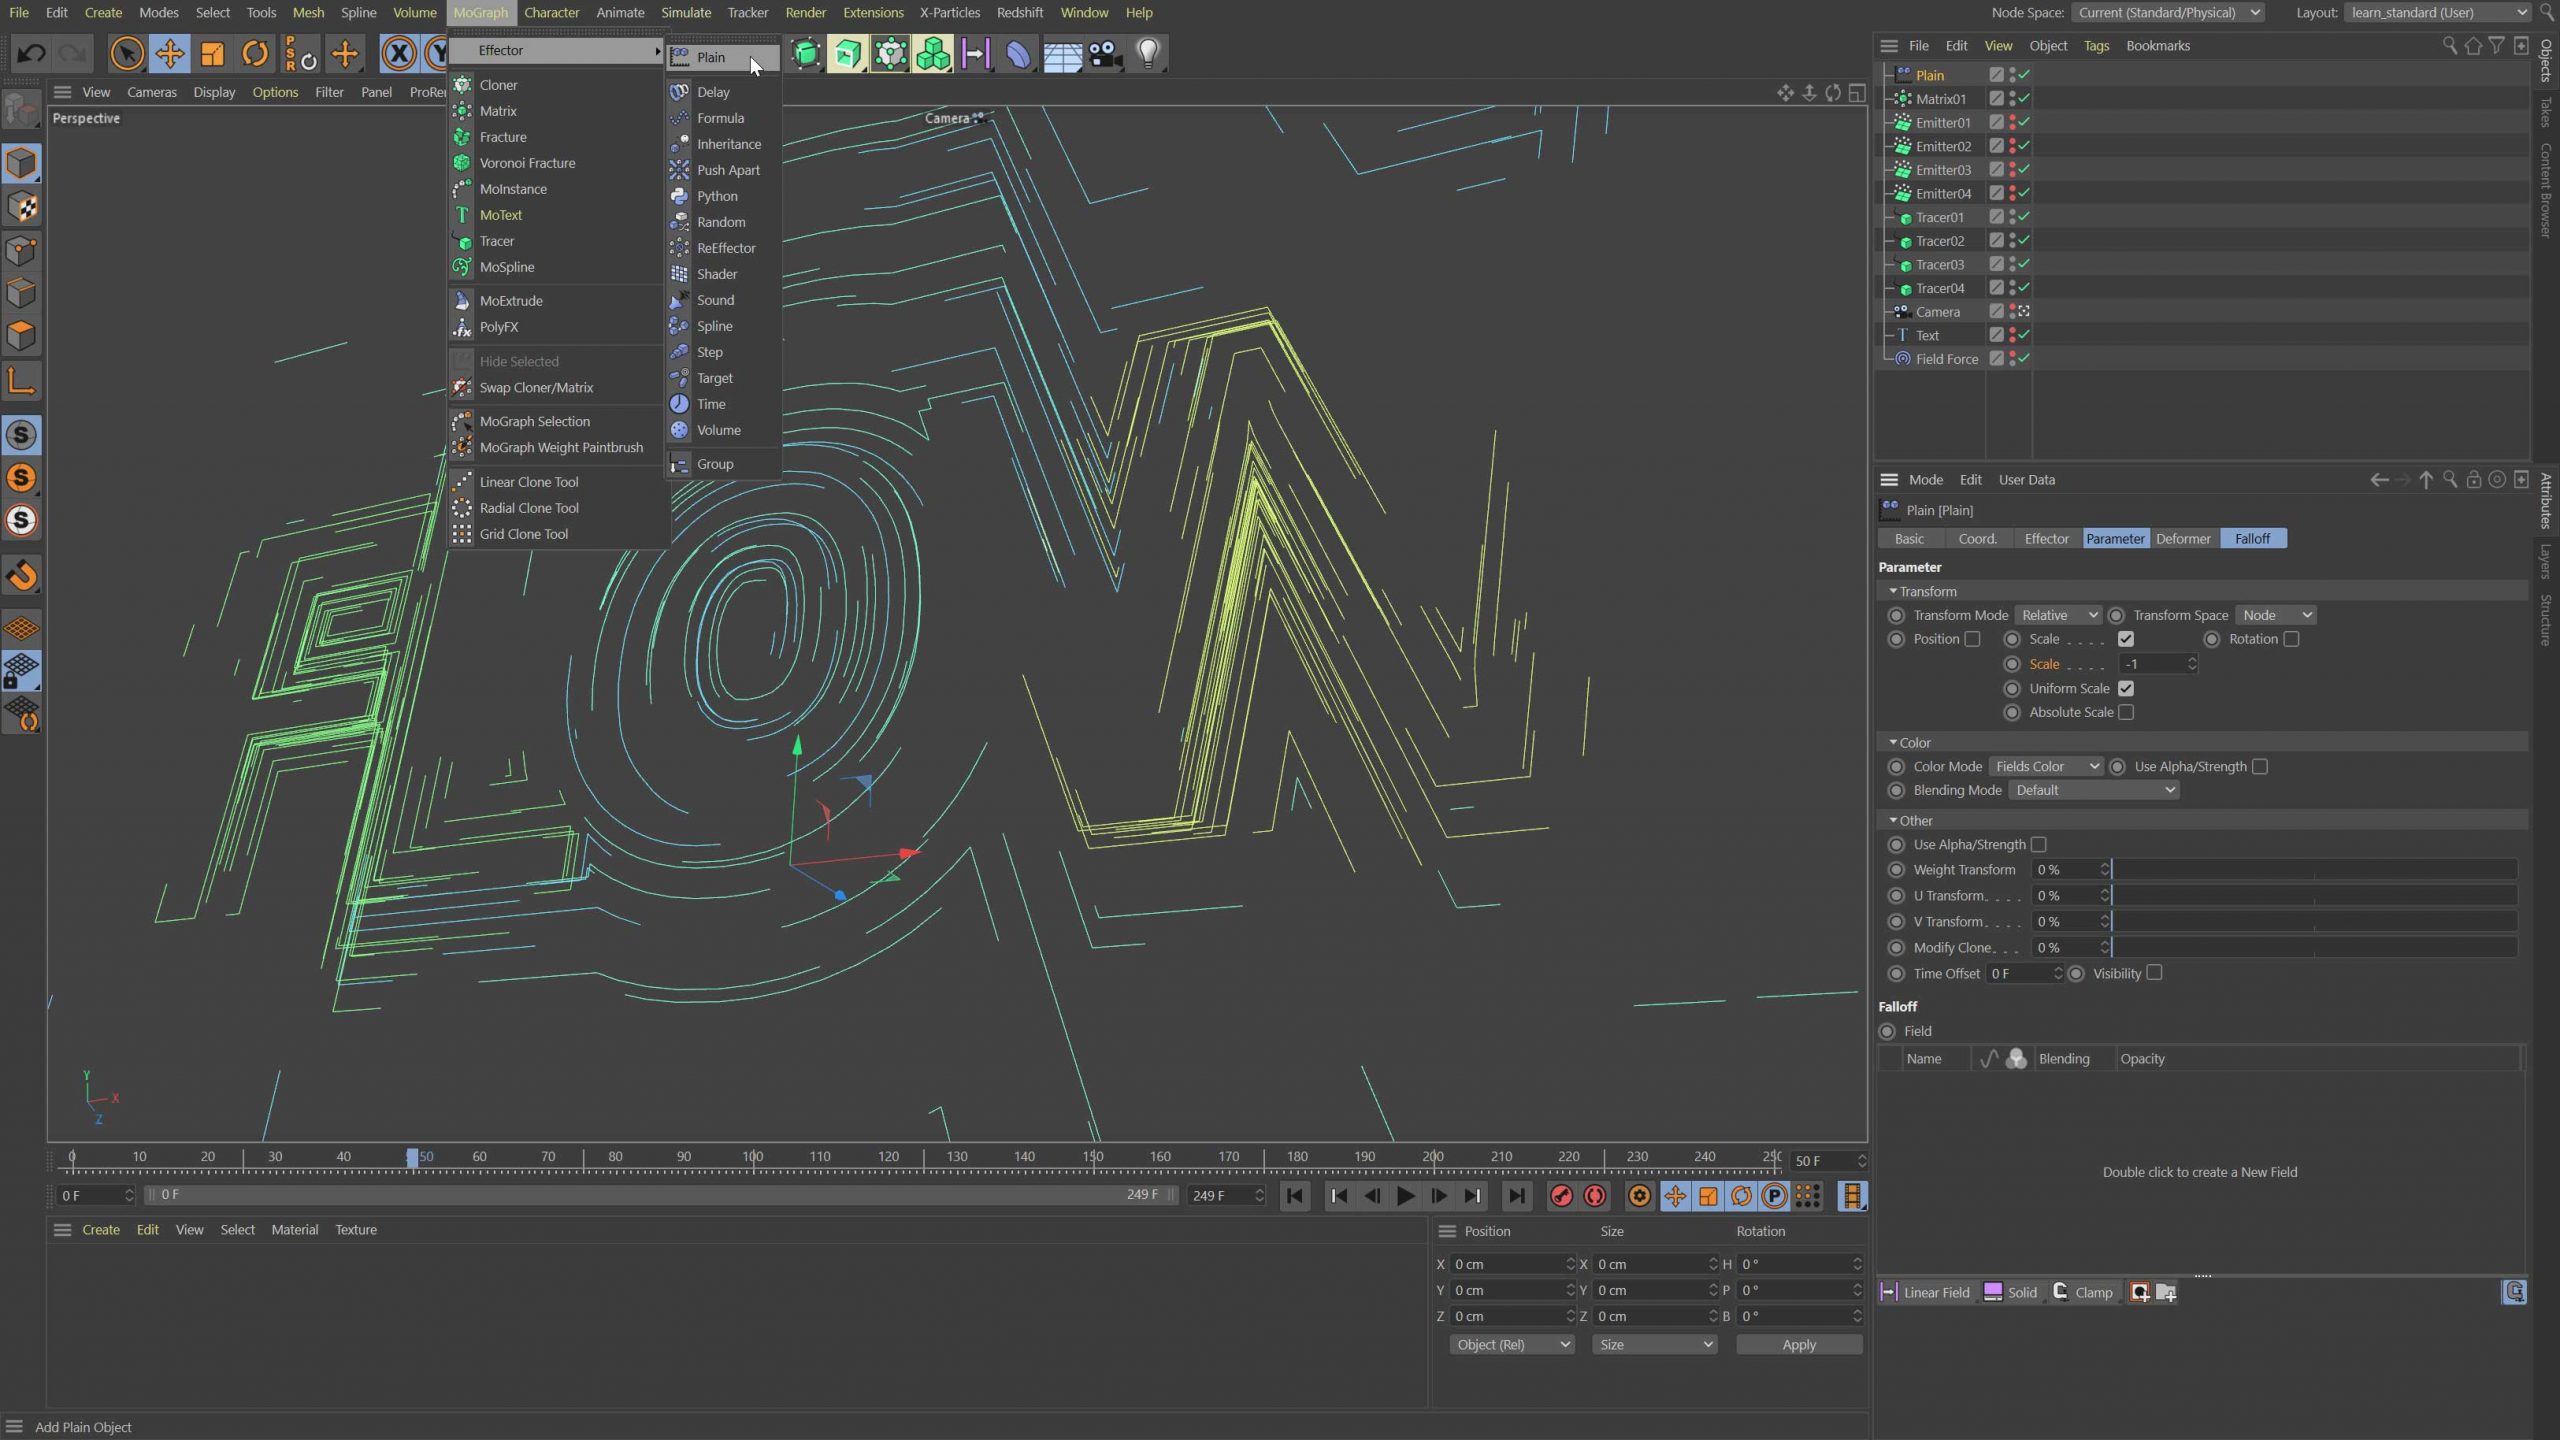
Add a Matrix Object from the Mograph menu and create a grid array that is flat and fills the same area as the generated splines. I used X 160, Y 90, per step distance of 4cm, and positioned the Matrix object in line with the splines. With the Matrix still selected, add a Plain Effector and under the Parameter tab, disable Position and enable Scale. Set Scale to uniform with a value of -1. All the Matrices disappear as they are scaled to zero.
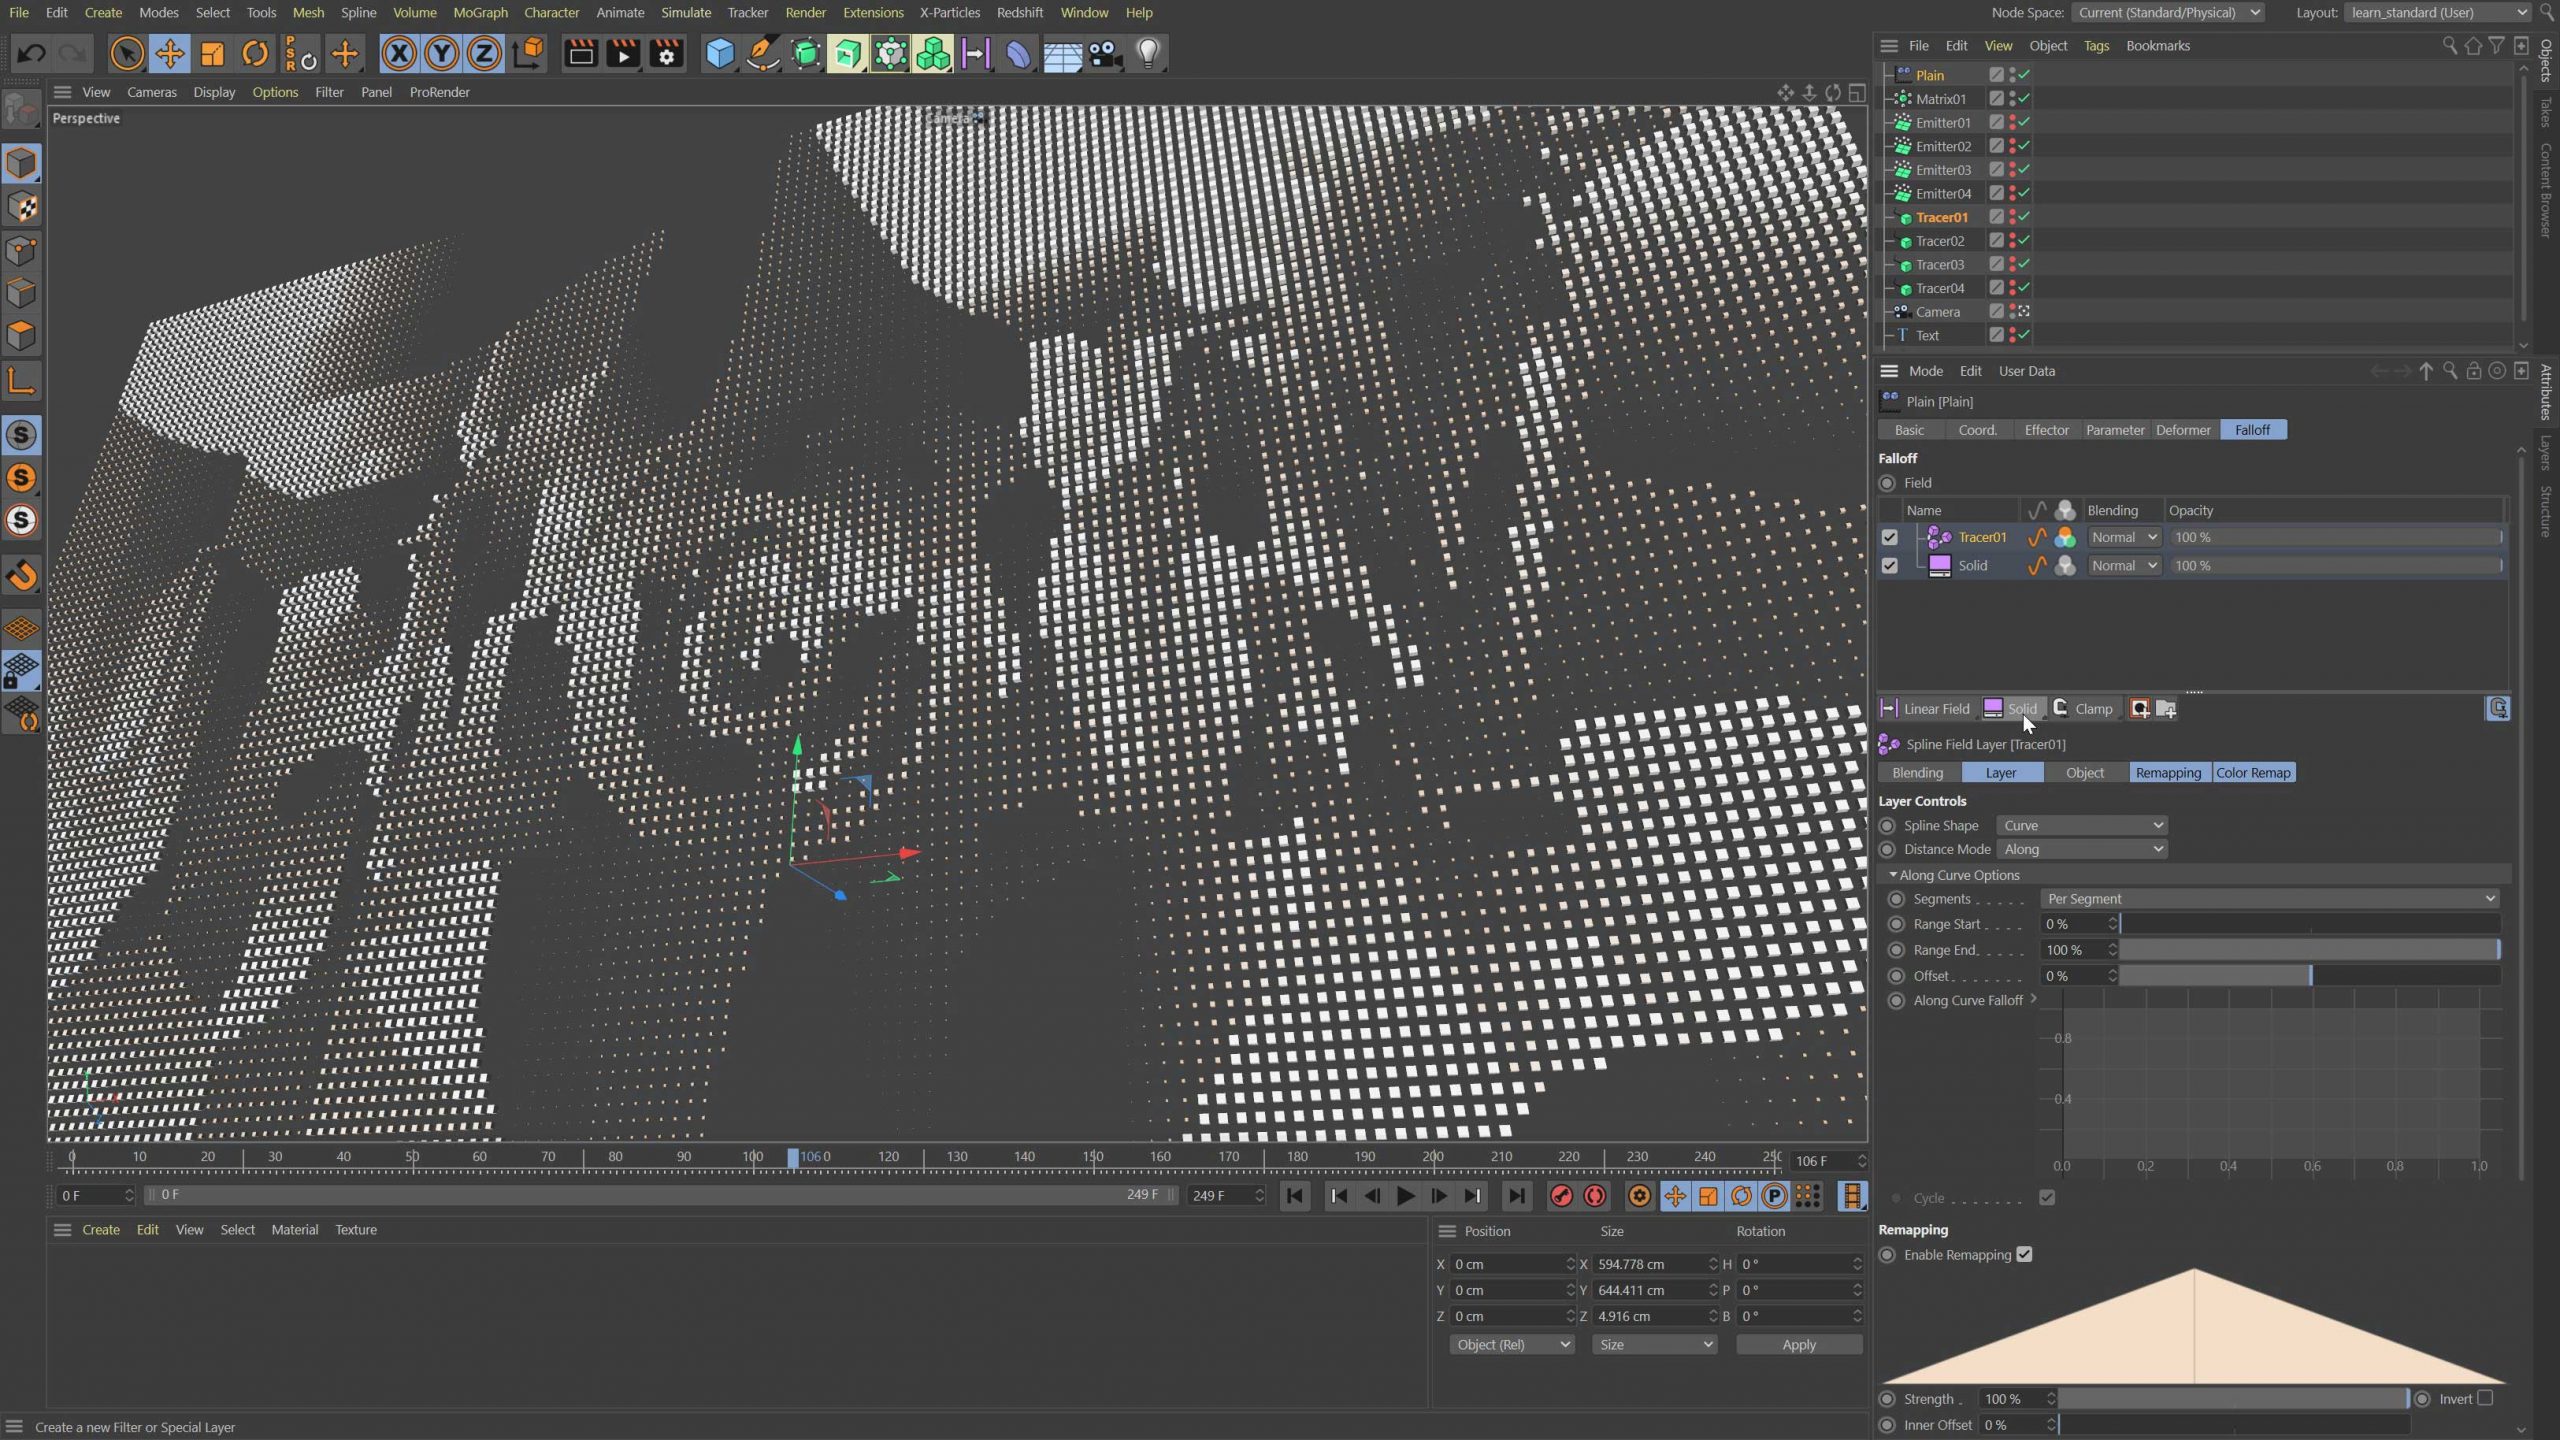
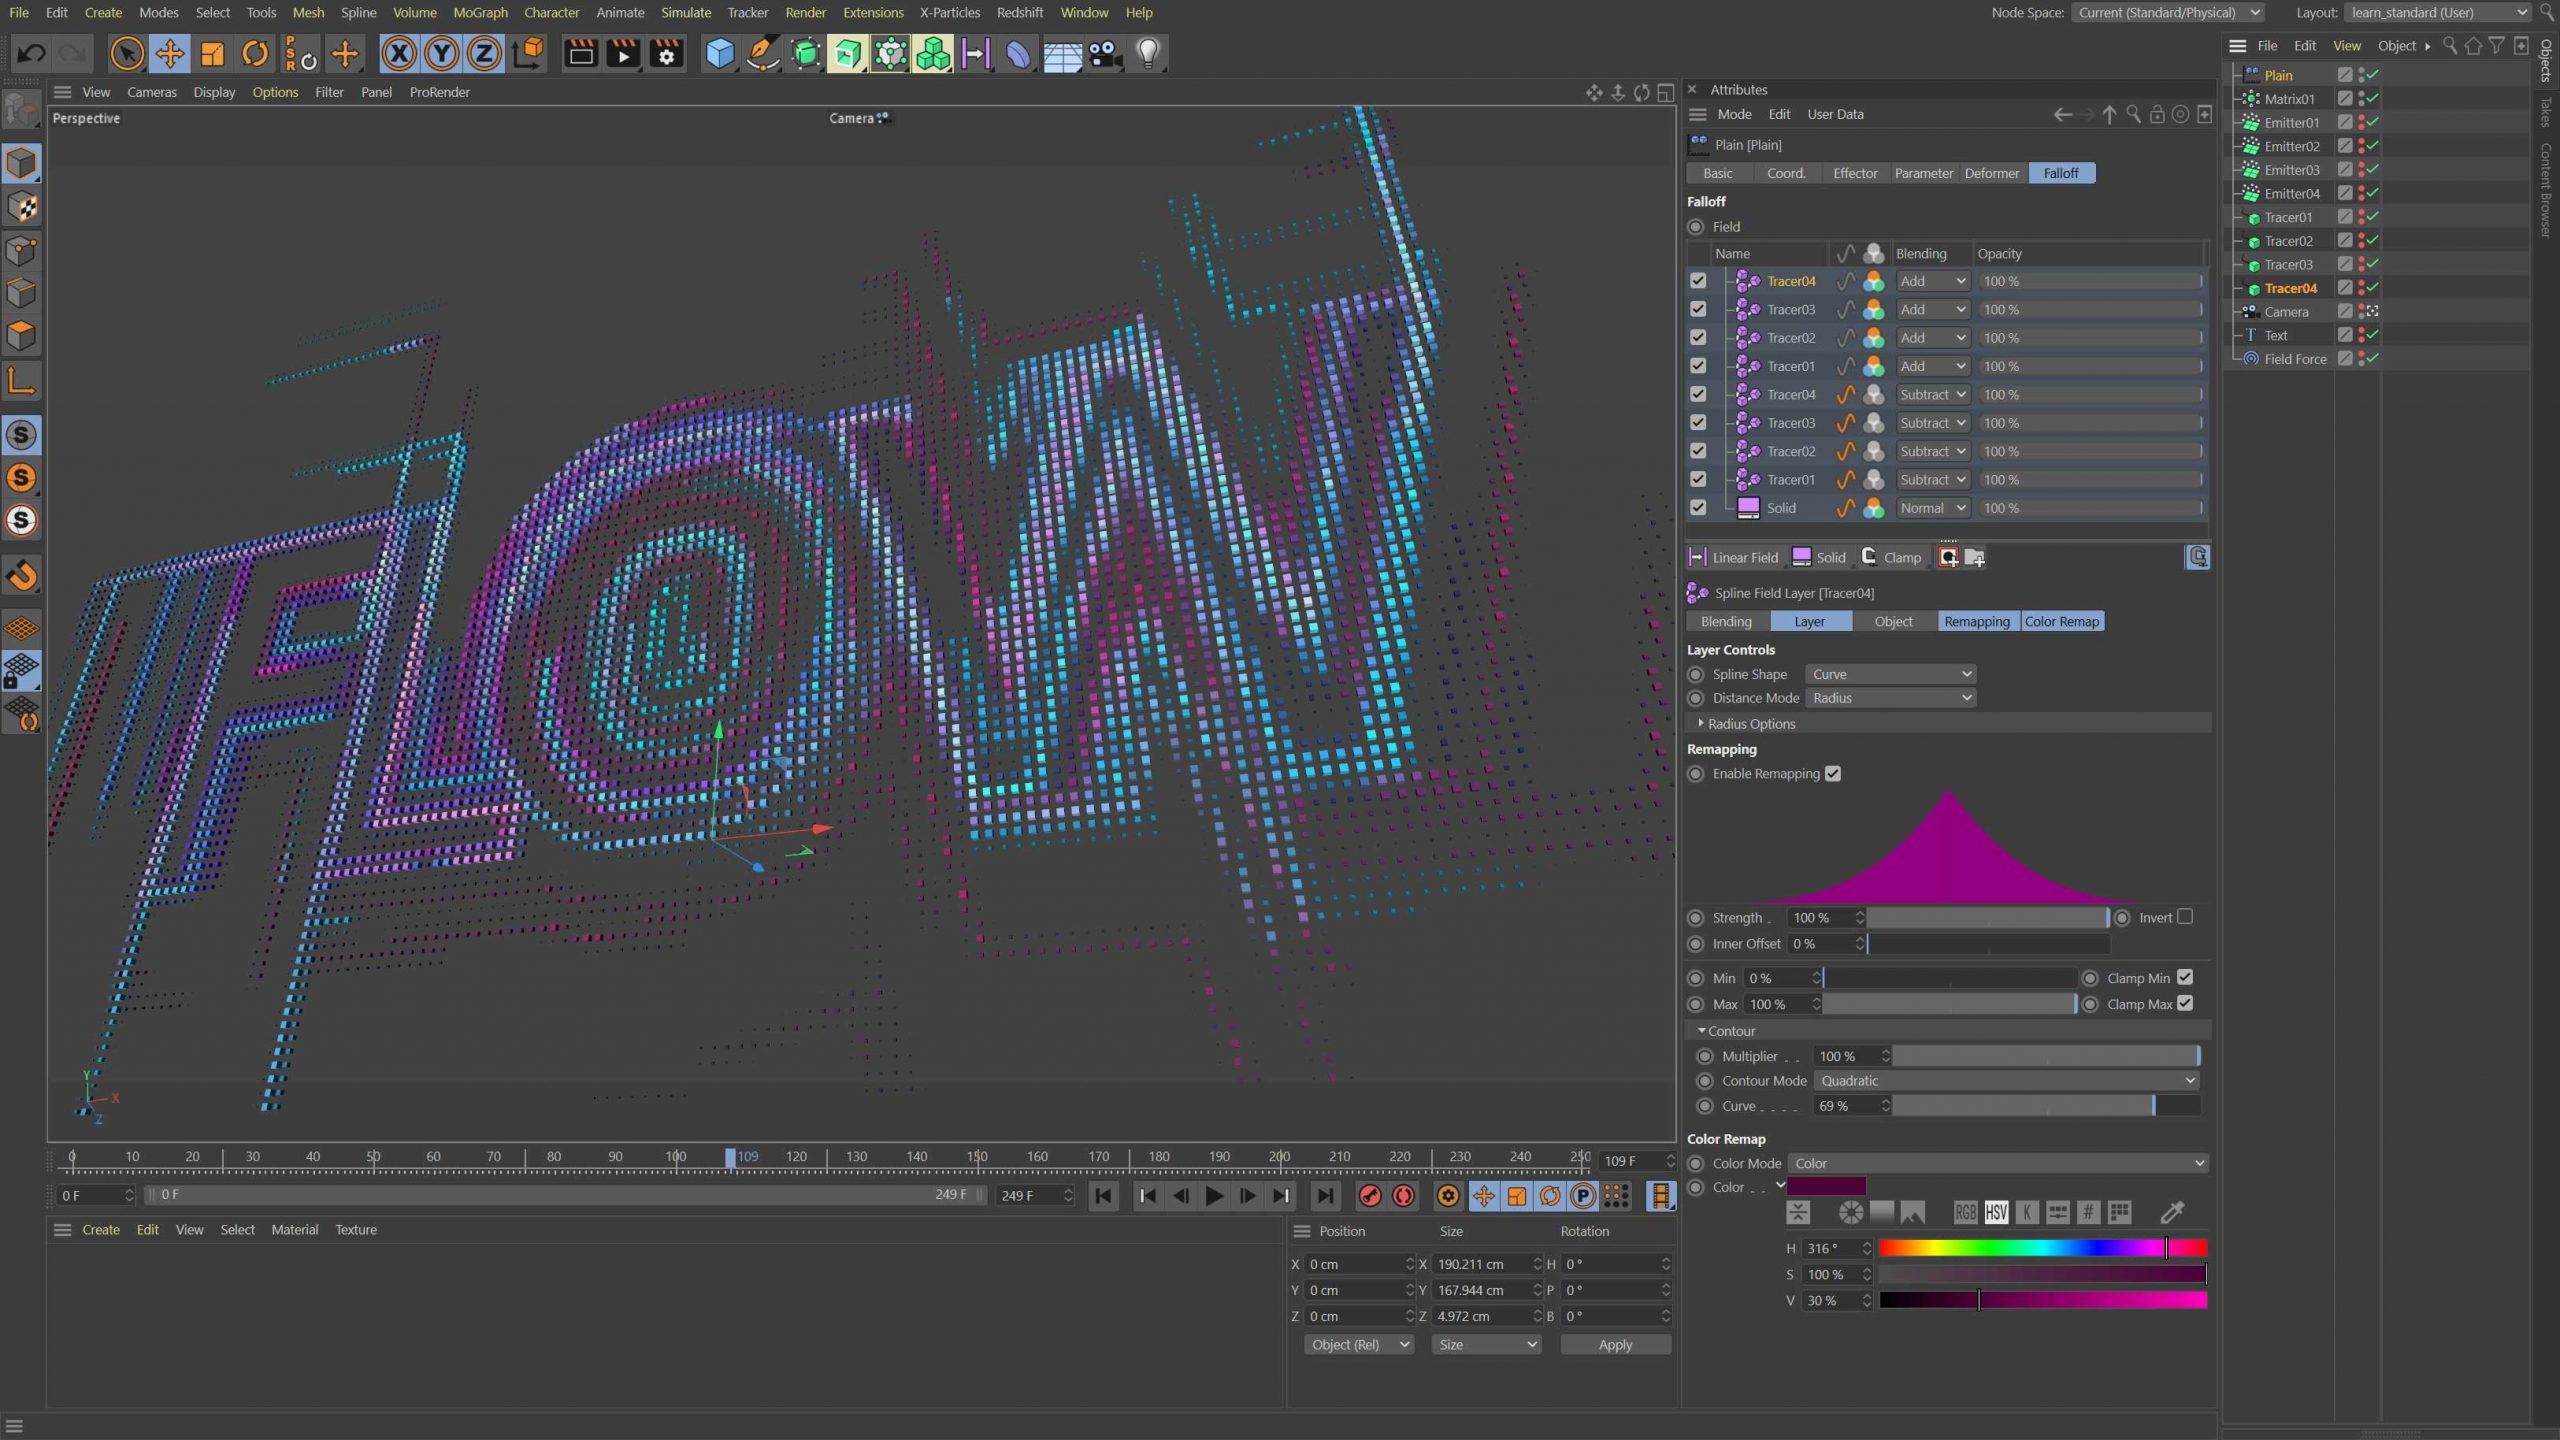
In the Plain Effector Falloff tab, create a solid layer from the pop out menu under the Field List. Then drag and drop the first Tracer Object into the same list. It might look something like this when you press play.
Spline Field settings
Looking interesting, but let’s change the way the Spline Field works. Select the Tracer in the Field list and adjust the parameters so Spline Shape is Curve and Distance Mode is Radius. I adjusted the radius, the remapping curve and also the colour remap. Then I set the layer to Subtract Blending mode. Really what you do with these layers and how you blend them is up to you.
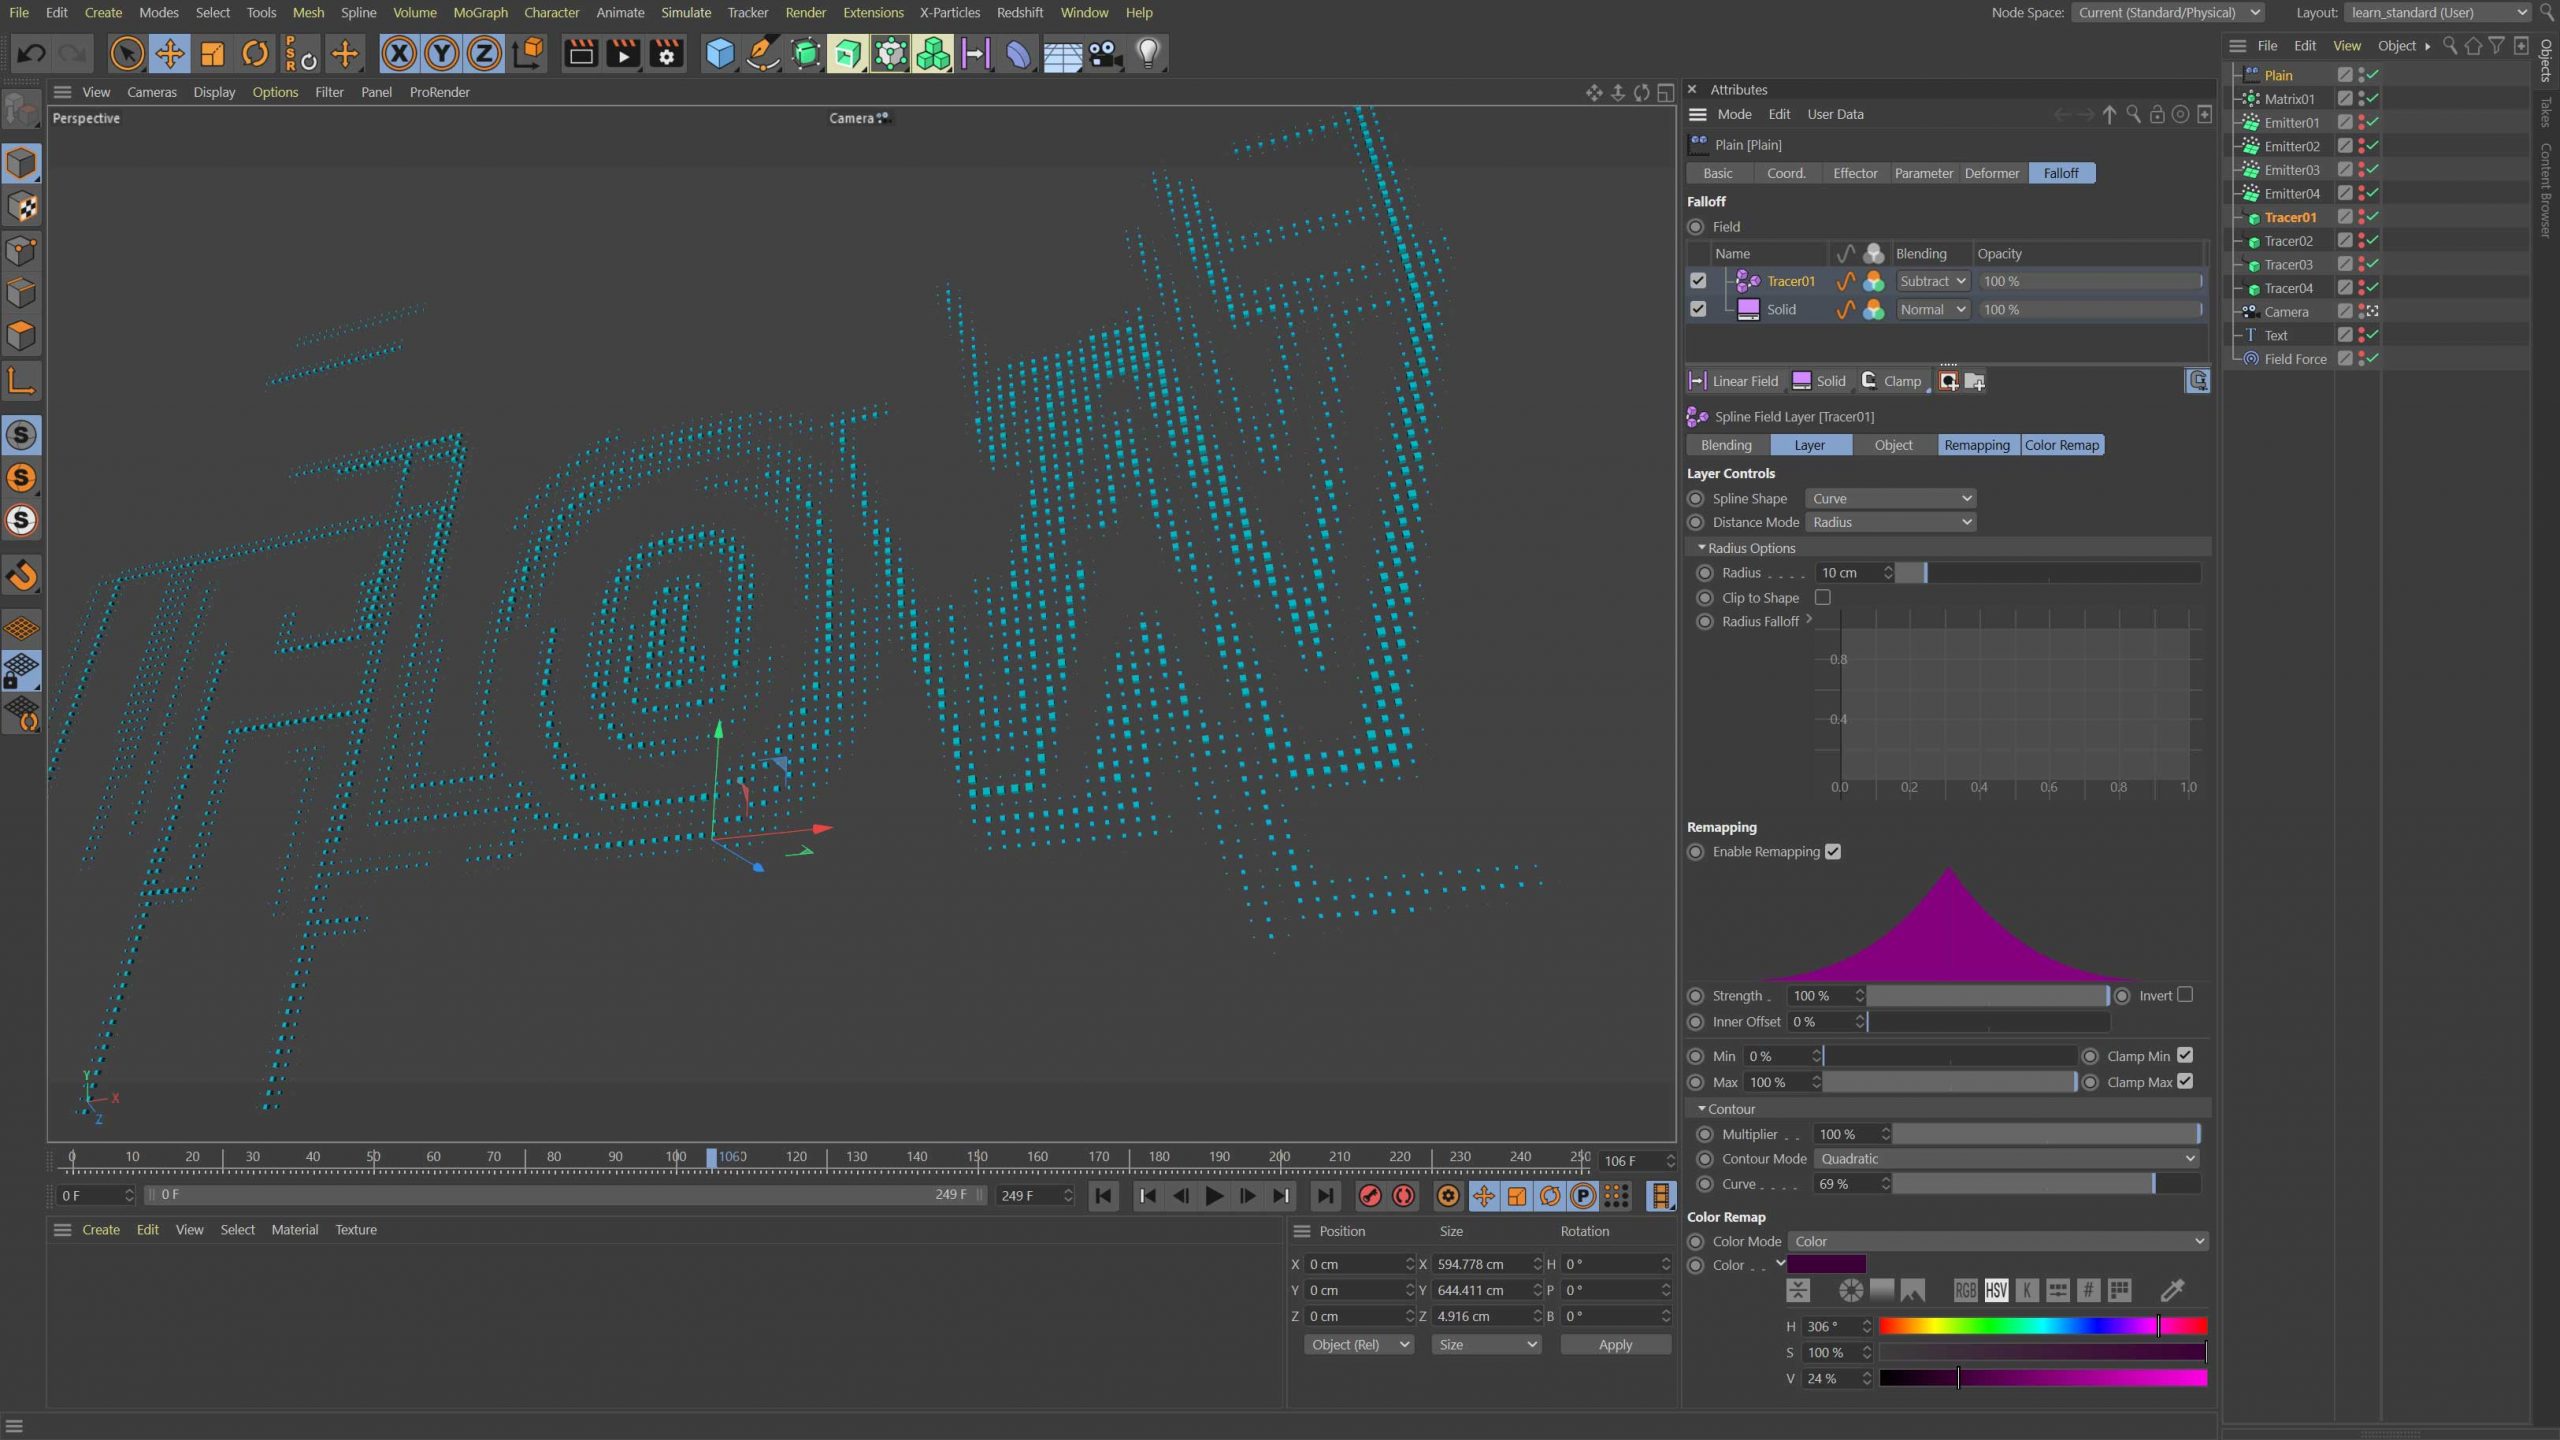
We can either create multiple Matrix objects and then assign a new effector and tracer to each one, or you could stack the tracers as spline fields in the one effector and use blending modes to control visibility and colour. You can use the same tracer twice, one for values and the other for colour for more control over the colours blending.

learn more techniques like this
By the way I only used the Matrix object because it is so fast for playback, this works fine with other Mograph generators. Using this approach is quicker and you can always use a Cloner in Object mode and clone directly onto these Matrix objects. You can also take the Matrix Objects and use them in a Volume builder for even more interesting results.
This is a great technique with a million different routes you can take from here. We used type and created a 2D effect, but you could use this in a 3D volume as well. That could open a lot of doors for interesting effects. Fields really are incredible in their flexibility and if you would like to learn more then please check out learn. Fields in One Day with nearly 7 hours of Mograph Fields and OpenVDB training spread over 19 tutorials.

learn. Cinema 4D Fields in One Day
Fields and OpenVDB bring an incredible toolset full of exciting features to Cinema 4D. The already powerful Mograph module has evolved into a powerhouse of opportunity, opening the doors of creativity to the 3D artist. Tim Clapham, an established expert at working with Mograph, is the perfect partner to guide you through this creative feature set.