`
Create this crazy detailed mandelbulb set up with just three nodes and a little bit of patience!

This is a really simple thing to create and it looks pretty impressive straight out of the node! I’ve made this using Cinema 4D’s Node system, so if you want to follow along you need to have C4D R23 as a minimum. The Node system is still a tech demo, it’s still got a way to go before being production ready, but it is new, exciting and has a lot of power!
To get you started with Cinema 4D Nodes here are the first three steps.
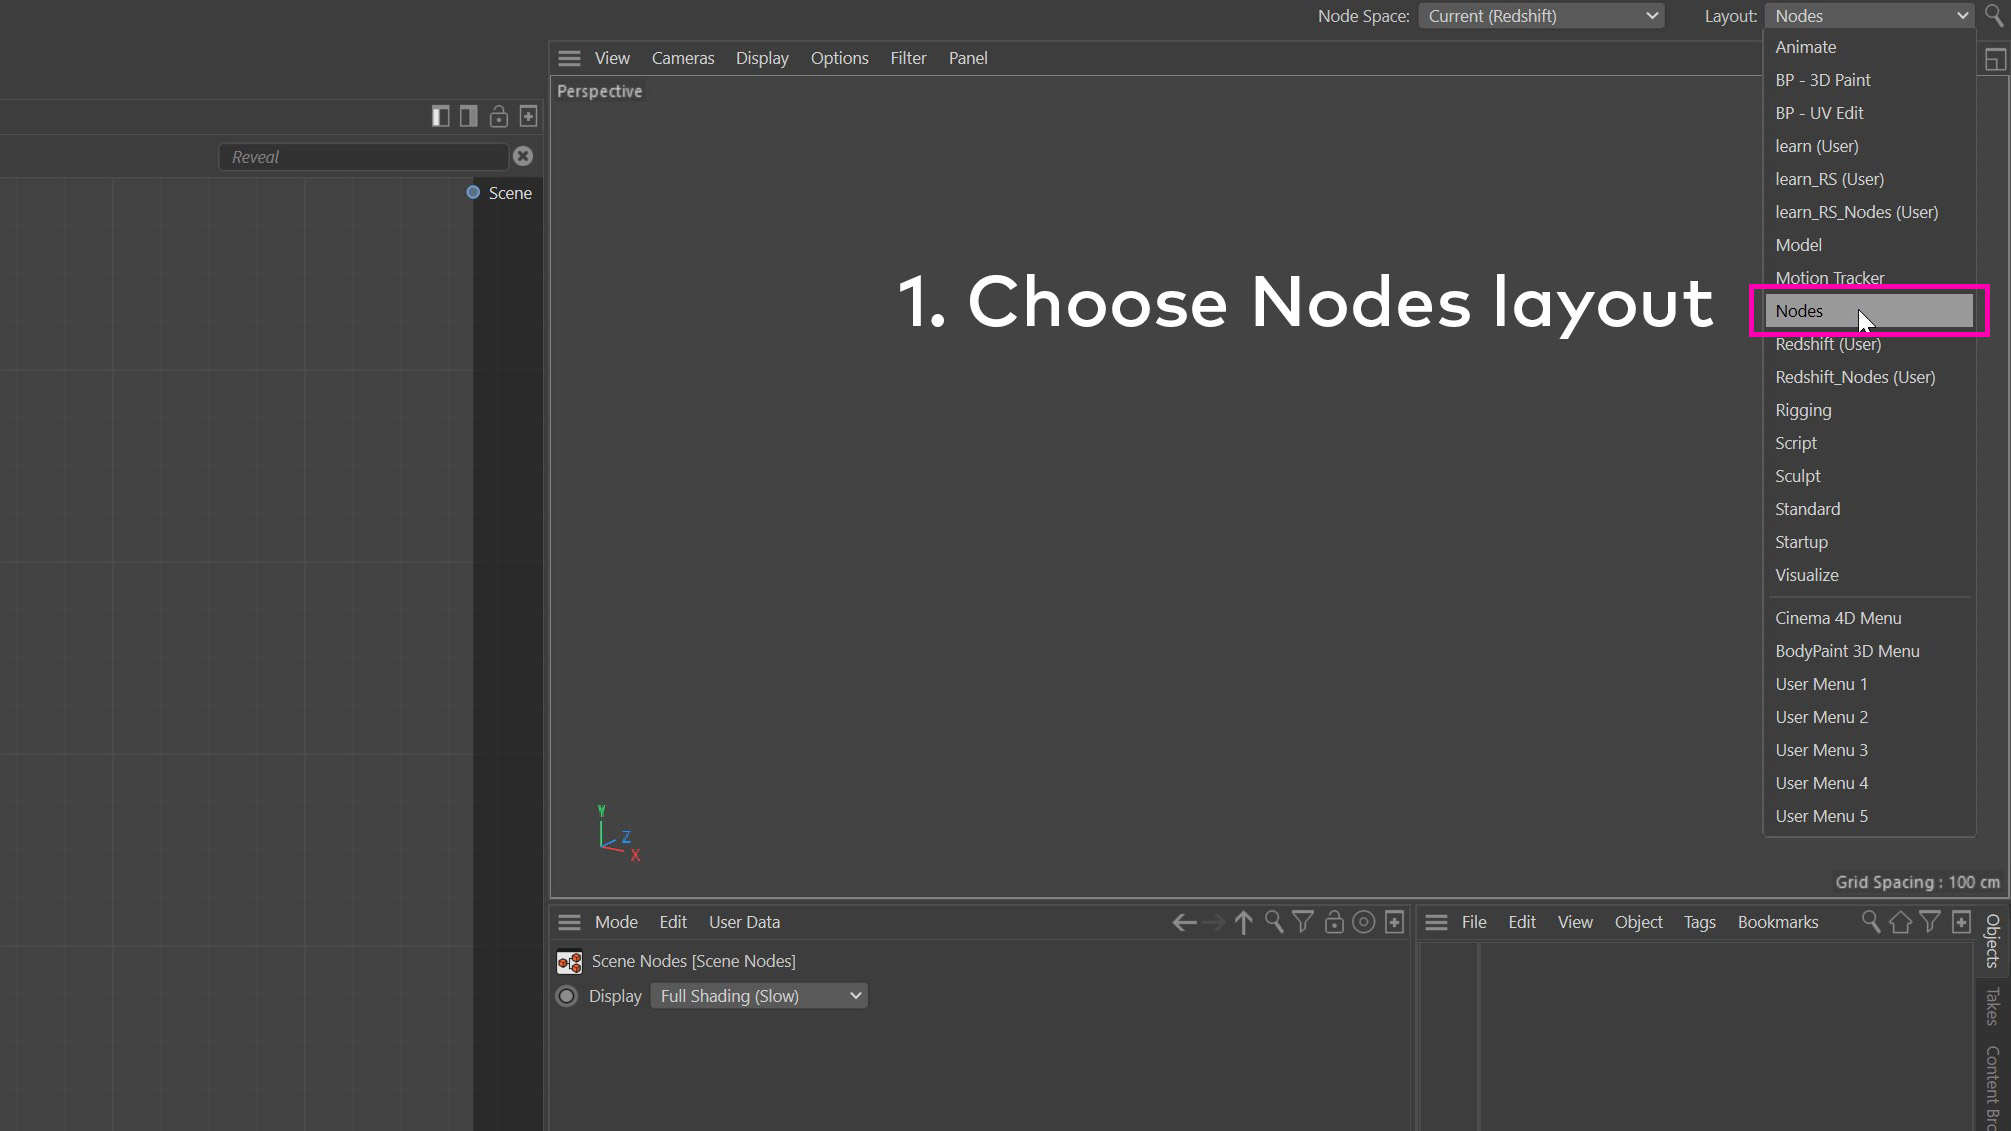
- Switch to the Nodes layout
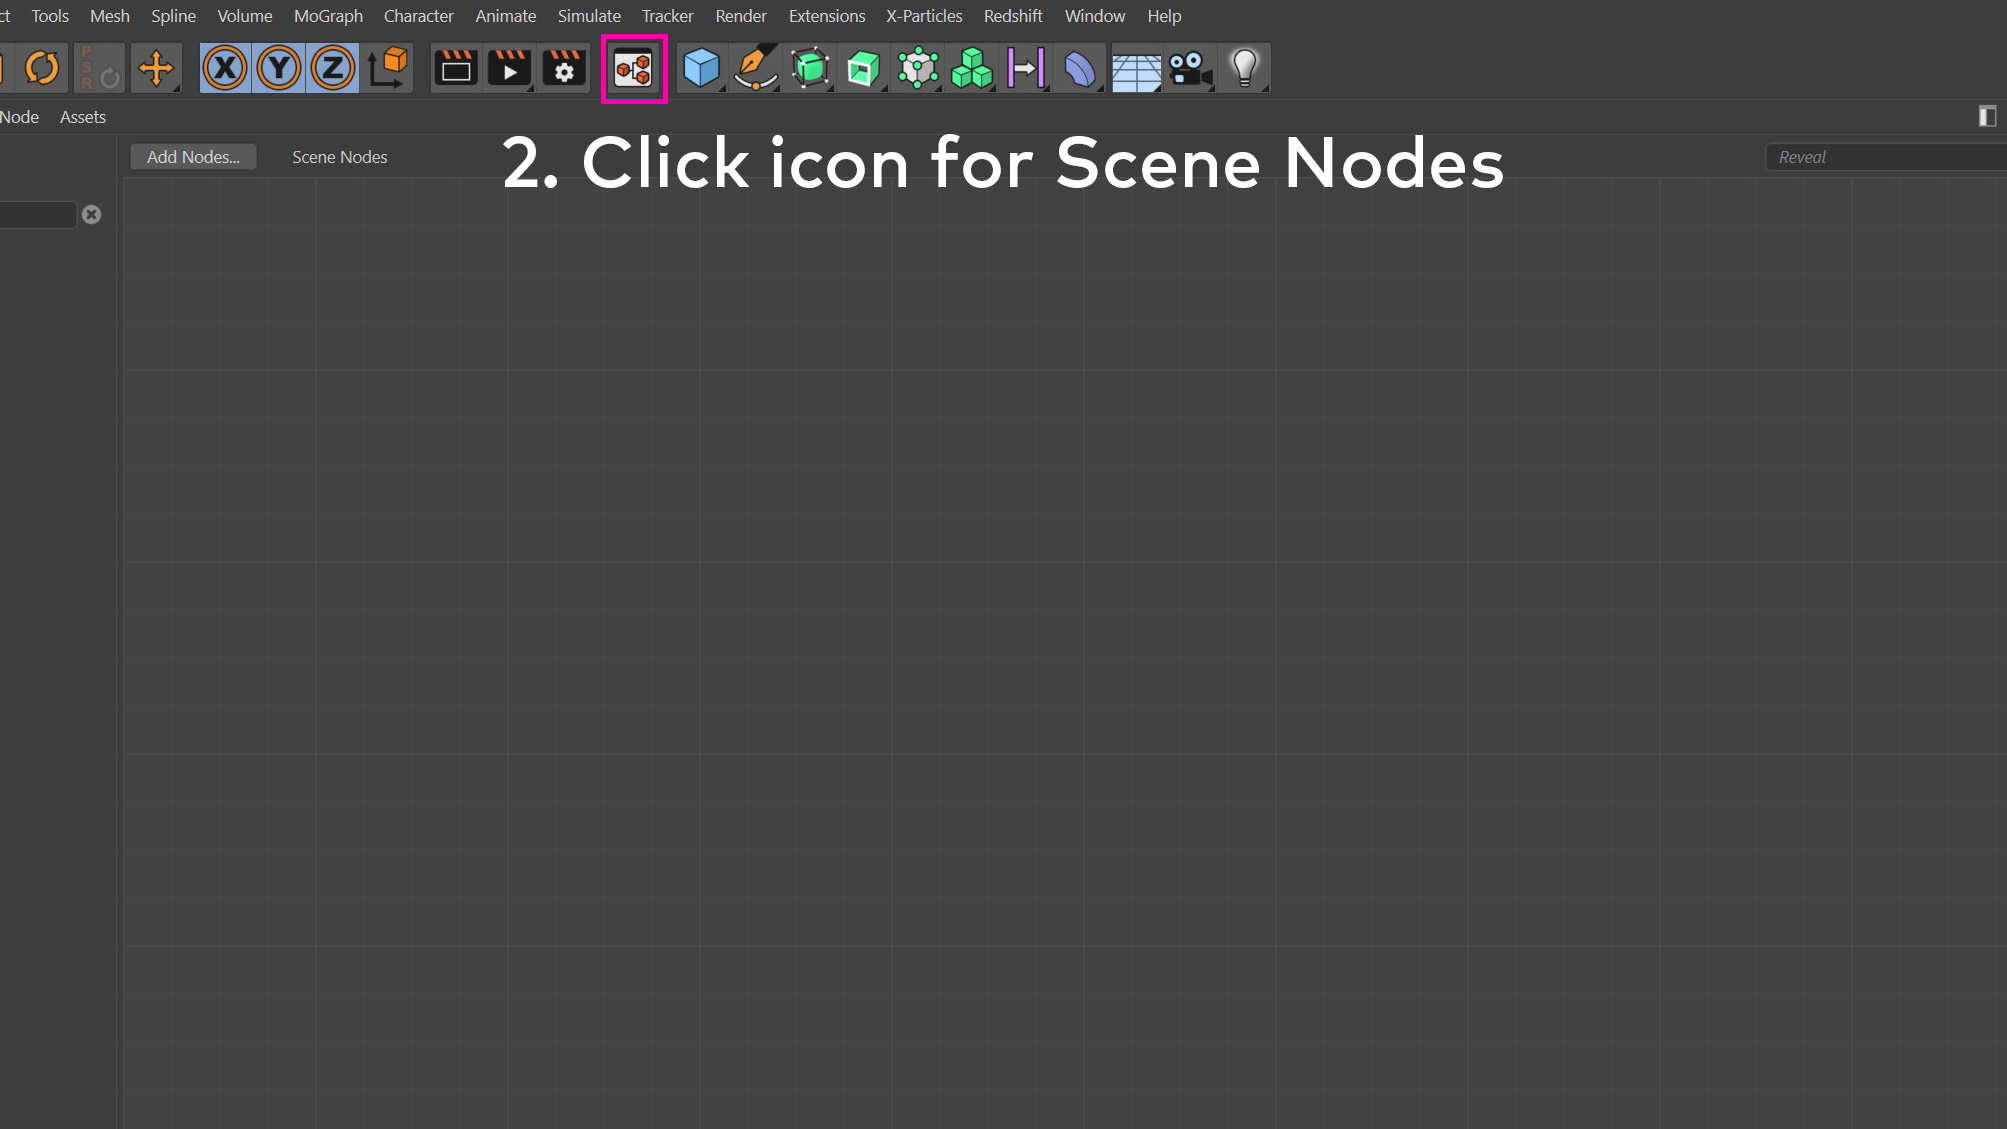
- Enable Scene Nodes by clicking on the icon
- Press C to bring up the Nodes commander, then you can type to add a node.
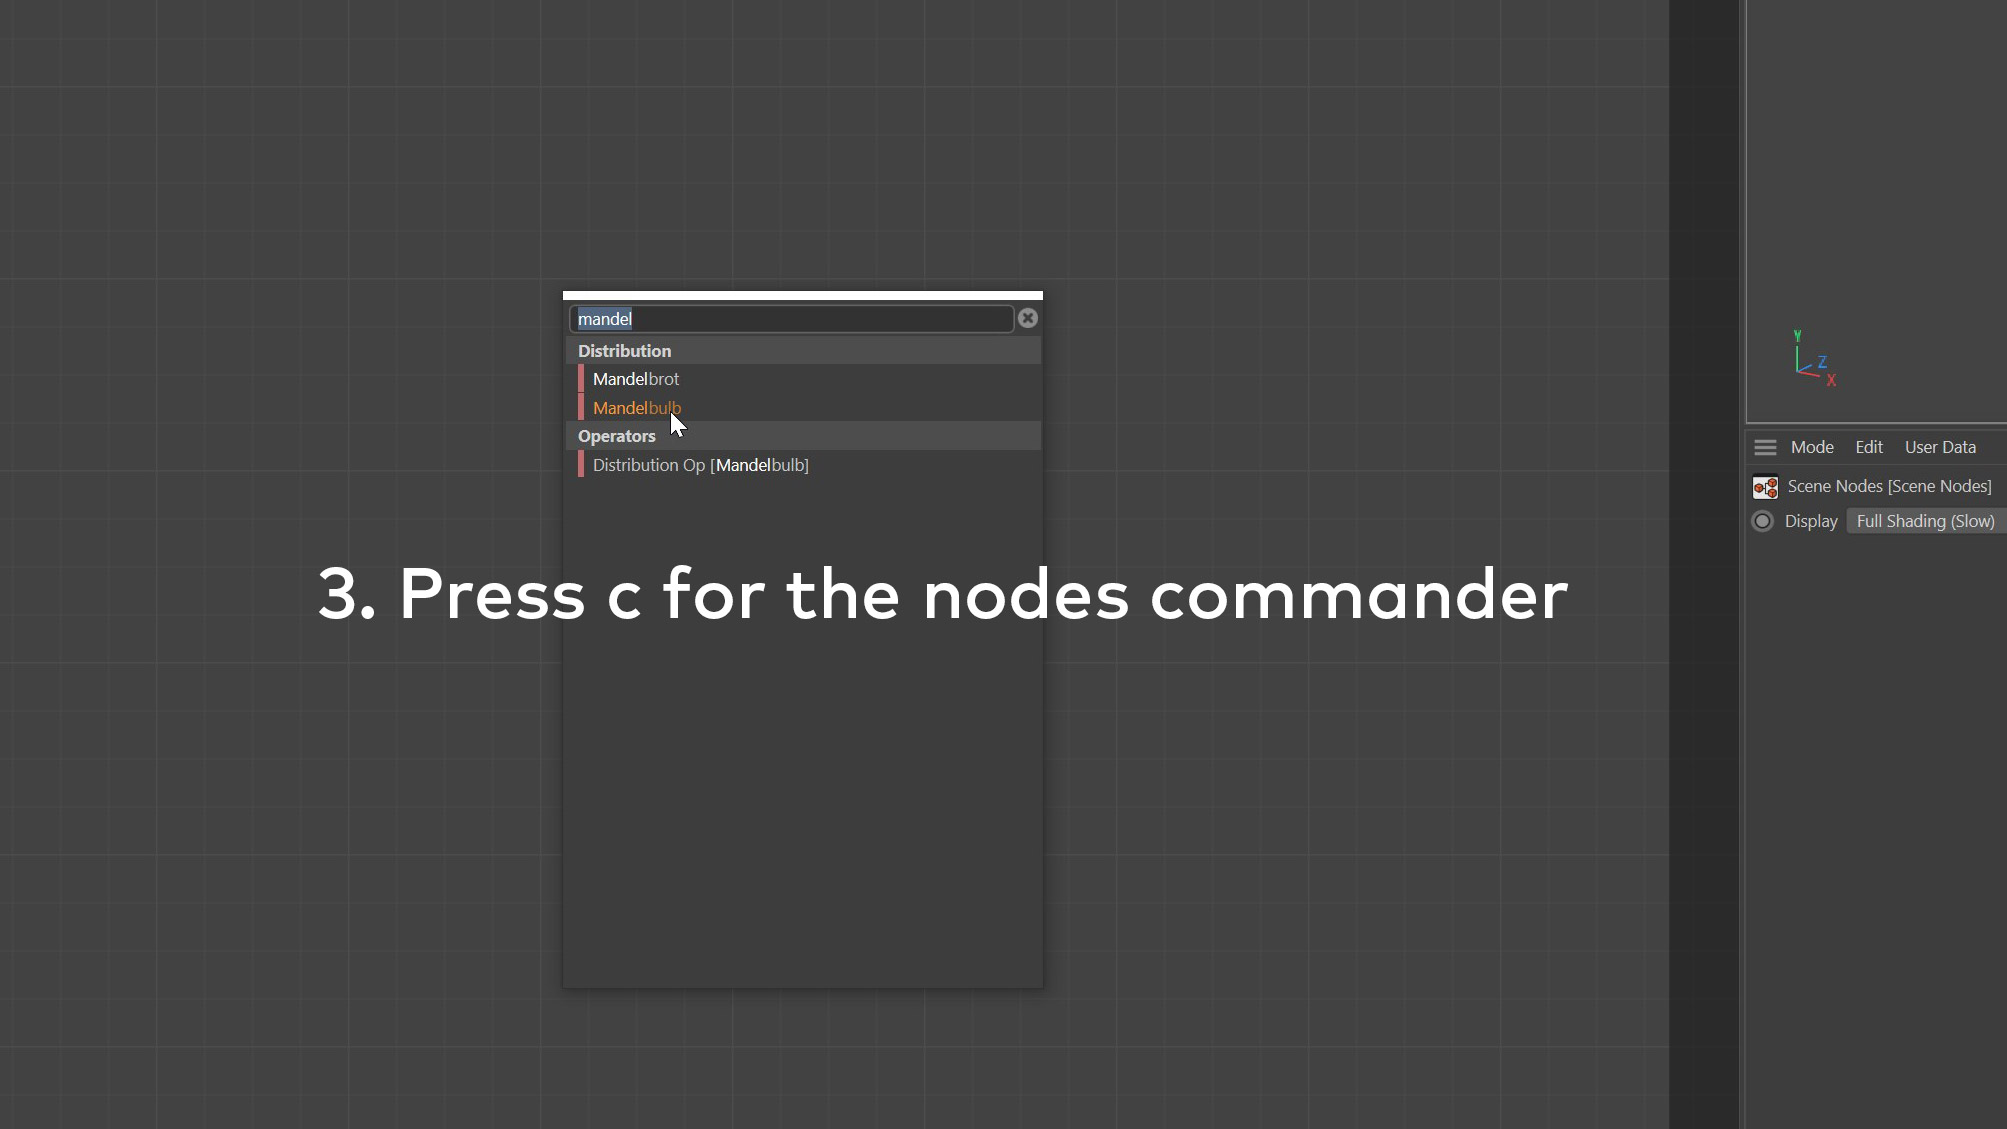
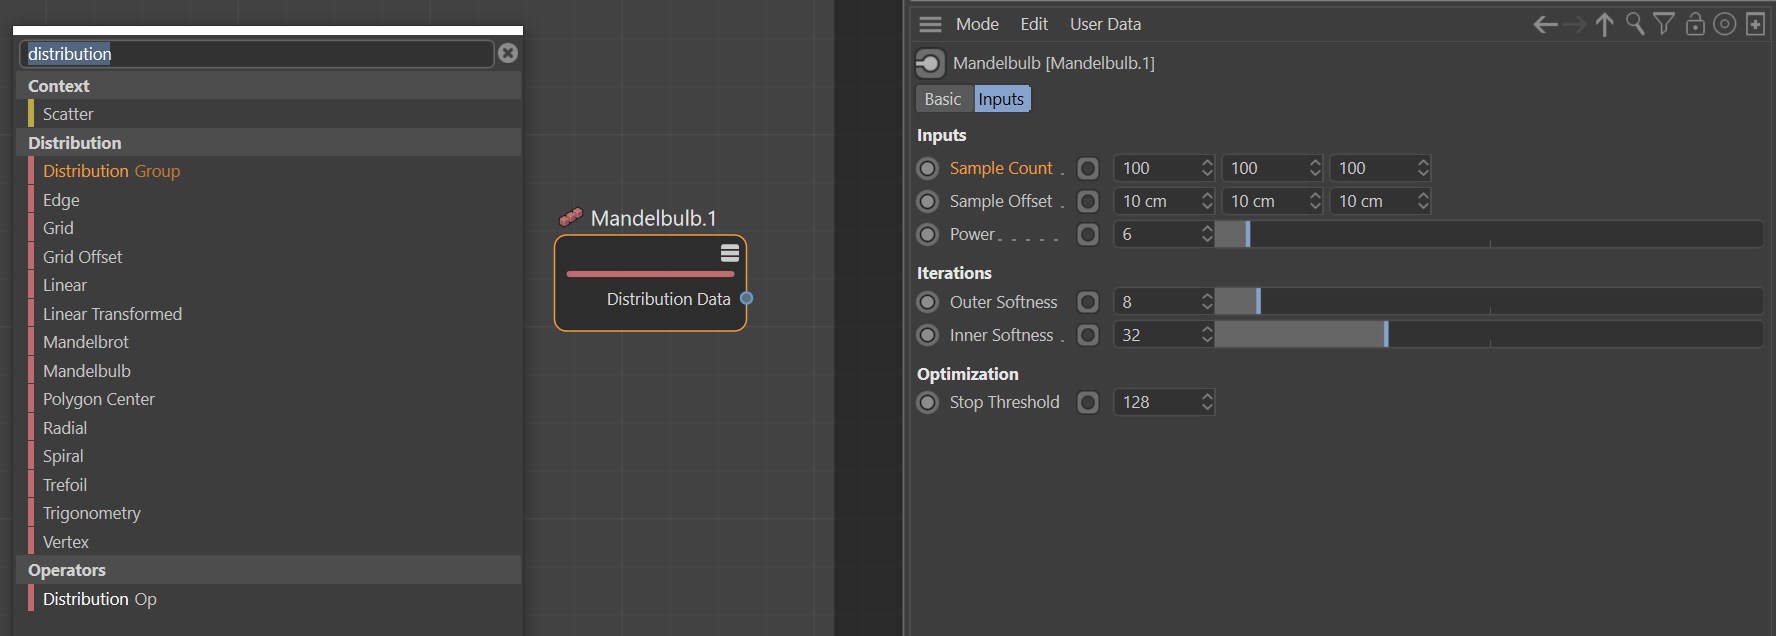
Now you’ve got this far. Type mandelbulb and then drag it onto the Node Editor. With this node selected the attribute manager will update to show available parameters. This node is a distribution node, so you will see controls for count, offset, etc. It is a little bit like a specialised Cloner, it only does this distribution type. If you press C again and type distribution, then you will see all the distribution nodes currently available.
The viewport will still look quite boringly empty, but that is because this node is only for Distribution. To add a cube for distribution, we add a Primitive Op(erator). This node allows us to change between all the primitive shapes available.
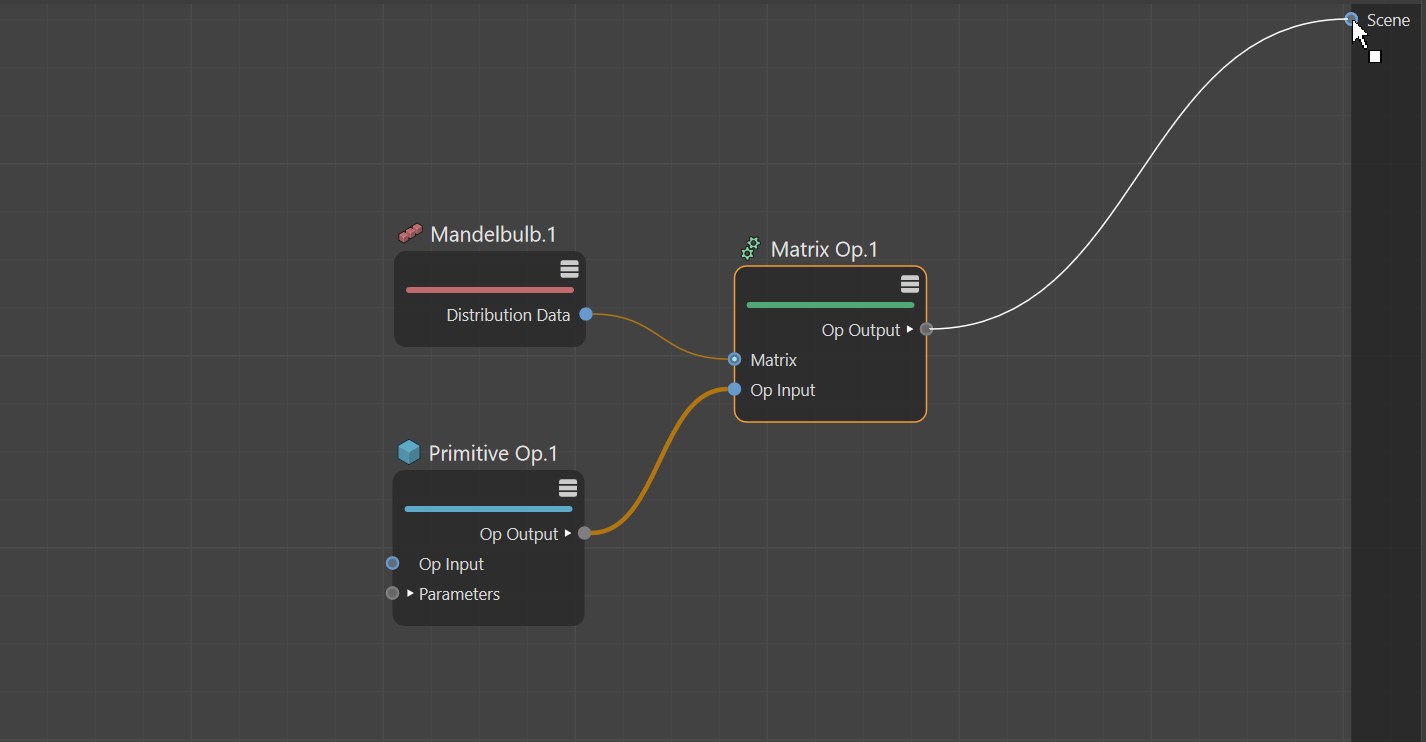
Next we need to link the distribution data to the cube. We do this with a Matrix Op. We feed the Primitive Op into Op Input and feed the Distribution Data into the Matrix input. Finally drag the Op Output from the Matrix Op onto the Scene port.
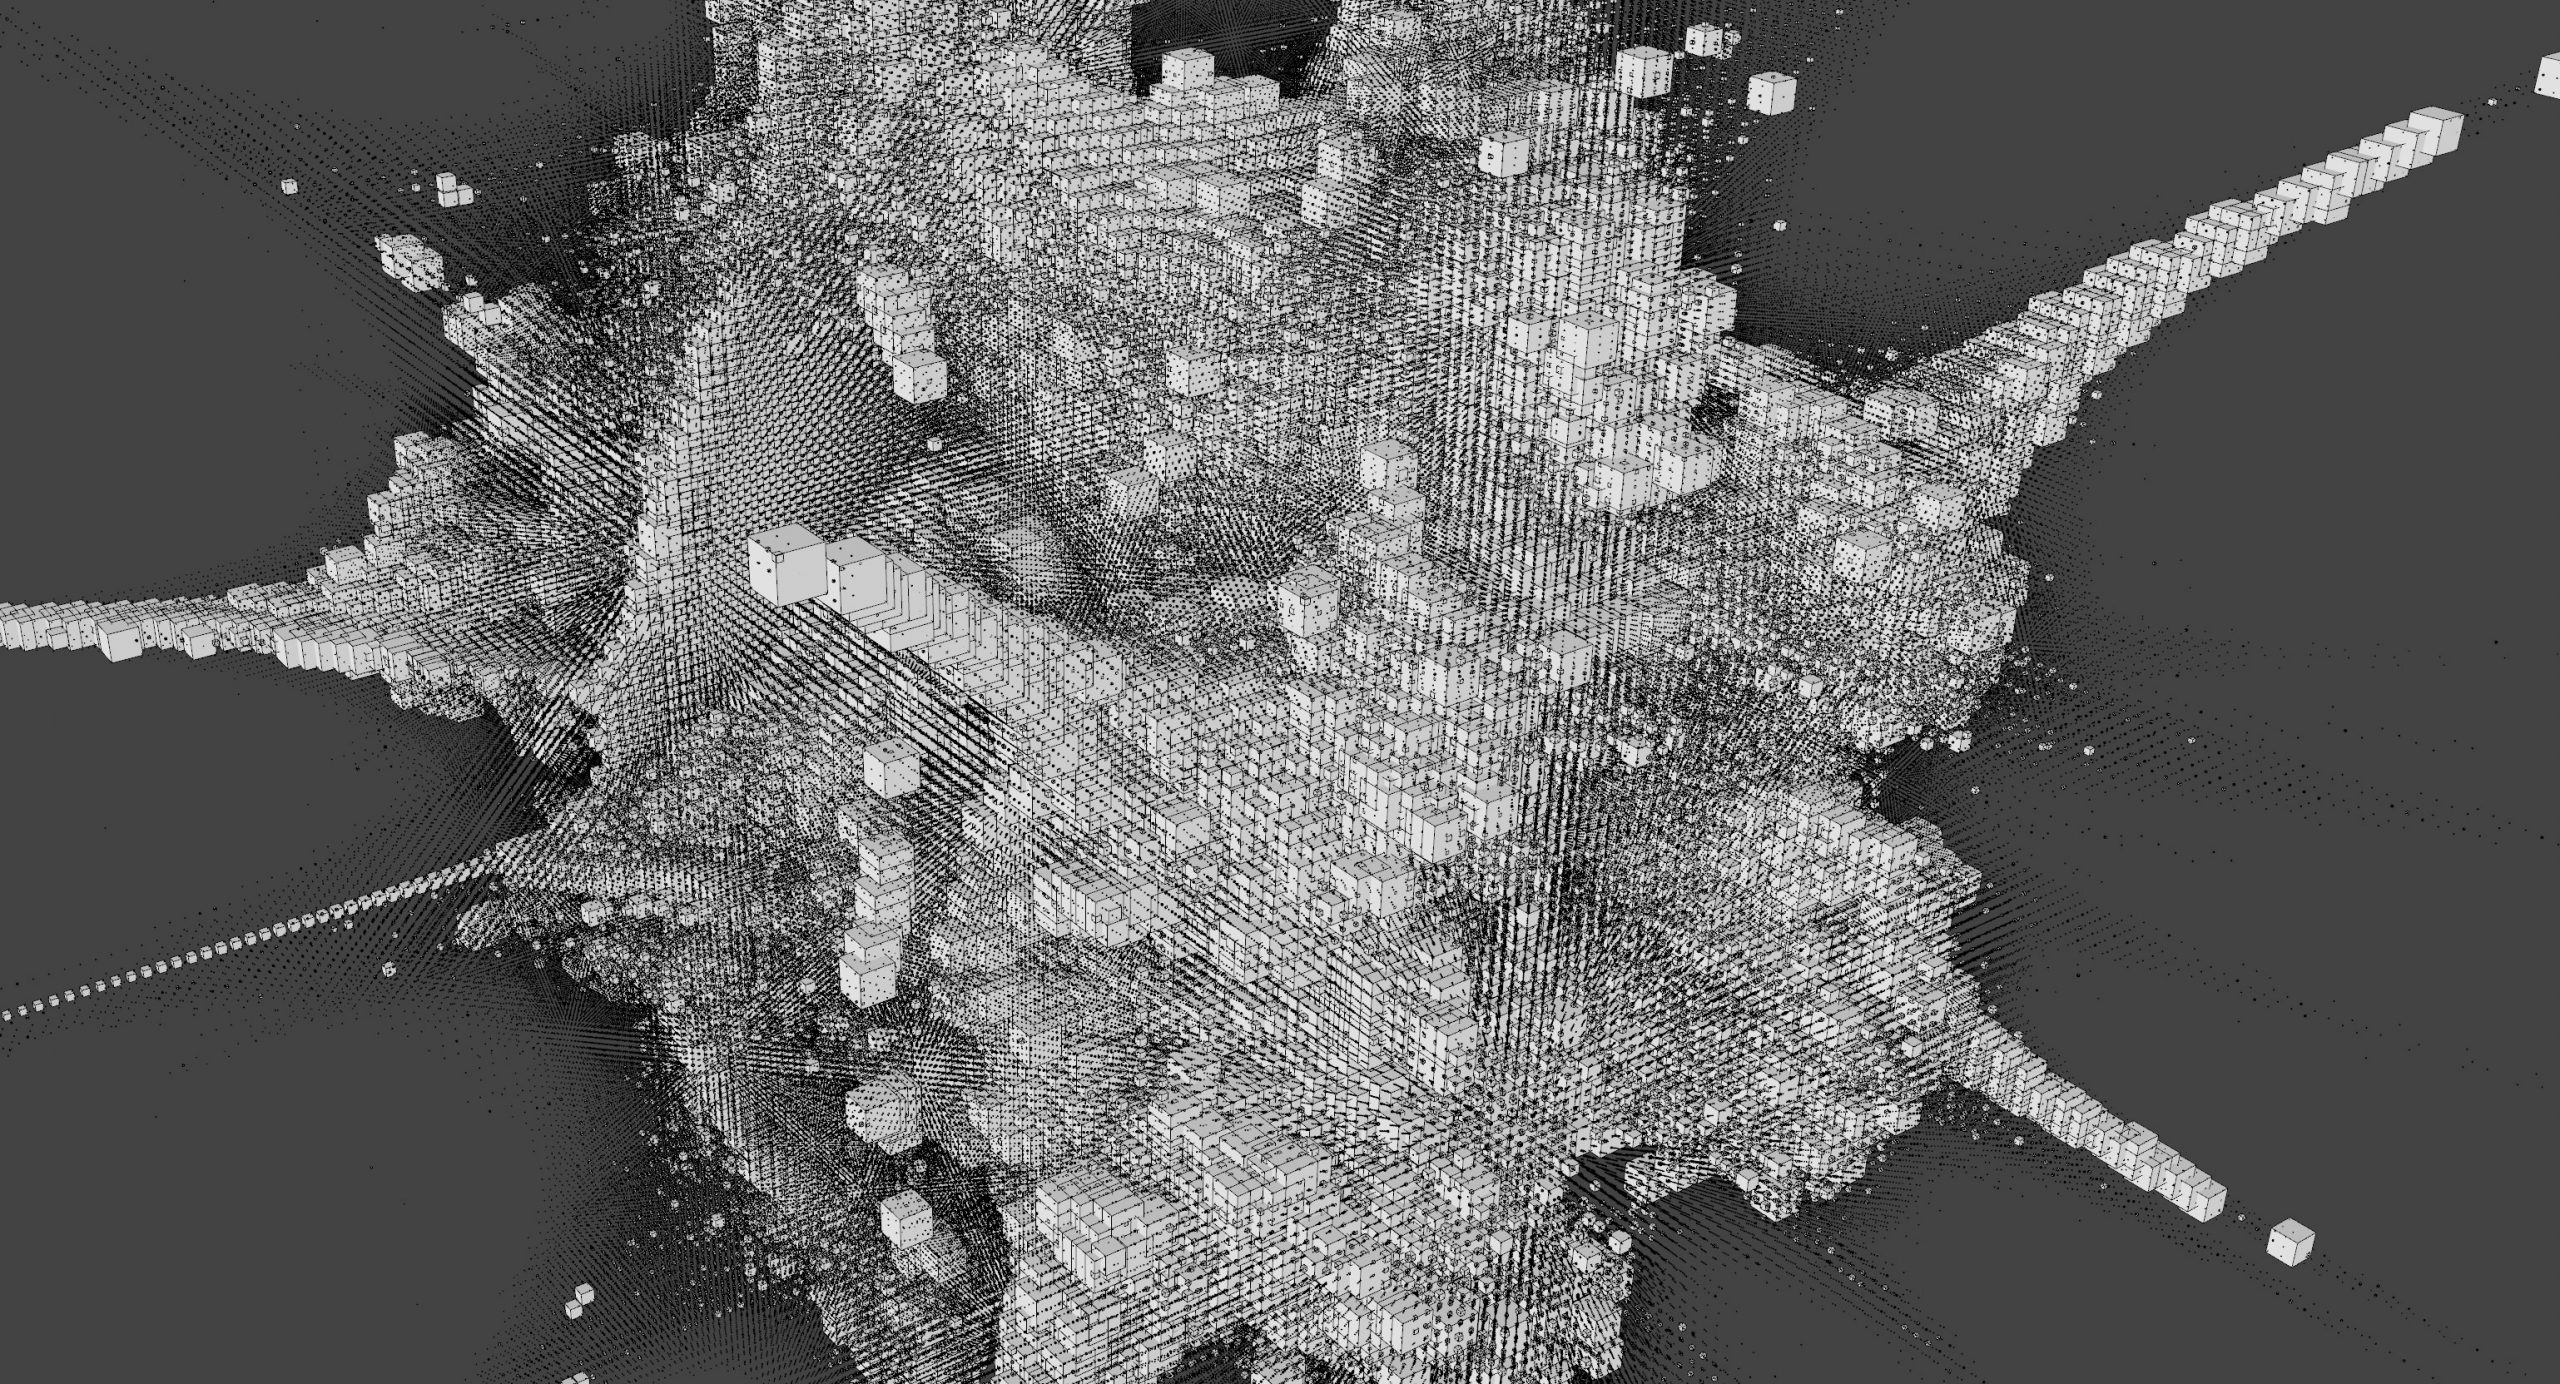
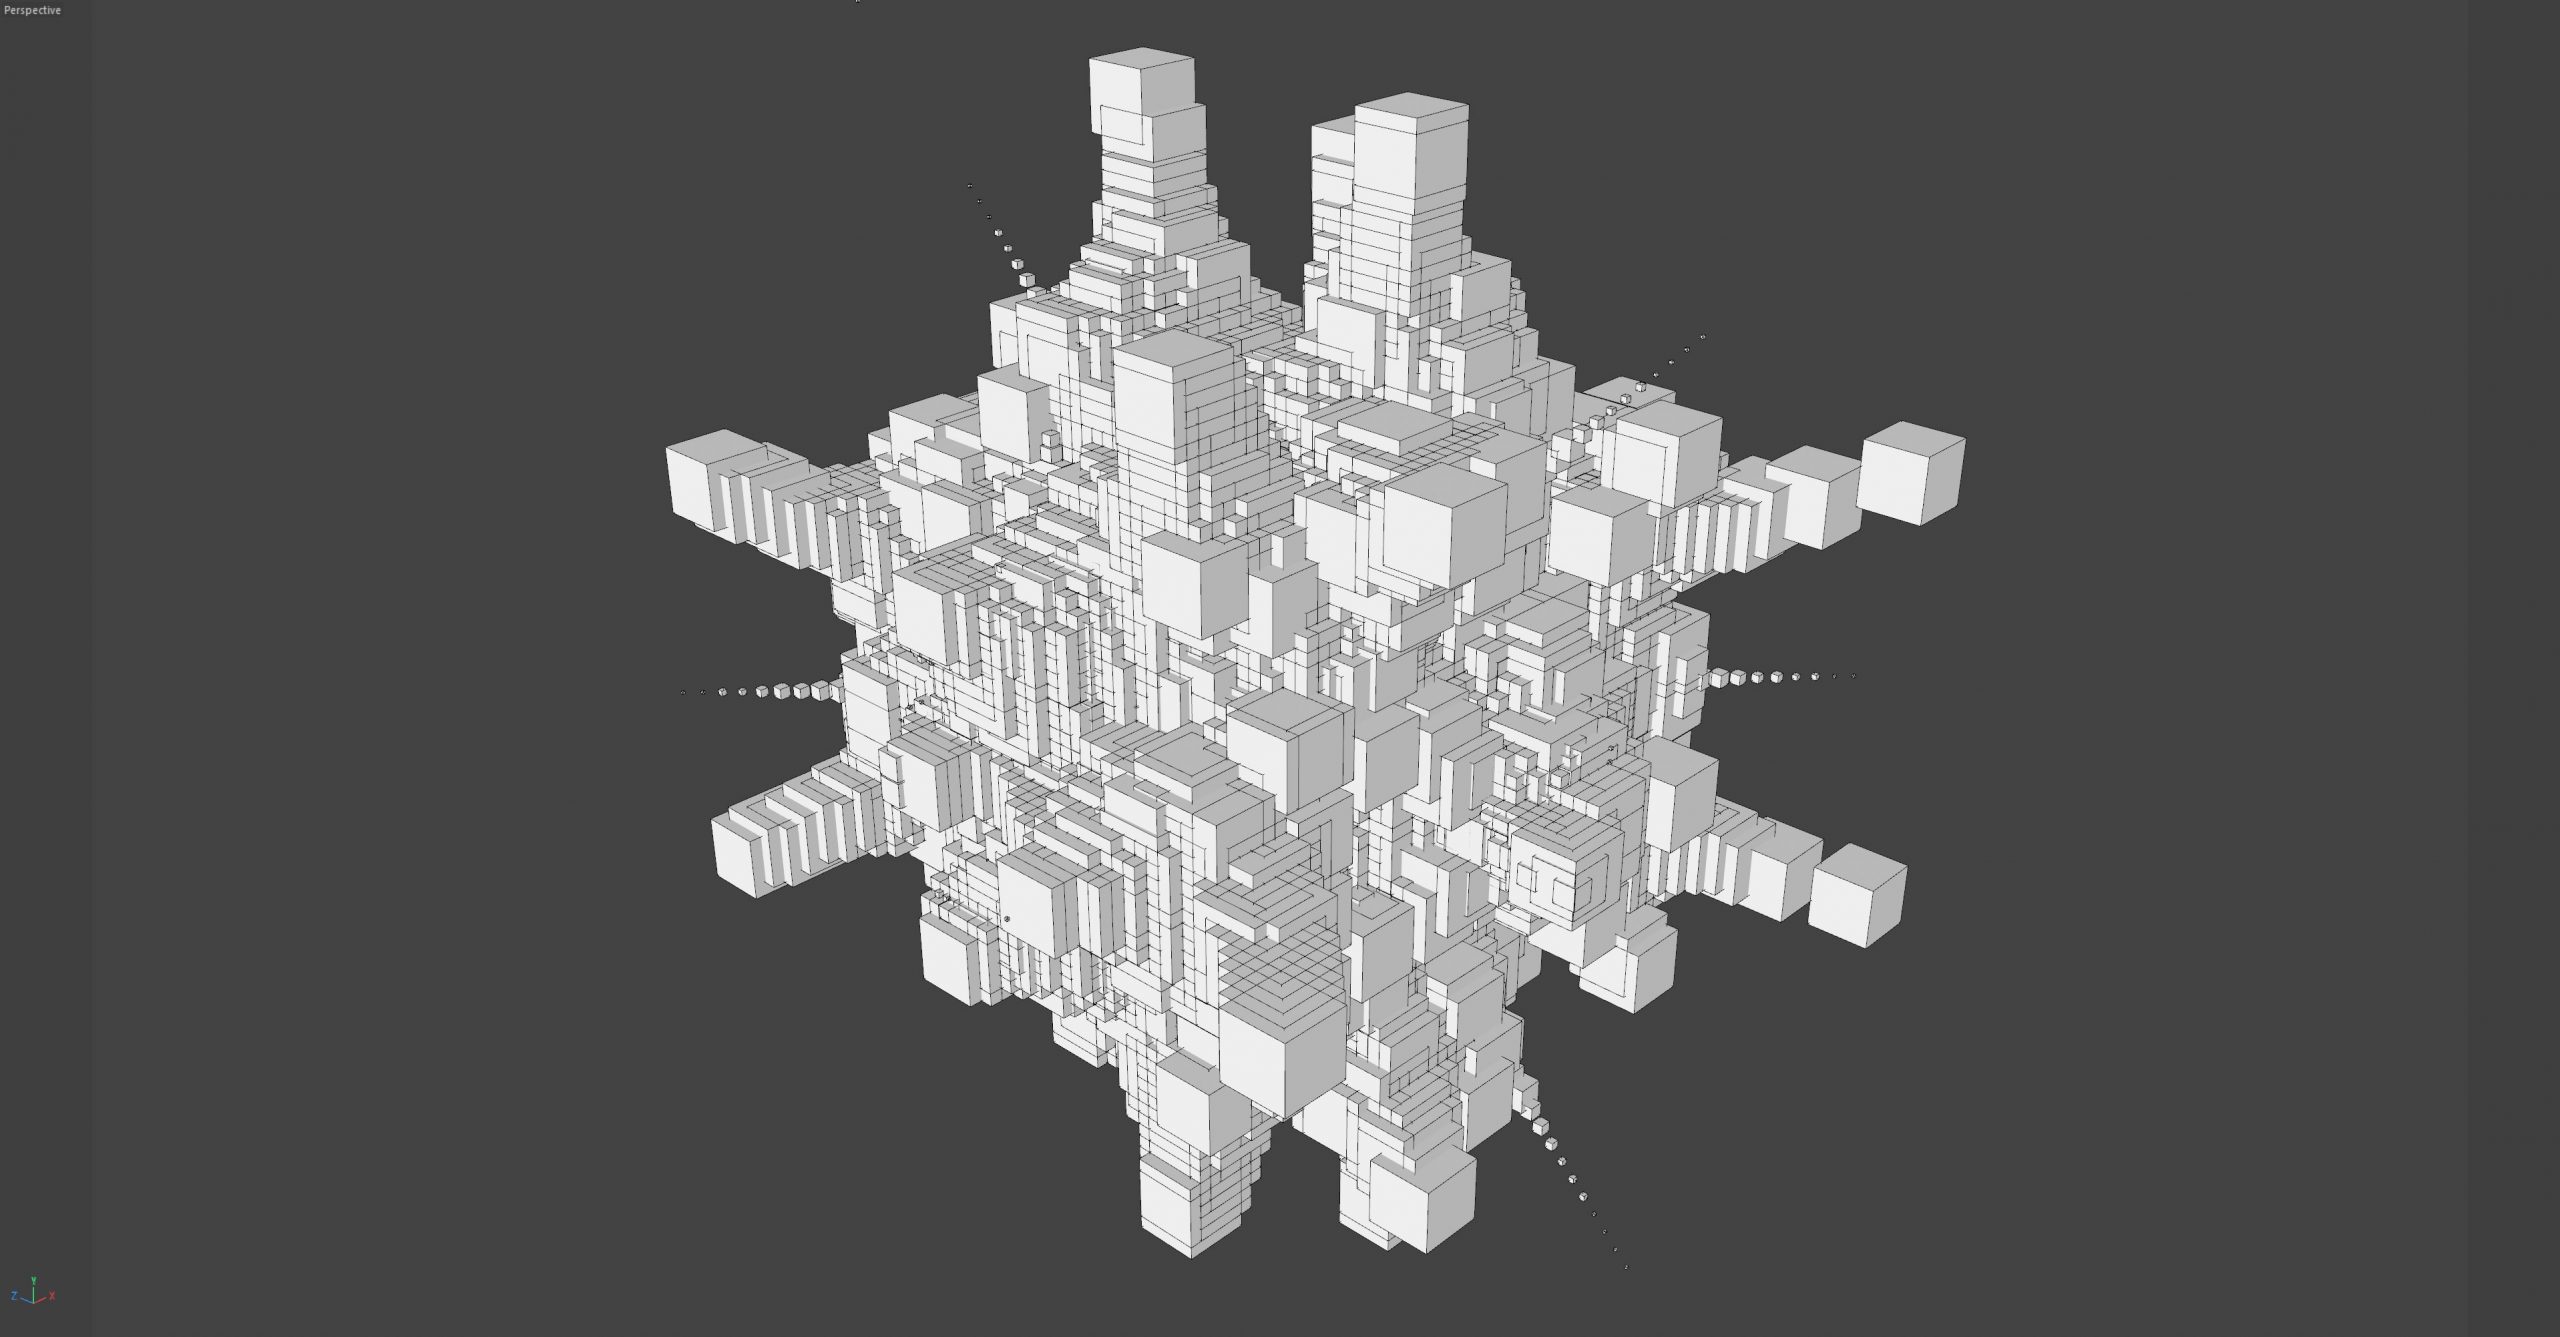
Your setup should look like the screenshot below. As soon as you connect the output to the scene, the viewport will refresh and you should see the mandelbulb distribution of cubes.
If you don’t see much detail then maybe your cube is too large, select the node and change the size in the attribute manager.
Now mess with the parameters for the mandelbulb, beware of setting the count too high, for some reason this distribution is a lot slower than many of the other distribution nodes. I’m not sure if that’s because it is tech demo or whether this fractal is computationally expensive. Probably a bit of both.
Try keeping the count to 50 x 50 x 50 to start, then once you get a feel for the parameters, push it higher on one axis at a time. 150 x 150 x 150 gets you a nice result, but it might take a few seconds to calculate. Once the screen has redrawn though you can move around nice and smoothly.
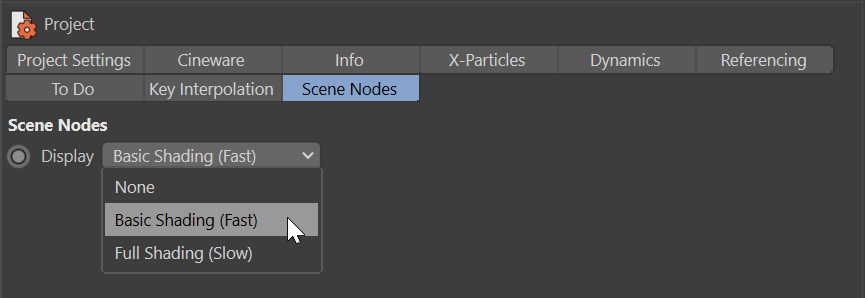
If your redraw is horrendous, then you’re probably using the old viewport settings. Switch to Project Settings (Ctrl-D), then choose Scene Nodes tab. Set the Display to Basic Shading (Fast)
That is pretty much it. Very simple to set up and now you have these nodes in place, try adding in a different distribution type and connecting that into your Matrix Op.
Here you begin your journey into the world of nodes in Cinema 4D.