Speed up your Mograph scenes in Cinema 4D using Fields and a little Xpresso.
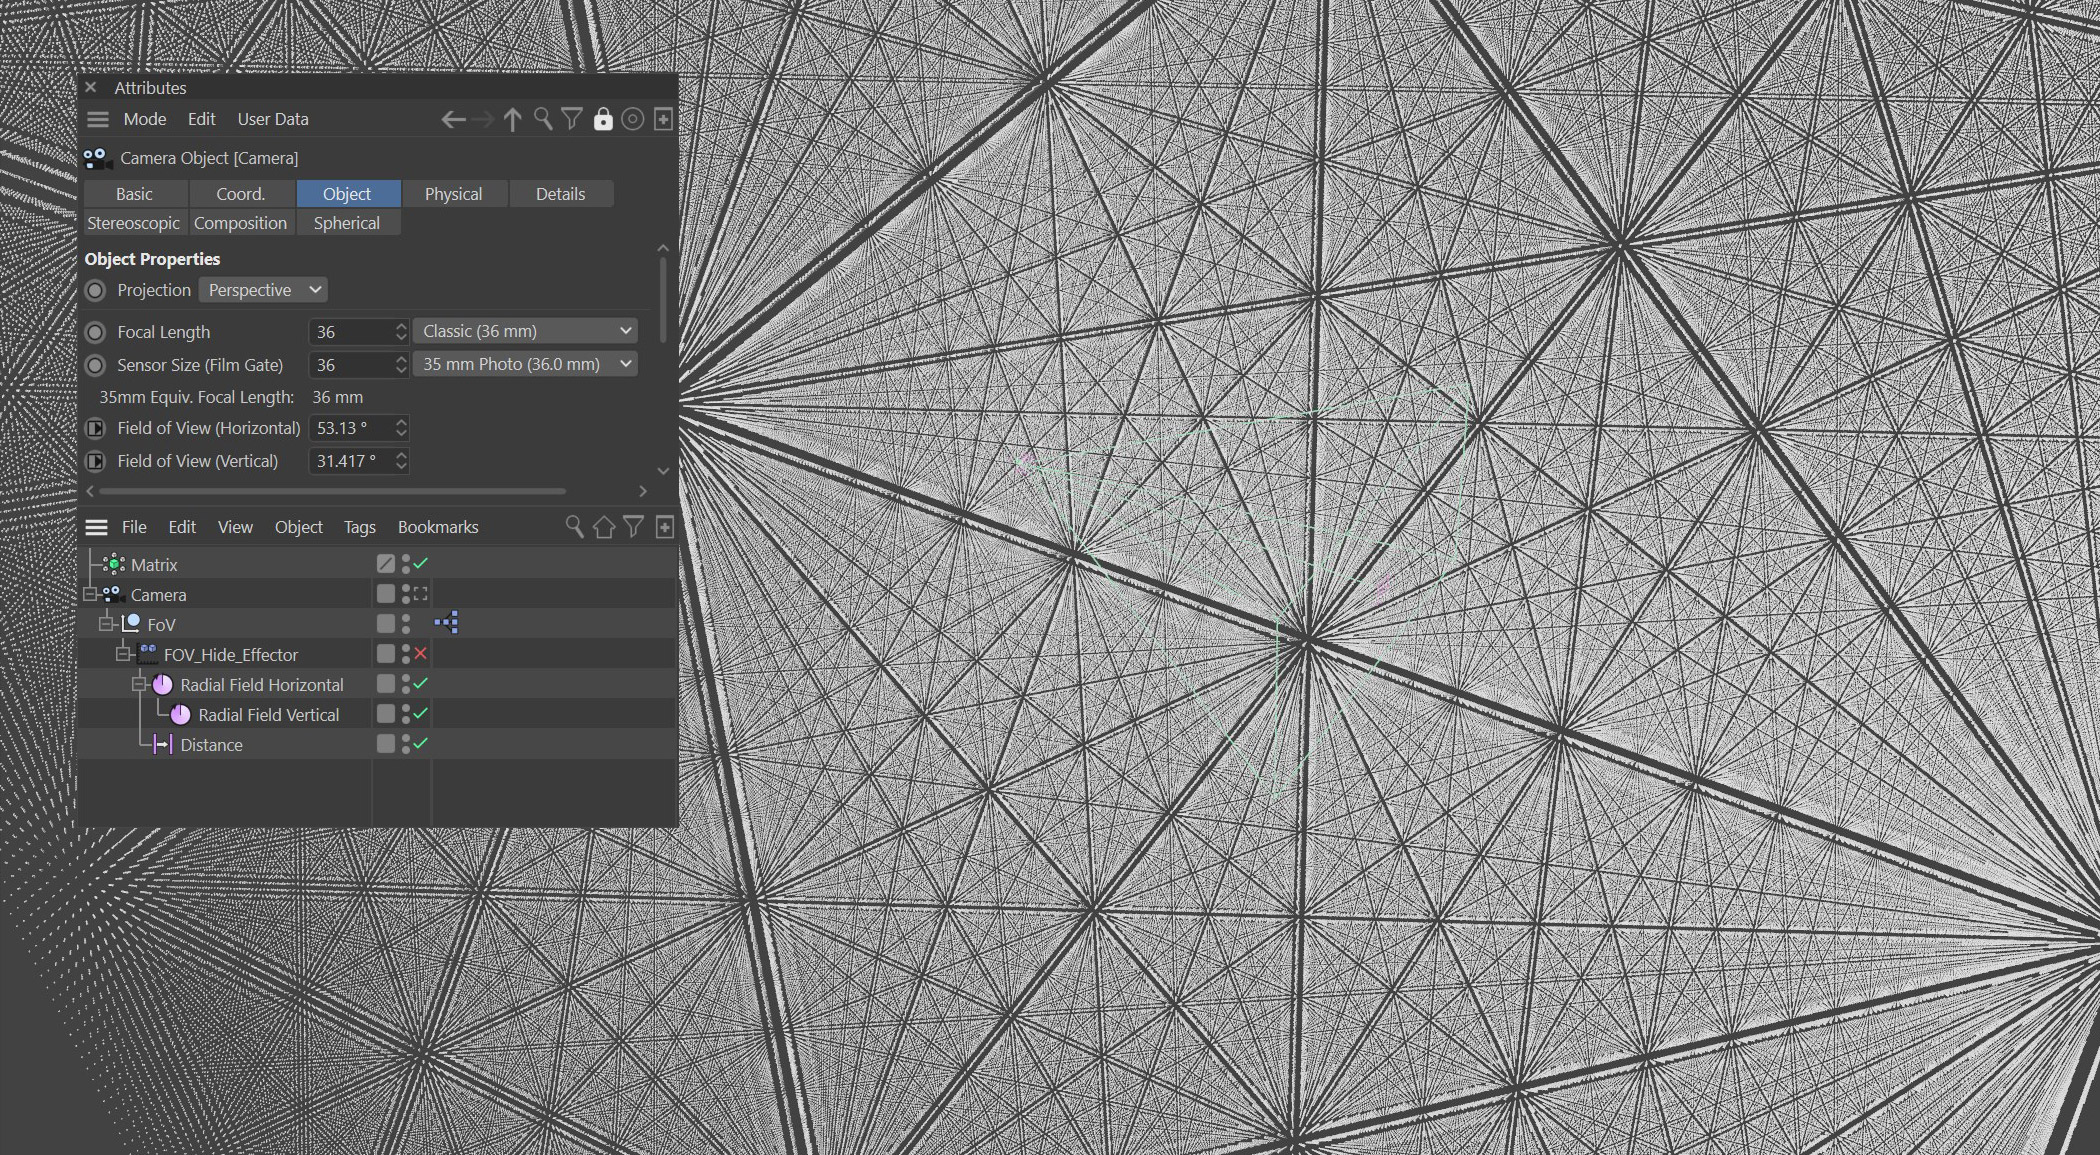
This week I’ve been working on a project which involved cloning a lot of objects over some dense landscapes. In these situations I tend to use a Matrix object, clone over the surface, and then use a Cloner in Object mode to clone onto the matrices. This workflow is fast and efficient, but the scene can become a bit laggy when you have hundreds of thousands of matrices to display and animate.
There are a few solutions to this, you could build it with Scene Nodes, realistically they’re not production ready and it could be risky. The approach that I use is to create an effector that essentially culls all the clones outside of the camera field of view. This can offer a dramatic improvement to performance in scenes with a lot of clones.
I tweeted about this a while ago and this week after using this setup again, I decided to write this short tutorial where I’ll show you how to build this setup yourself. We’ll look at the basic principle and then how to use Xpresso to link parameters together in order to automate the process.
It is really simple and once complete, you’ll then have another handy asset for your library.
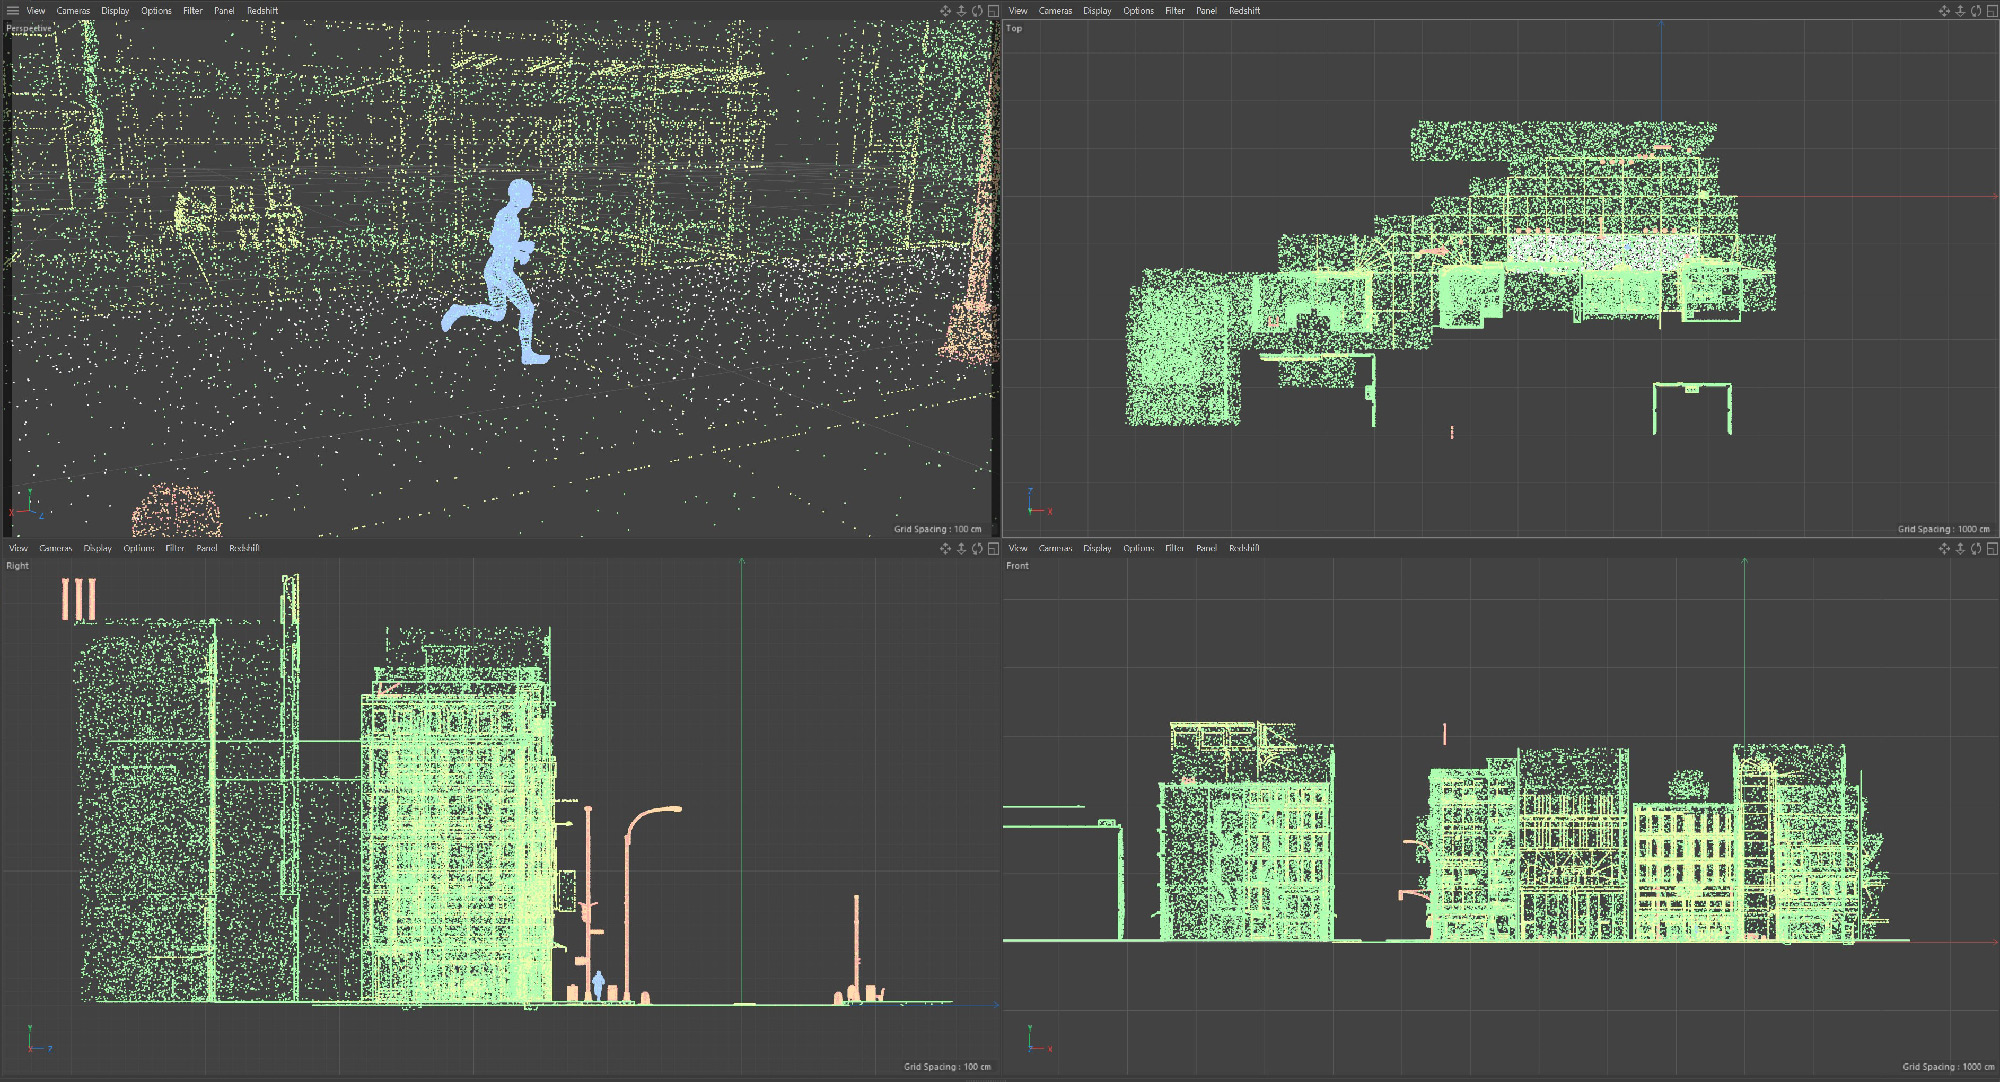
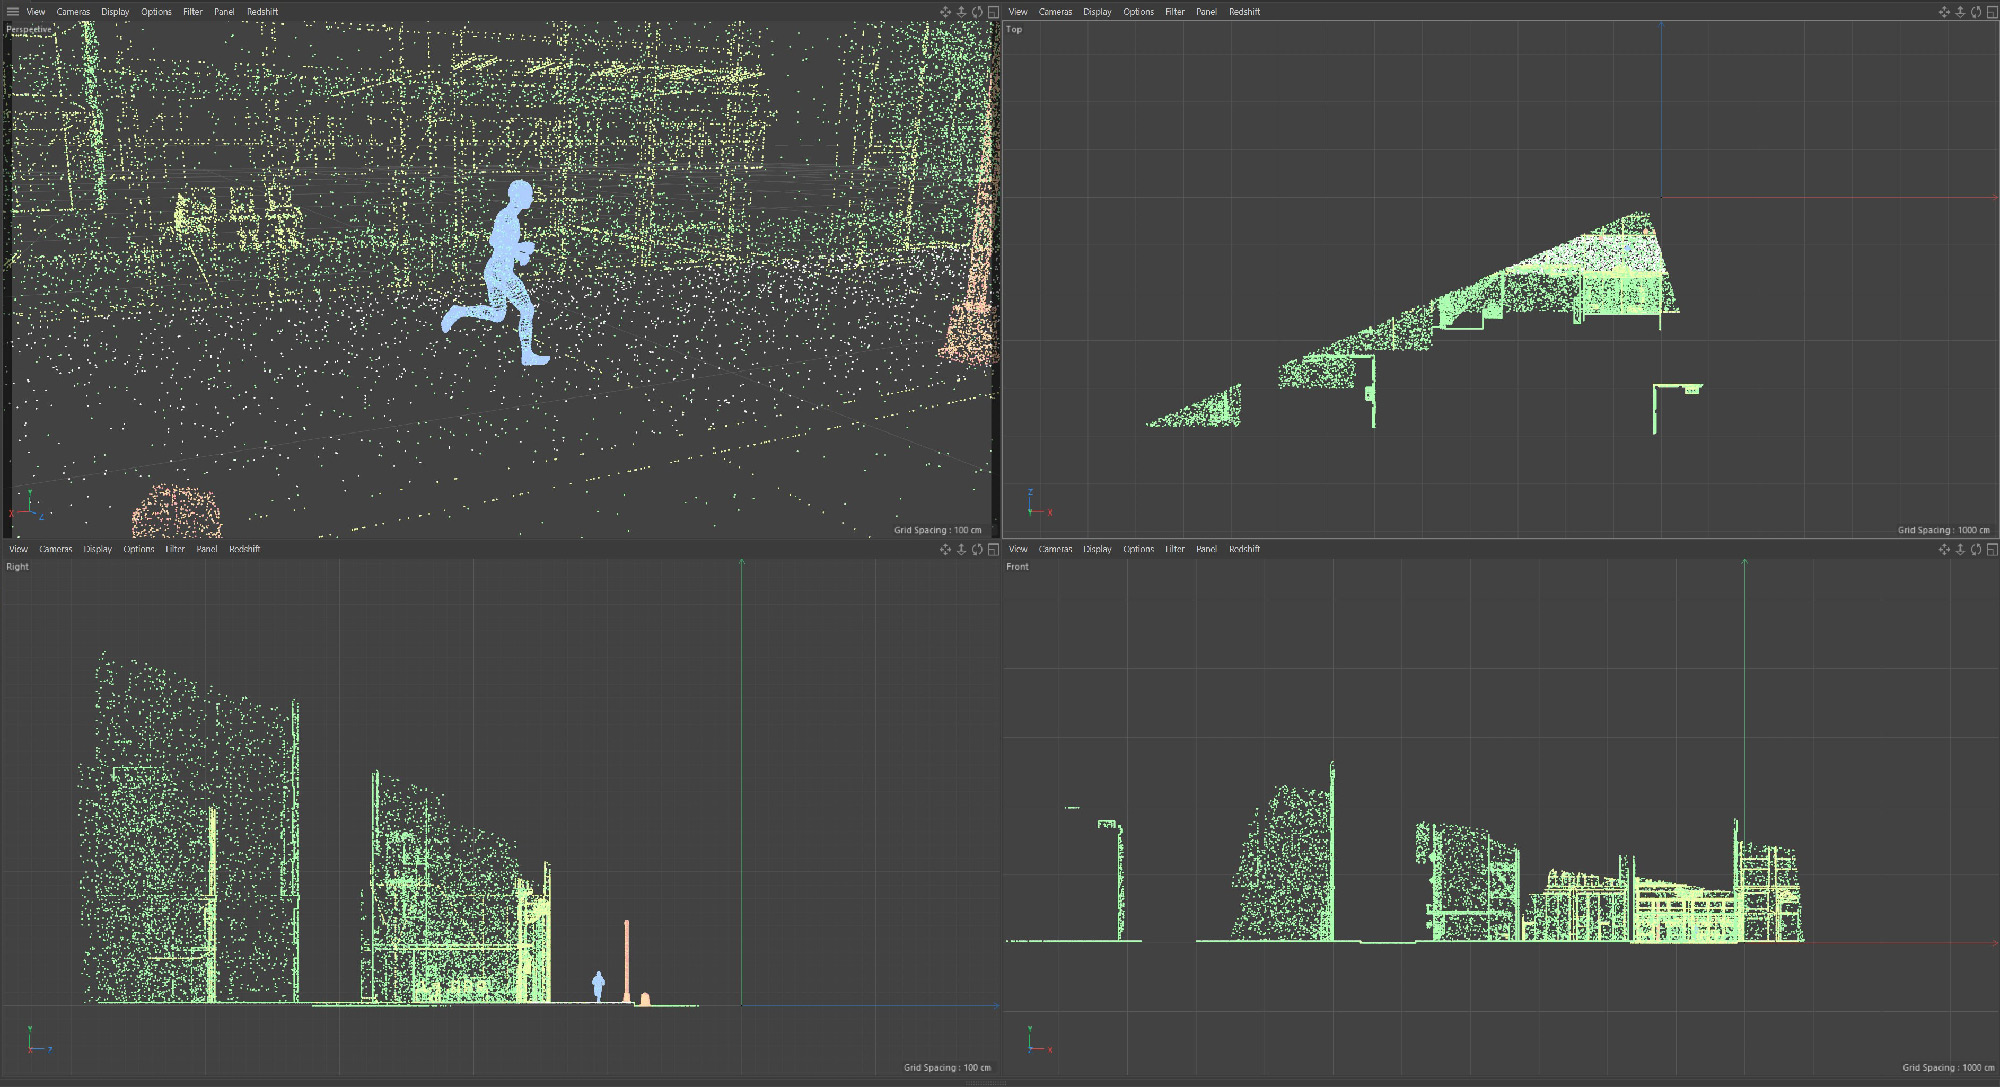

If you look at the images above, you can see a real world example of this technique in use. These screenshots are from MACHINE a film about artificial intelligence that Luxx worked on back in 2019. In this shot, there is a guy running through the streets, the buildings are made with wires representing networks and data. To do this we cloned matrices across the city and then used Ubertracer to connect this into a wired environment. You can see the Cinema 4D editor viewport before and after this FOV effector is applied. The matrices are culled from the majority of the scene, making everything much faster and smoother to work with, but from the Camera point of view, nothing changes.
how do I set this up?
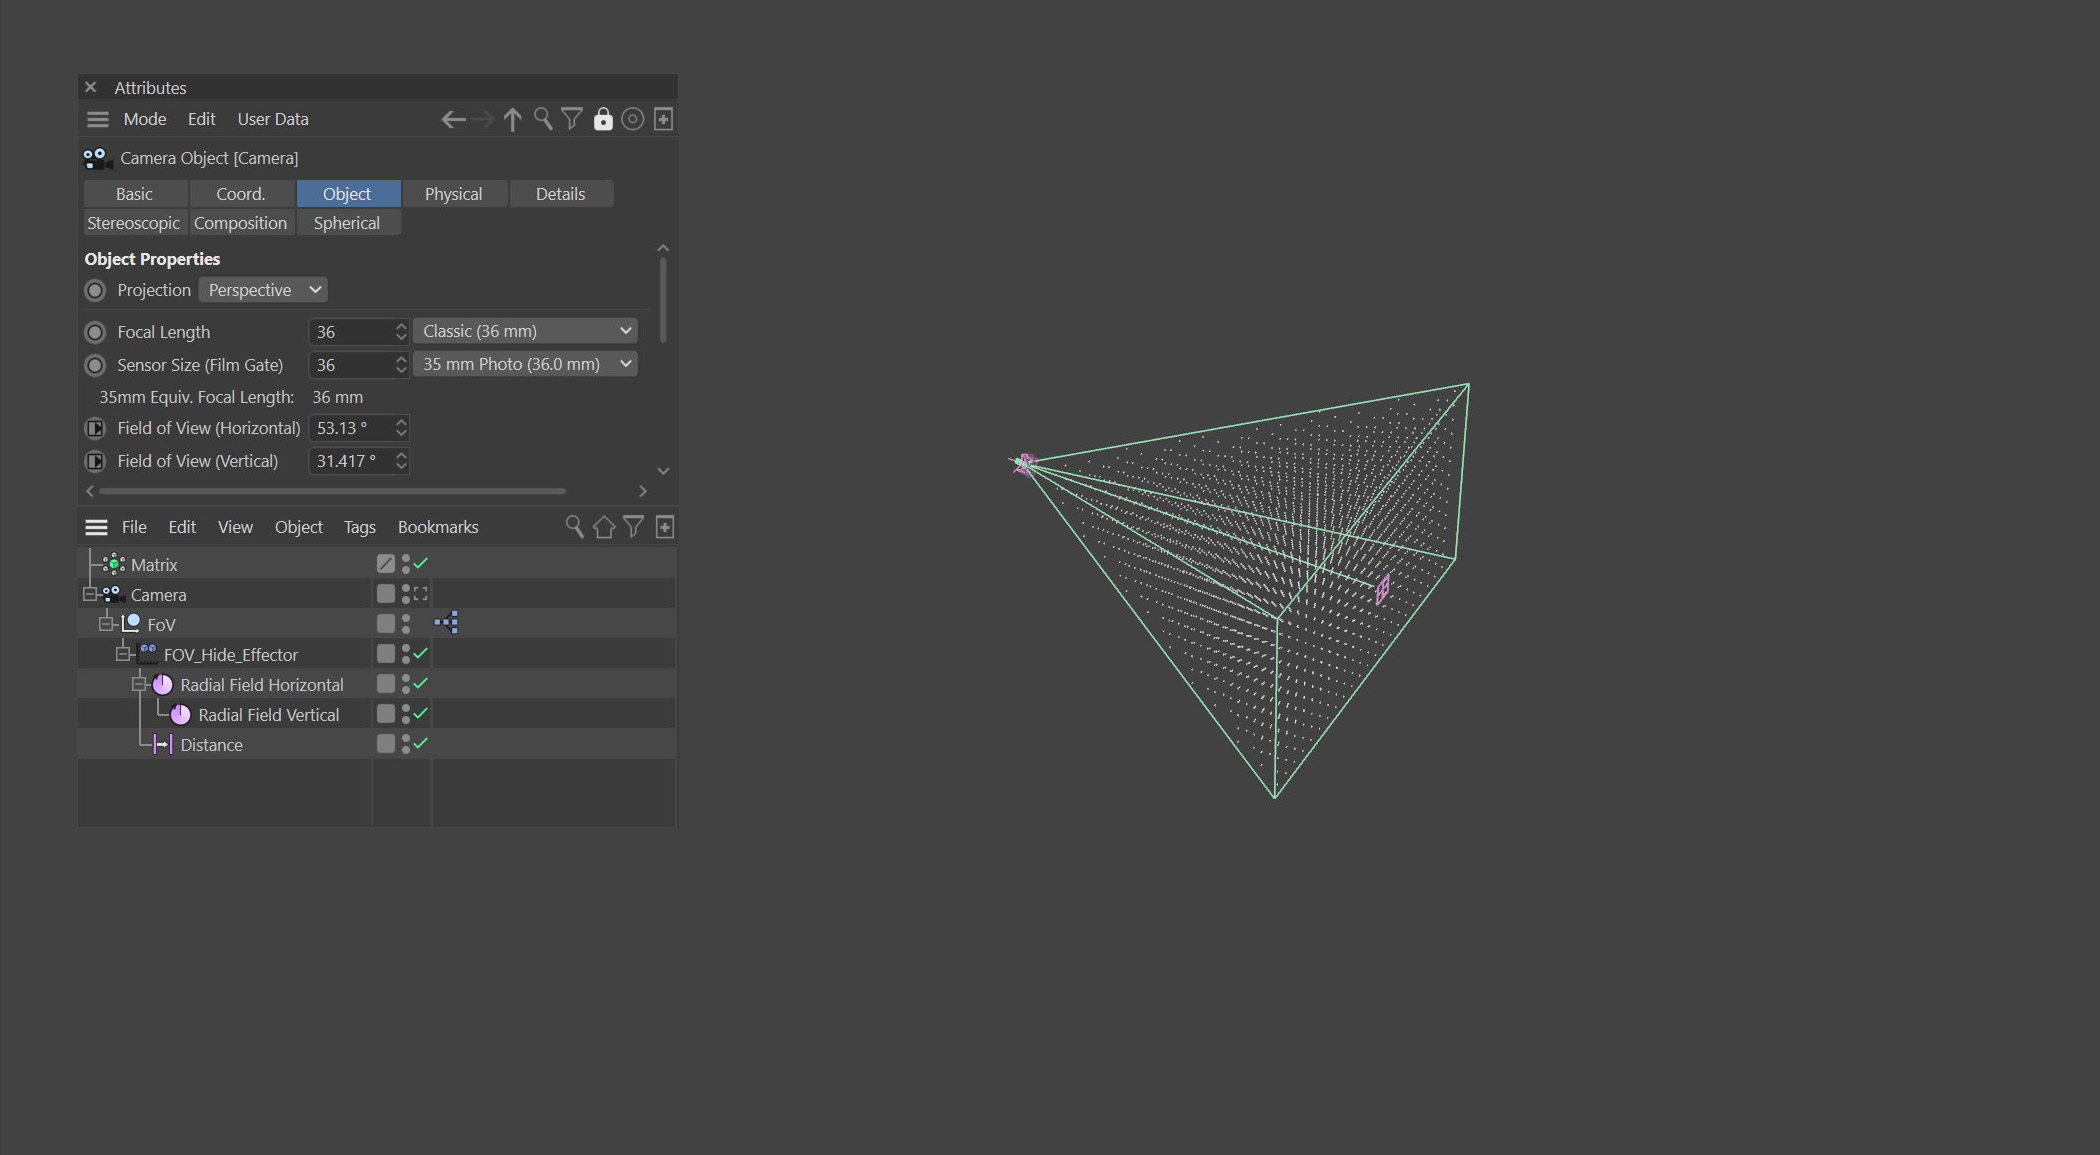
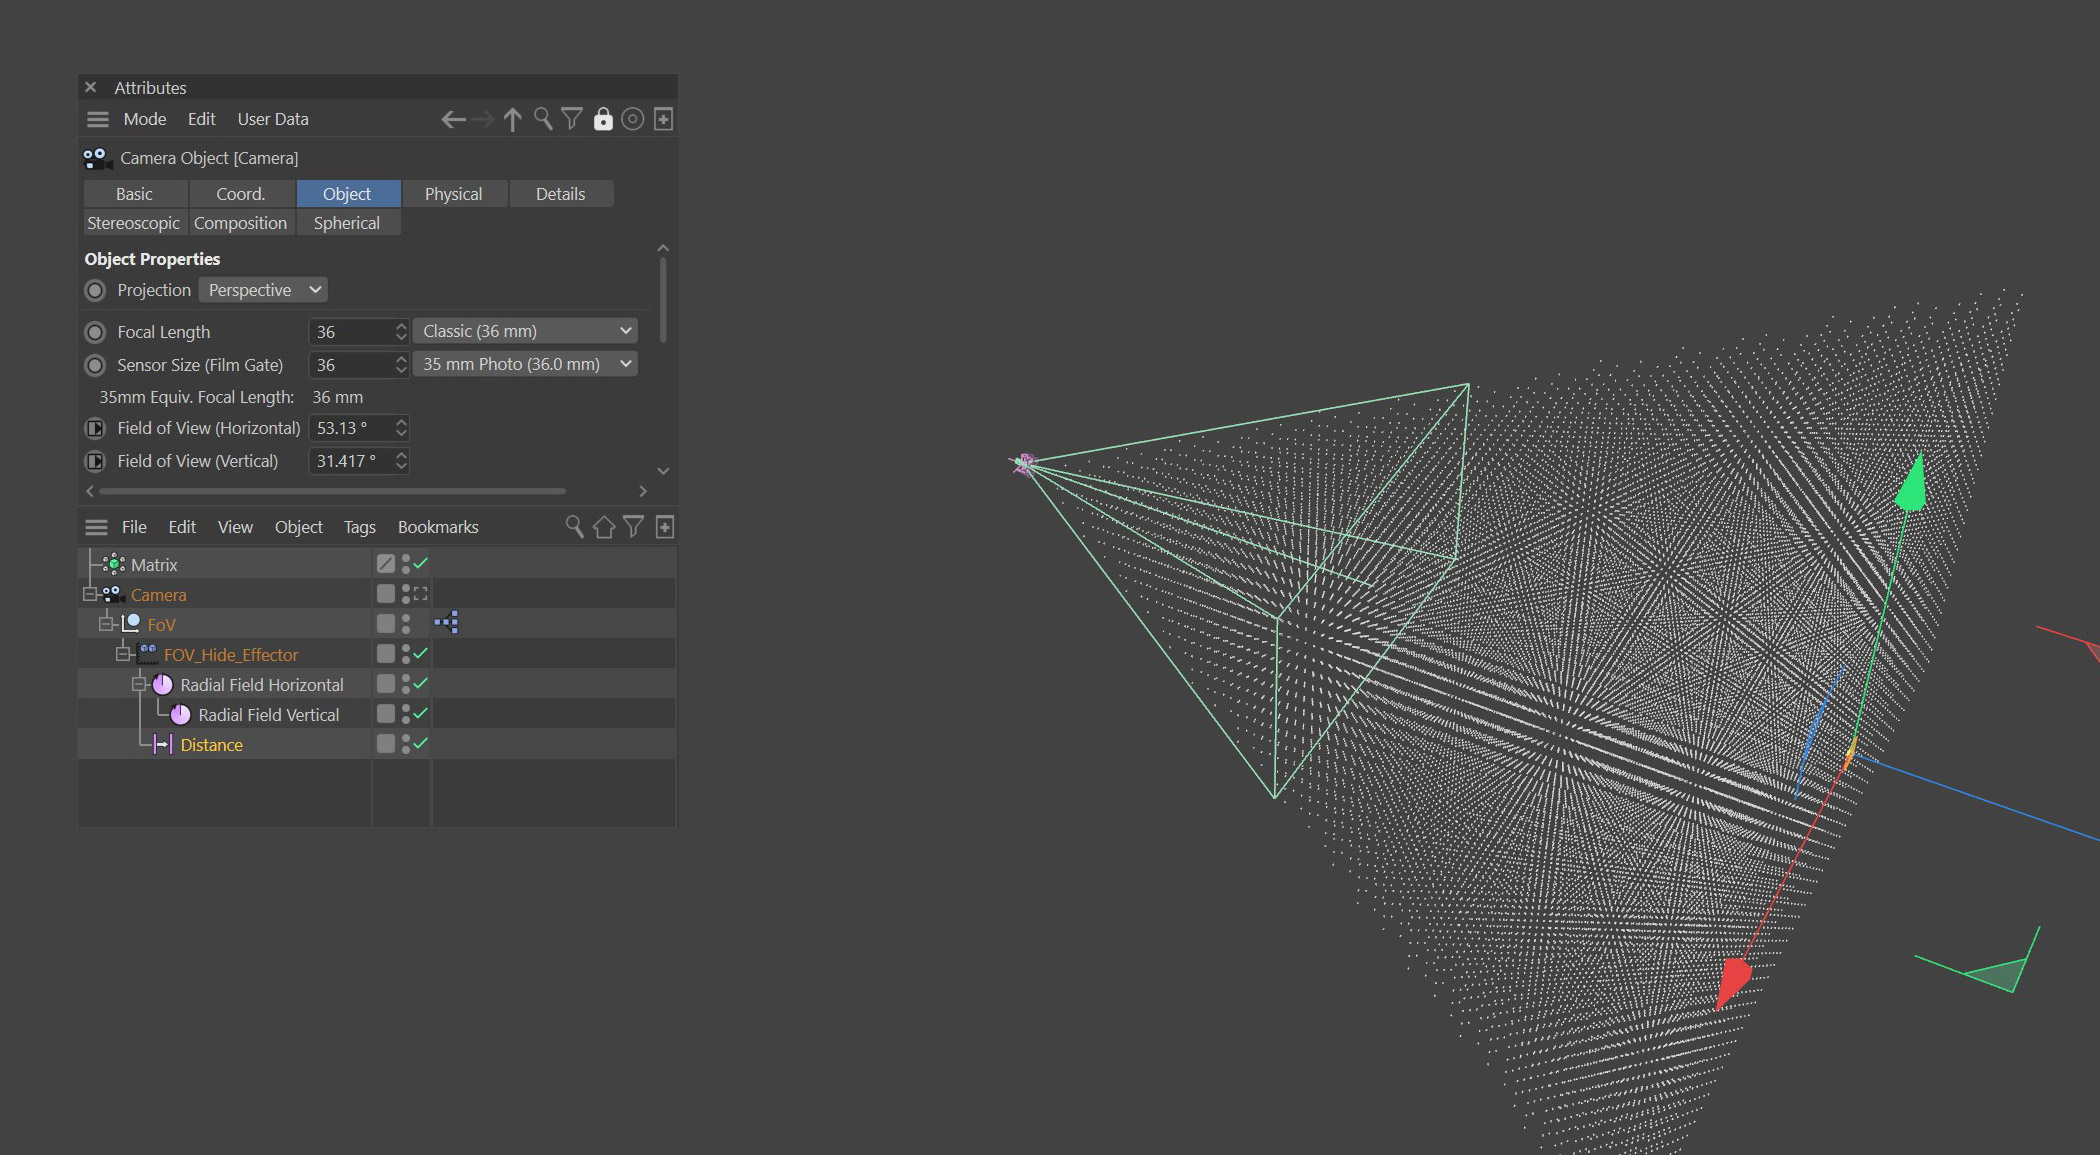
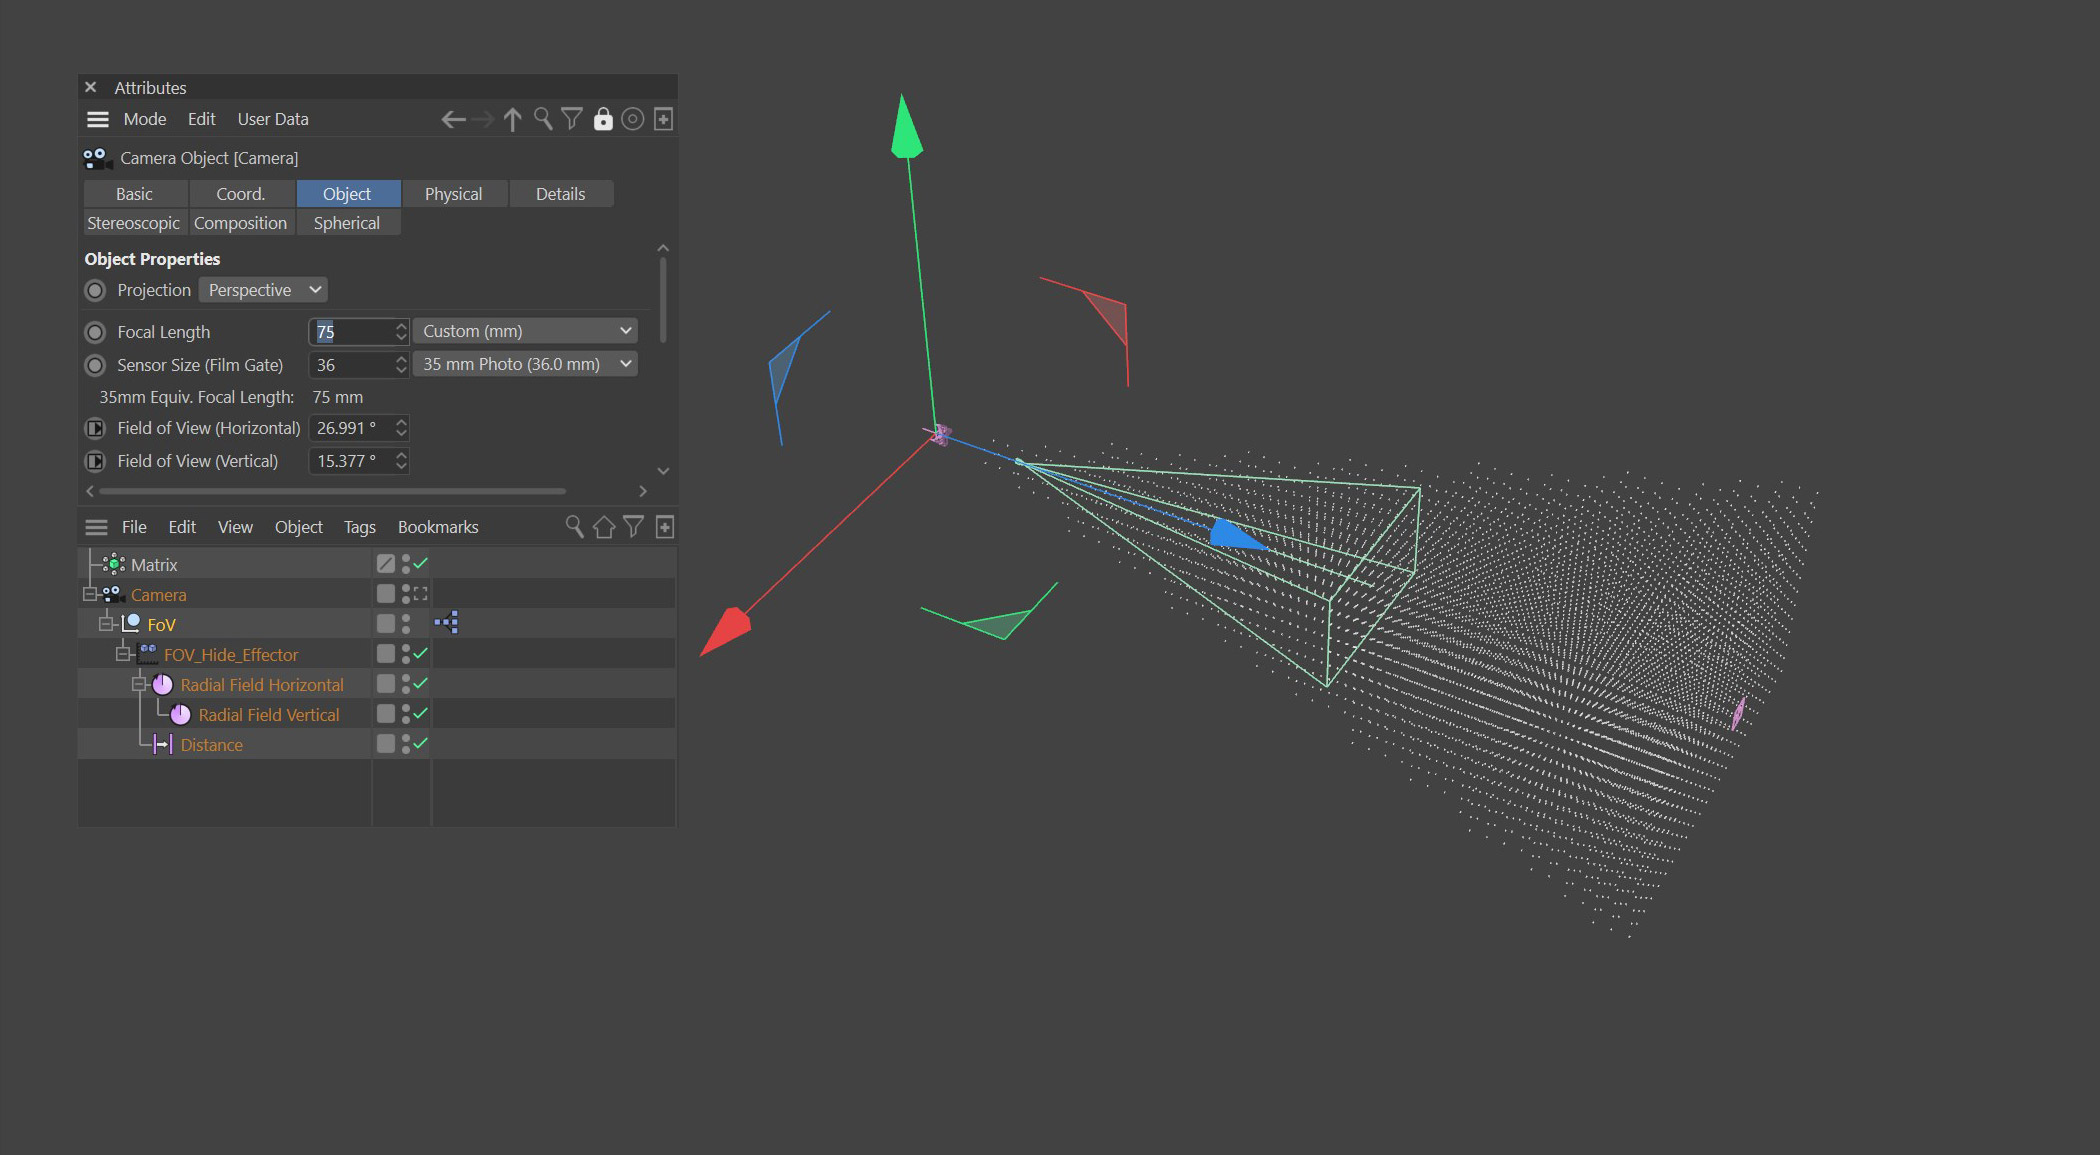
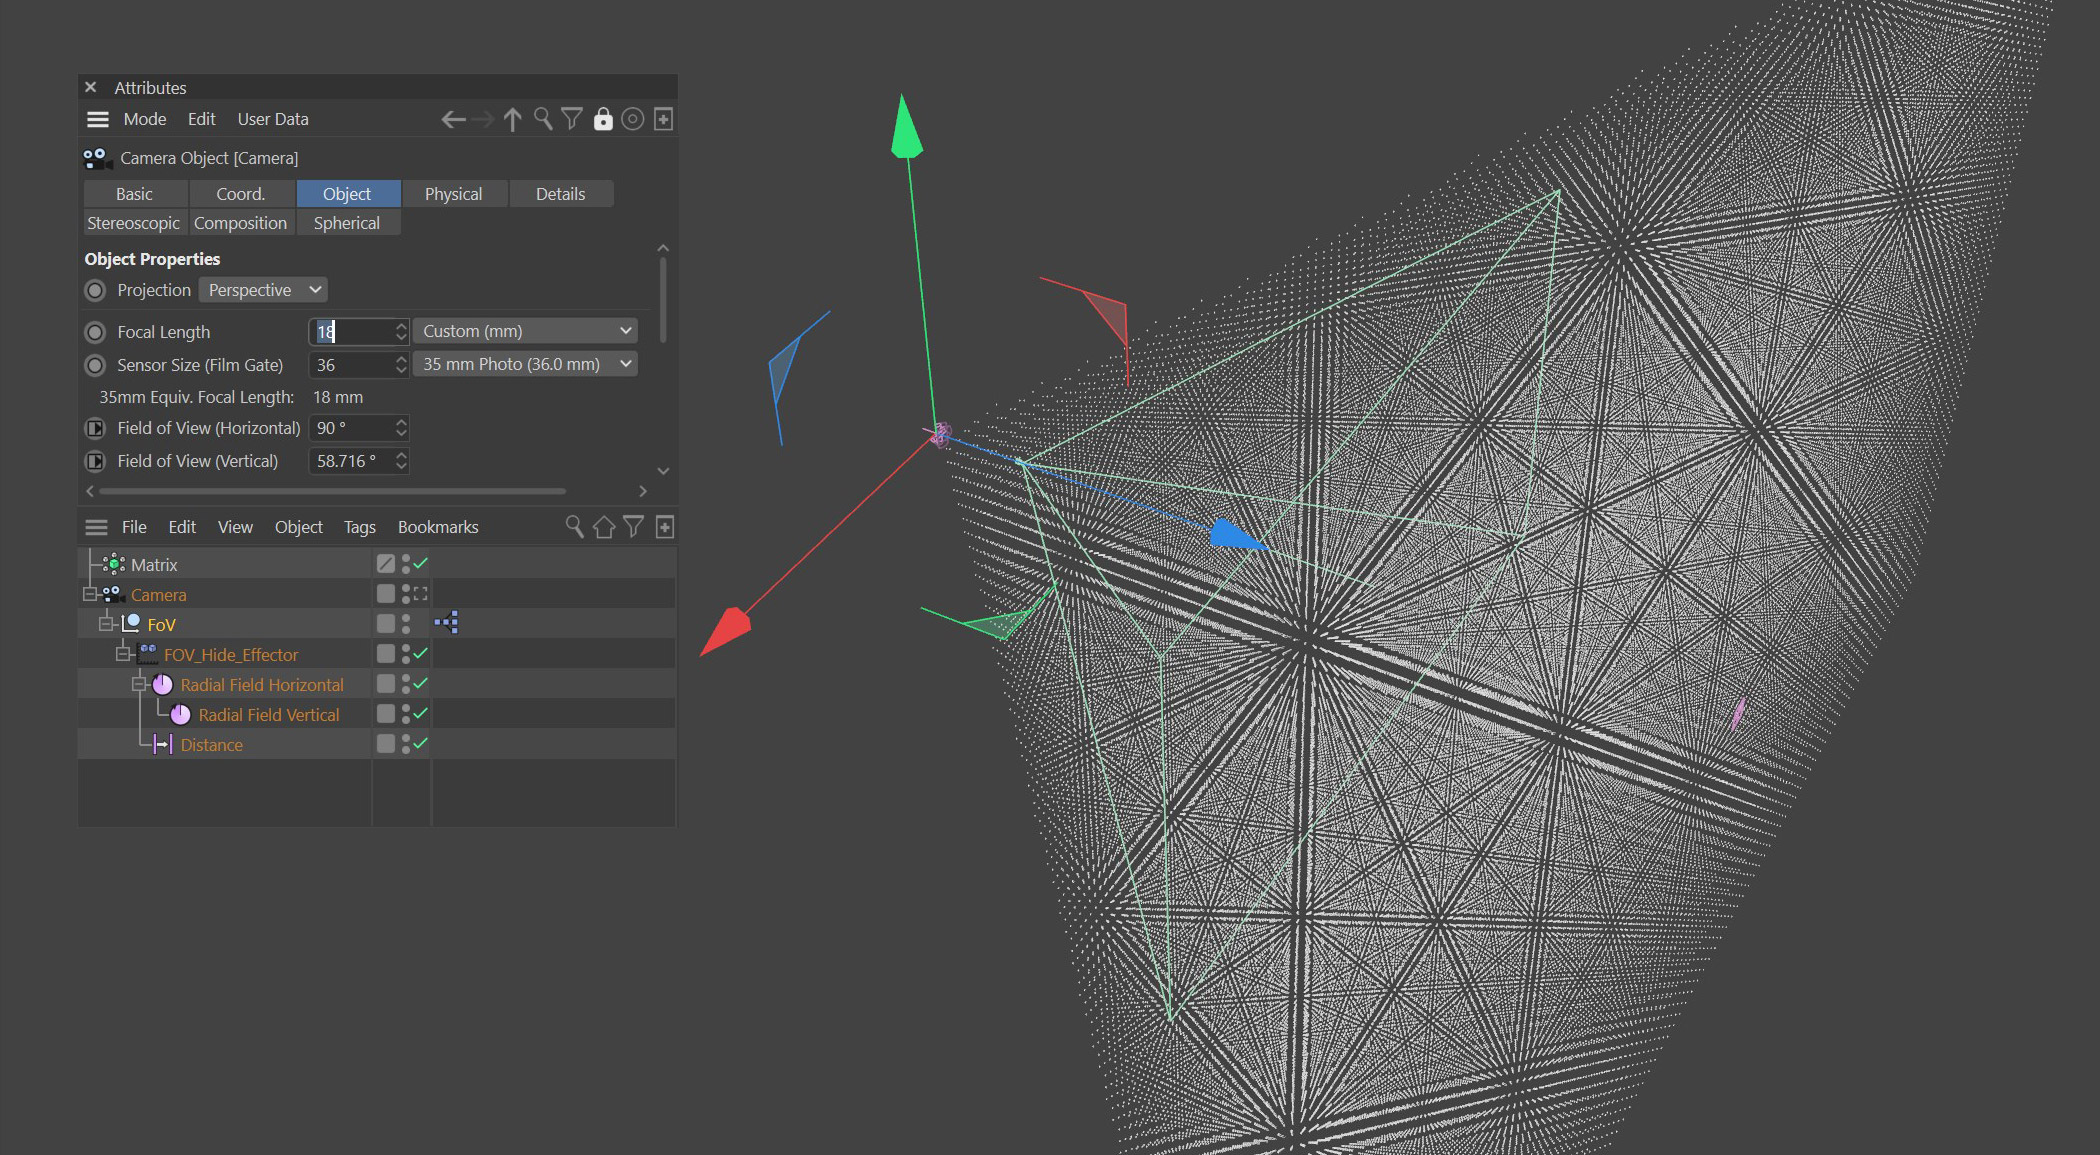
In the scene, you’ll need a Camera, a Mograph Object (I used a Matrix Object) and to this Matrix Object you need to apply a Plain Effector. The Plain Effector should be set to effect Visibility under the Parameter Tab.
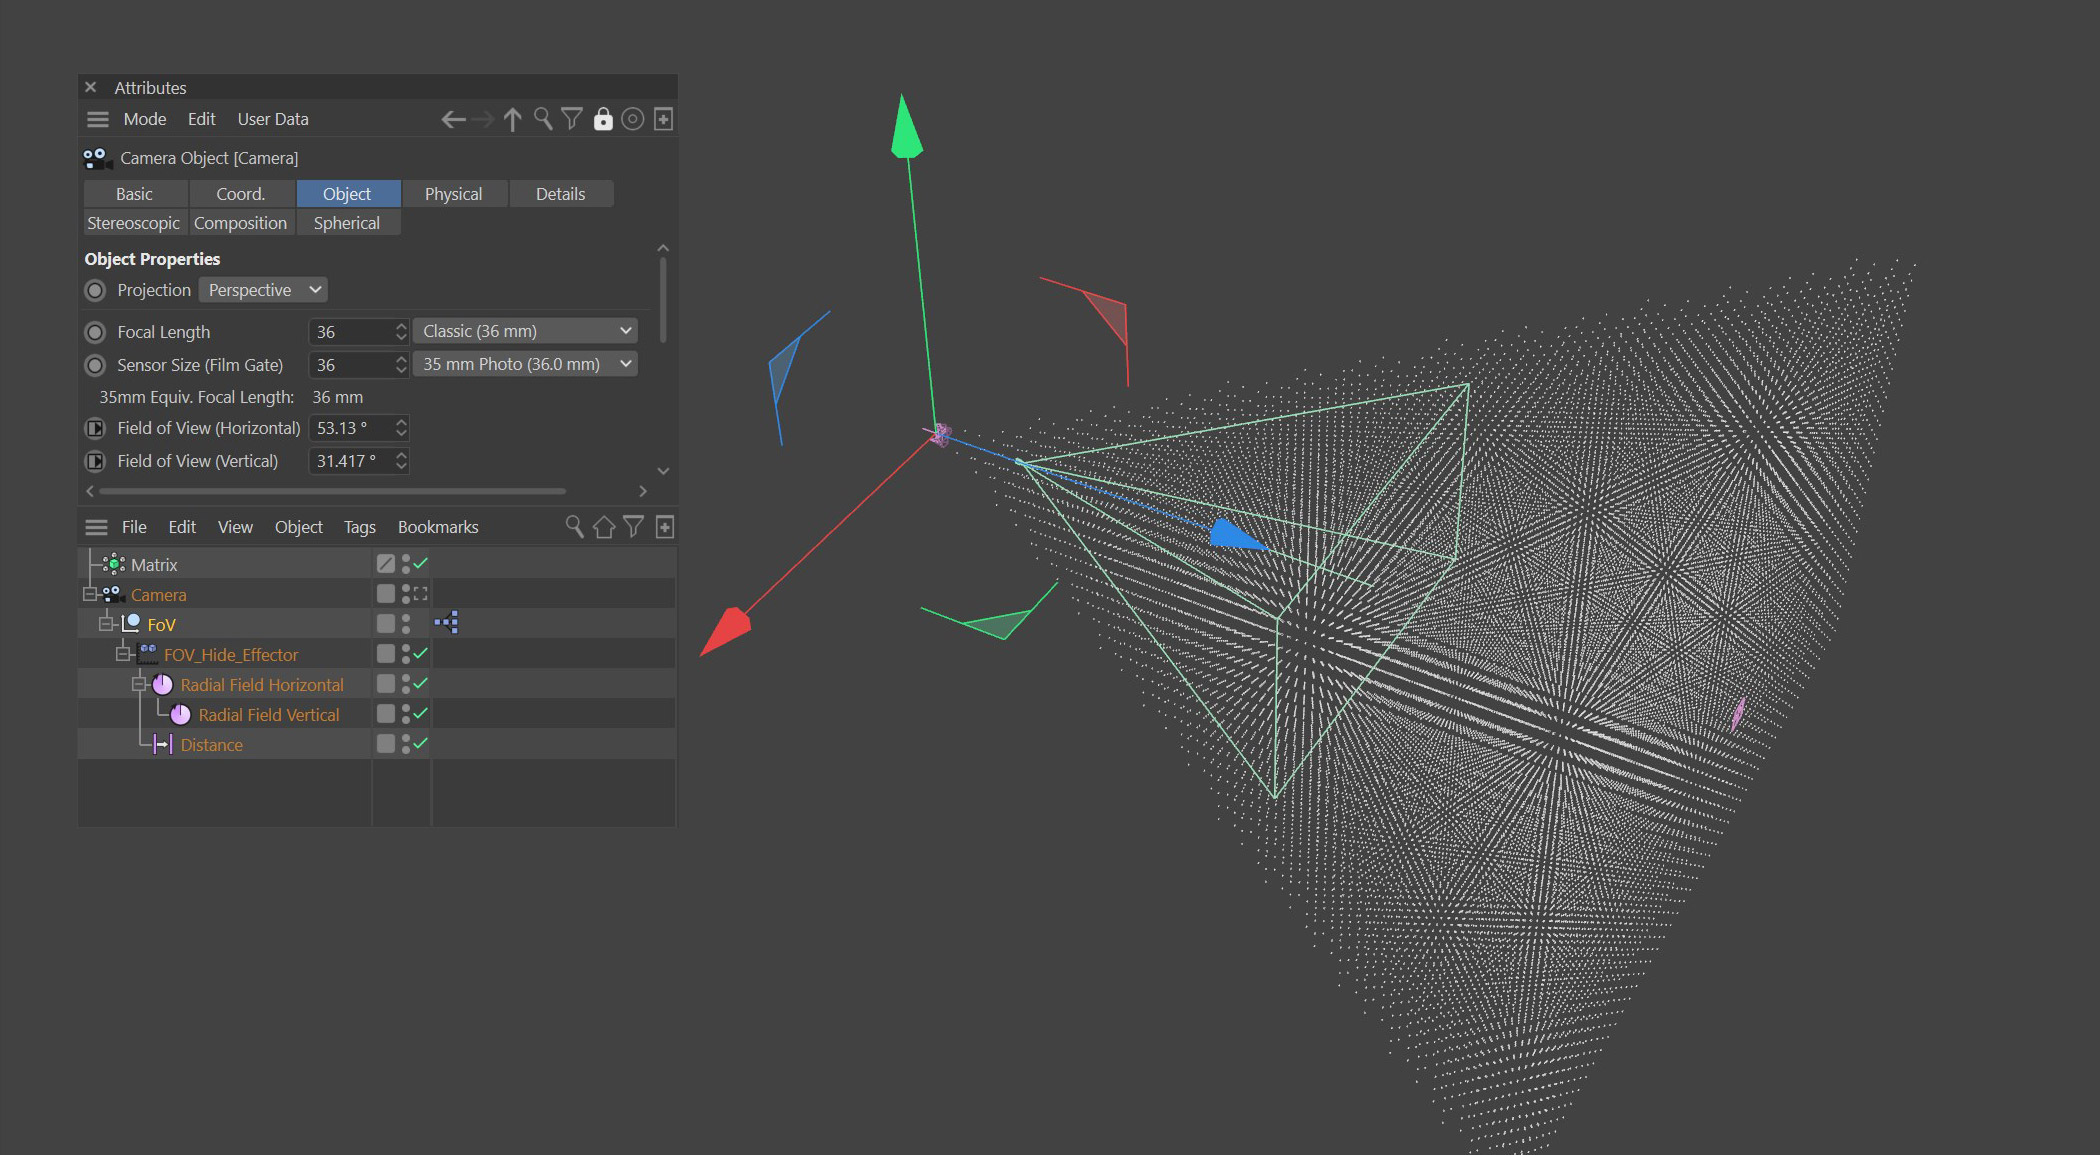
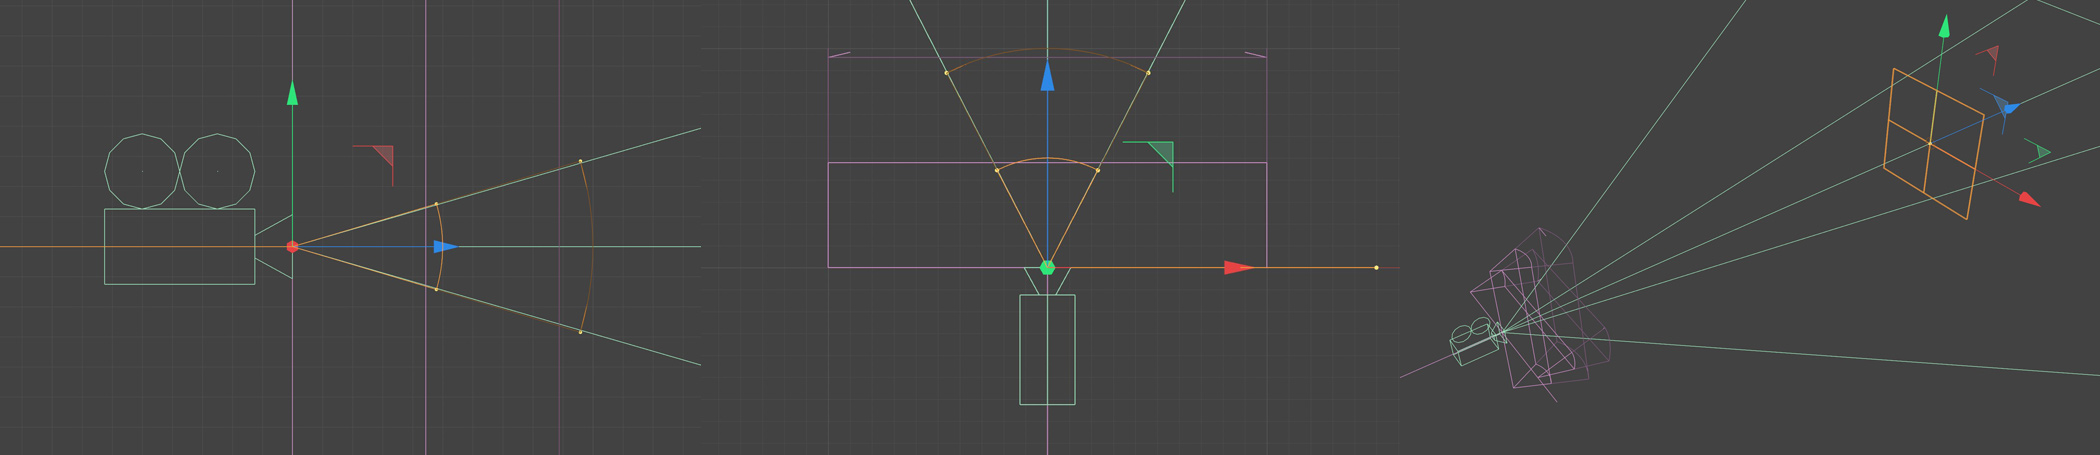
Under the Plain Effectors Field list, I added in two Radial Fields for the horizontal and vertical FoV, these are set to use X and Y for their respective axis. These two radial fields need to be placed at the 0,0,0 coordinates of the camera object, to do this, I group everything in a null and move that as a child of the camera.
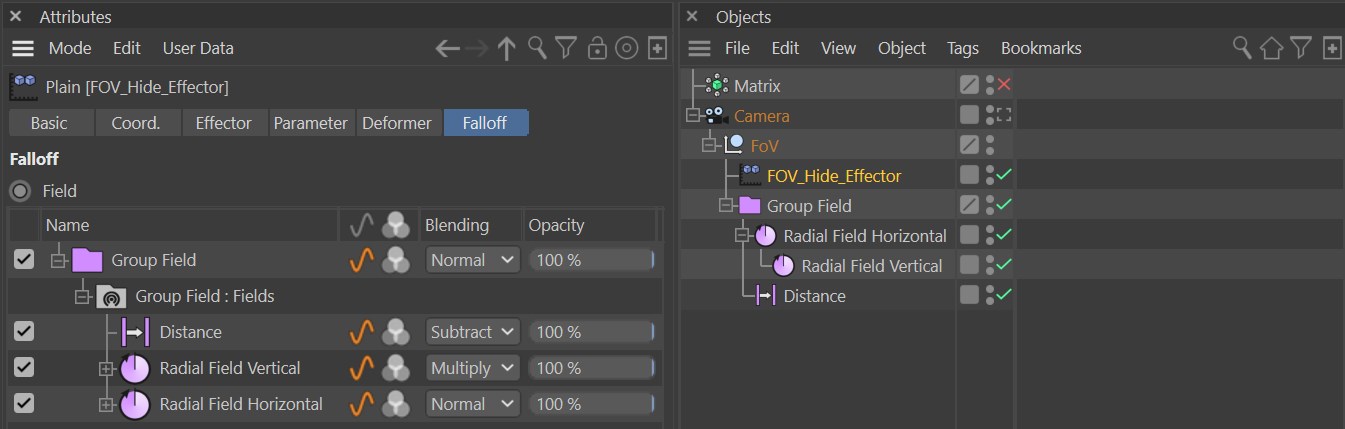
Next, a linear field on the +Z axis, is added to the field list. This has a size of one and enables us to hide clones which are at a certain distance from the camera. Change the blending mode so that the second radial field is Multiply and the linear field is set to Subtract. Finally if you select all three layers in the field list, right click and choose ‘Group field from Selection’. This will place all your fields into a group field, which is particularly handy if you need to add this to an existing project as it will allow you to easily add the FoV control to any effector you have in the scene.
Now switch to your top and side views, zoom in close to the camera and adjust the angles of the radial fields so they align with the camera FoV. That is essentially all you need to do to make this work and it’s a good idea to save now and give this a try.
what if I change the camera focal length?
To make this setup a little more useful, we can use Xpresso to remap the camera FoV angle values to the radial fields, so that any changes in lens focal length or sensor size will automatically update the fields to match.
First I add a User Data to the FoV Null. Do this in the Attribute Manager / User Data / Add User Data. This should be Data Type ‘Link’ and called Camera. Drag your camera object into this new link field.
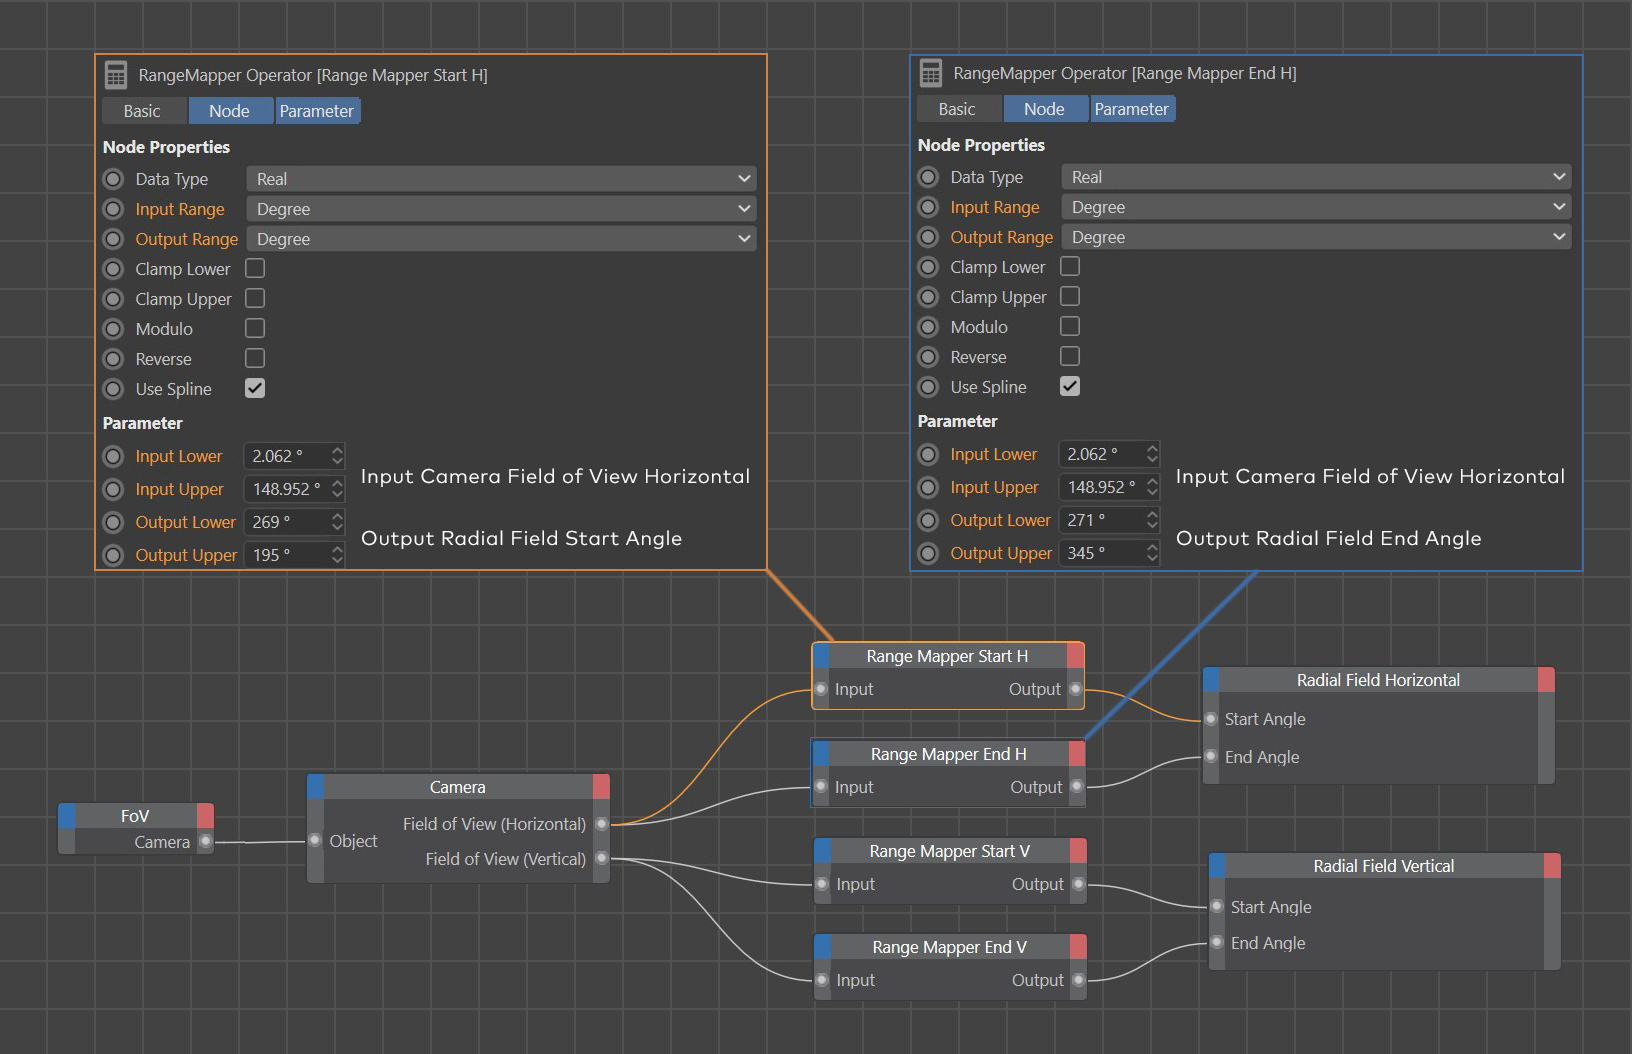
Next add an Xpresso tag to the FoV Null and drag the FoV Null into the Xpresso window. In this Xpresso setup, we first connect the camera user data into a camera object node. From this we ouput the FoV which is then fed into two rangemappers for each FoV axis.
To calculate the angles, I first set my camera focal length to 5mm, noted down the field of view angles, then I aligned the radial fields and noted these angles. I did the same with the focal length set to 1000mm. These values are then used to remap the angle from the FoV into the Radial Fields.
In the screenshot below, you can see that when the…
Camera Field of View(Horizontal) = 2.062, the Radial Field’s Start Angle = 269.
Camera Field of View (Horizontal) = 148.952, the Radial Field’s Start Angle = 195
You need to repeat this with four rangemappers in total, this way you have the values mapped for both radial effectors start and end angles. Once complete, try adjusting the Camera Focal length and watch the radial field align to the fustrum. If it is not working, go back and check your numbers are correct!
why more xpresso?
To make this rig more foolproof, it is a good idea to clamp some values so that the field group can’t be moved around by mistake. However it is not a good idea to constrain everything as you need to be able to adapt this for different uses.
Imagine you have this working great with your Matrix object, then you clone some geometry into the matrices and as you move the camera, you can see your objects disappear at the edge of the frame. Perhaps the object is still casting a shadow into frame, so if you hide this, the shadow will be gone! To solve this, we can add some margin to the camera fustrum, this needs to be adjustable as the size of the margin required will be determined by the size of the object being cloned.
In the Xpresso below, the top three nodes are simple linking the global matrix of the main group null to the radial fields. This ensures the radial fields cannot move away from the parent null. Below that the constant node feeds a value of zero into the rotation and position X and Y parameters of the main parent null and also the distance linear field. This means that they are also constrained to their parent object, but they are free to move along the Z axis.

By leaving the Z position free to move allows you to move the whole group backwards, away from the camera, this will make the cone wider than the camera frustum and is an easily adjustable margin. The distance field also needs to move towards or away from the camera, so the Z position is left free.
I broke it, what happened?
It is worth noting that this setup is dependent on the render settings aspect ratio, as this will also affect the camera field of view. In this example I used a 16:9 aspect ratio, but a square render setting would be different as it would have the same FoV for both Vertical and Horizontal. If you change the aspect ratio, you’ll need to recalculate the angles in the rangemapper nodes.
To copy this into another scene I would recommend copying the camera object. Switch to your scene and paste this camera in. If you already have a camera in your scene, select the FoV Null and drag your camera into the User Data field. This will update the Xpresso and you can now, place the FoV group under your camera and delete the copied camera.
The reason for this is that if you do not copy the original camera, the xpresso will lose the link to a camera and the node’s ports will become undefined. An annoying bug that has been with xpresso since time began. To stop this happening, just copy the camera, relink your camera, delete copied camera. Solved.
That pretty much wraps it up for this rig. Fairly simple, but really useful workflow enhancer that speeds things up a lot if you’re scene is crazy busy with Mograph.
Download the file here